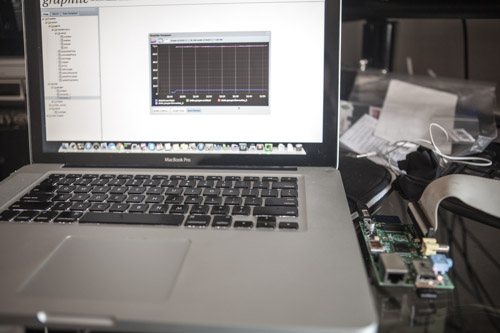
The Raspberry Pi is a cheap single-board computer with generic IO features which make it ideal for brewery automation projects. The BrewPi project is just one example. I decided to assemble a similar project with the goal of being able to monitor, log, and control the fermentation temperature of two 5-6 gallon carboys of fermenting beer.
Parts List
- Raspberry Pi
- SD Card
- WiFi Adapter
- SD Card Reader
- Micro USB Power Adapter
- Network cable
Bootstrapping
The Raspberry Pi board by itself isn’t actually enough to do anything with. Before it can even be turned on, a power source and SD card with an OS image all need to be provided. You’ll also probably want a WiFi adapter for networking unless you’ll be keeping the board somewhere that is easily accessible with a network cable. Lastly, some way to initially interface with the board is needed. If you have a spare monitor, mini HDMI adapter and USB keyboard then you can connect them directly to the Pi. Another option is to use a USB to TTL serial cable and connect it to another computer. A third option is to use a network cable connected to a router and connect via SSH. This last option is the route I chose.
The first step is to choose an OS and get it installed onto the SD card. You can either order an SD card which already has an OS installed on it or if you have an SD card reader you can download an OS image and write it to the card yourself. I have a USB 19-in-1 Kingston card reader that I already use for my camera media cards so this was the obvious choice for me. First, download the latest version of Raspbian, a version of Debian Wheezy made specifically for the Raspberry Pi. On Windows, an image writing application like the Win32 Disk Imager is also necessary.
- Insert SD card in USB reader connected to PC
- Check drive SD card is mounted as (mine showed up in Explorer as G:)
- Extract imager and OS zips
- Run disk imager
- Write extracted raspbian image file to G:
- Eject SD card
Booting Up
Now that you have an SD card with Raspbian on it, you can go ahead and boot it. The Pi runs off of any 1A 5V DC power source with a micro USB plug on it. Some phone chargers provide this output with the exact cord that fits. A powered USB hub with a USB adapter cable could also be used. I used a spare charger from an old Motorola Droid X that wasn’t being used anymore.
- Insert SD card in Pi’s card slot
- Insert WiFi adapter in Pi’s USB port (if you’re using one)
- Connect ethernet cable to Pi
- Connect power cable
Once it’s plugged in, unless you have a monitor hooked up directly, you won’t see much going on other than maybe some lights on the board start to light up and blink. For connectivity, I hooked up a network cable into one of the LAN ports on my home network’s WiFi router. Raspbian comes with sshd configured to start on boot, so after waiting a couple minutes I was able to login to my router’s administrative interface in my web browser (E.g. by going to http://192.168.1.1/) and see what IP had been assigned to the Pi by DHCP. Then I was able to use Putty to login to the Pi using SSH and start performing some basic configuration.
The official Raspberry Pi quick start guide covers all of these initial setup steps in a convenient and easy to read PDF document. I also found a helpful blog post with the information about the headless setup procedure to get me started.
Configuration
There shouldn’t be much initial configuration that you need to do. You’ll probably want to run the interactive configuration tool and then make sure that your OS is fully up to date with any new packages. After that, you can move on to configuring the WiFi adapter.
# ssh into Pi.  Default username is 'pi' with password 'raspberry'
ssh [email protected]

# Initial interactive configuration
sudo raspi-config

# Update OS packages
sudo aptitude update
sudo aptitude dist-upgrade
sudo apt-get update
sudo apt-get dist-upgrade
WiFi
One of the most popular choices for WiFi is the Edimax USB adapter. It’s tiny and Raspbian has the drivers for it already loaded. All that’s necessary is to configure it for your network. There’s a good guide with pictures on the Savage Home Automation site.
# verify edimax entry is shown
lsmod # verify 8192cu entry is shown
iwconfig # verify wlan0 entry is shown

sudo nano /etc/network/interfaces

# add line:
auto wlan0

sudo nano -w /etc/wpa_supplicant/wpa_supplicant.conf

# add block:

network={
ssid="mynetworkname"
proto=RSN
key_mgmt=WPA-PSK
pairwise=CCMP TKIP
group=CCMP TKIP
psk="wifipassword"
}

# toggle wireless off/on & apply new configuration
sudo ifdown wlan0
sudo ifup wlan0
sudo ifconfig wlan0 # verify ip address assignment - may take a minute to acquire

# shutdown & prepare for reboot
sudo shutdown -h now
You can now shutdown the Pi, unhook the network cable, and boot it back up. After retrieving the new DHCP assignment in your router’s control panel you should be able to reconnect to it with SSH over the WiFi link.
Conclusion
That’s all there is to getting a basic Raspberry Pi computer up and running. Next, you’ll probably want to start getting more software installed and start playing with some sensors. I’ll follow up with the details on how I did that in Part 2.