This is my second batch of craft home brewed beer. When I set out to pick the recipe this time around I had several goals in mind. Based on my experiences the first time, I knew I wanted to expand on the knowledge and techniques I had used so far. It needed to be an even bigger beer. Instead of using dry yeast it had to be a liquid variety and use a proper starter. I wanted to try a dry extract using the late addition method rather than the standard liquid schedule. Lastly, it had to be a different style.
After much contemplation and searching on various home brew recipe sites, I eventually settled on a Belgian golden strong ale known as “Blonde Bombshell.” Weighing in at around 8.3% ABV, it’s a surprisingly straightforward ingredient list that leads to a big favorful Belgian style beer.
Blonde Bombshell
- 18B. Strong Belgian Ale, Tripel
- OG 1.074
- FG 1.012
- IBU 26
- ABV 8%
- SRM 4
Recipe:
- 1 vial WLP550 White Labs Belgian Ale Yeast
- 7# Light DME – 4# @ pre-boil + 3# @ 20 minutes
- 1# Candi Sugar – @ 15 minutes
- 1# Carafoam – steep 30 minutes in 1 gallon water @ 150° for 30 minutes
- 1oz Hallertau 4.2% AAU – @ 60 minutes
- 1oz Styrian Goldings 4.2% AAU – @ 30 minutes
- 0.5oz Styrian Goldings – @ 15 minutes
- 1 tsp Irish Moss – @ 15 minutes
- 0.5oz Styrian Goldings – @ 0 minutes
Yeast Starter
An average yeast packet contains around 100 billion active cells. Higher gravity beers such as this require about double that amount to hit the target gravity in a 5 gallon batch. Rather than buying two packets to reach the necessary number of cells, a simple starter can be used to increase the cell count of a single packet. The starter is essentially a mini-batch of low gravity beer that the yeast is pitched into in order for it to feed and multiply to the required volume. Before preparing the starter, the yeast should be removed from the fridge and allowed to come to room temperature for a few hours. The closer to equilibrium temperature the yeast is to the wort it is being pitched into, the less initial shock it will undergo and the better chance it will have of doing its job.
08-07-09 – 11PM
I began with preparing a yeast starter the evening before the brewing session. The wort was prepared by mixing 1 cup of the DME into 2 pints of water and boiling it for 15 minutes to sterilize it. The boil pot was then quickly cooled in an ice bath for about 10 minutes before transferring the liquid to another container and pitching the yeast. The container, a funnel, large stopper, and airlock were all sanitized beforehand. A stopper and airlock are then placed into the container to seal it. The airlock should begin bubbling as a sign that the yeast is doing its job. The cell count should now double within the next 12 to 24 hours.
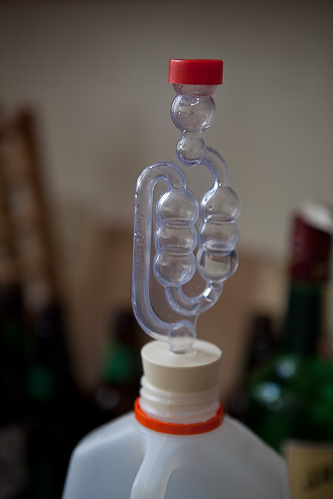
A large erlenmeyer flask is often recommended because it can be used directly on the stove without requiring a separate boiling pot. However, Any food grade plastic or glass container can be used to hold the starter. A bottle or jug into which a standard stopper fits works the best. I used a plastic 1/2 gallon orange juice jug. The same stopper which fits in a glass carboy fits tightly in the opening.
It is also important that the yeast gets oxygen in order to improve its efficiency. This can be accomplished most effectively by using a stir plate. Though not as productive, the container can also be shaken every few hours to aerate the wort.
Brew Day
08-08-09 – 4PM
When I purchased the hops at my LHBS, the AAU’s were slightly different from the recipe. The Hallertau was only 3.6% and the Styrian Goldings were just 4%. As a result, I adjusted the recipe slightly and included an extra ounce of Hallertau in the bill. Half of it went in with the original scheduled hop addition and the remainder was added at flame out.
At this point, the ingredients are sorted out and I’m finally ready to begin the brew. Once everything is organized, it’s actually a pretty simple process. Boil, steep, boil, add ingredients, sterilize items, stir, etc. From the notes taken in my log book during the session, this was my procedure:
- boil 1 gallon water
- heat 2 gallon water to 150 °
- place carapils in grain bag
- steep grains in 2 gallons of water for 30 minutes
- in the meantime, sterilize bucket, stopper, airlock
- discard grains
- add 2 gallons of ‘grain tea’ + 3qt cold water to kettle + 3# DME
- heat to boil
- start 60 minute boil timer
- @60 minutes add 1oz hallertau + 0.5oz hallertau
- @30 minutes add 1oz styrian goldings
- @20 minutes kill heat
- mix in remaining DME
- return to boil / restart timer
- @15 minutes add 1# candi sugar
- @15 minutes add 0.5oz styrian goldings
- @15 minutes add whirlfloc tab
- in the meantime, prepare an ice bath in the sink
- @0 minutes (flame out) add 0.5oz styrian goldings & 0.5oz hallertau
- submerse kettle in ice bath and quickly cool wort temperature below 80°
- pour into primary fermenter with 1 gallon water
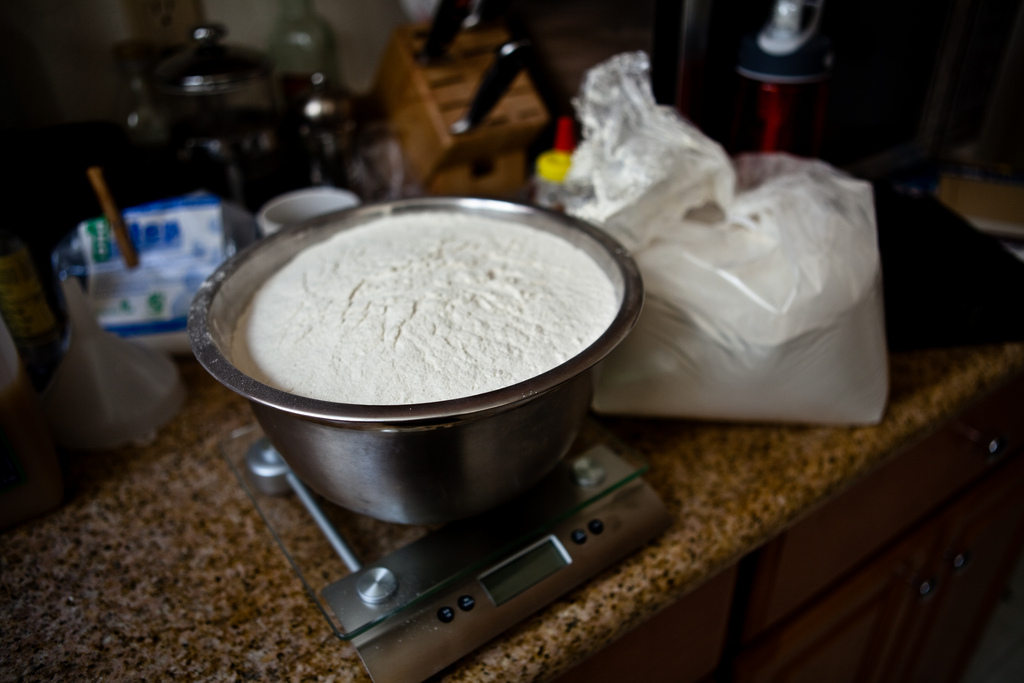
- take hydrometer sample – OG 1.074
- pitch yeast starter
- seal fermenter with lid, stopper, and airlock
Within a few hours, the airlock began fervently bubbling, indicating that the yeast were healthily doing their job. It also quickly became clear that the airlock need to be replaced by a blowoff tube. For the next few days while the fermentation remained fairly violent, a clear plastic tube leading to a bucket of clean water replaced the airlock. After things settled, a fresh airlock was put back in place.
Primary Sample
8-15-09 (7 days)
One full week after the initial brew session, I pulled a sample for a gravity reading and moved the primary fermenting bucket to the counter in preparation for transferring the beer to the secondary carboy for additional aging. Doing the move ahead of time allows any sediment stirred up by the movement to settle back down before the actual transfer. The gravity reading at this time comes in at 1.014 – indicating that the yeast has nearly reached its full attenuation. It is only a couple of points off from the target FG for the recipe. Hopefully, it will drop the final point or two over the course of the secondary conditioning period.
Secondary Transfer
8-19-09 (11 days)
Several days after moving the primary fermenter, it’s finally time to transfer to the secondary carboy. This is a pretty quick and simple process that involves nothing more than attaching a tube to the spigot on the primary bucket and then opening it up to drain. Another gravity reading shows that the gravity is still at 1.014.
Bottling Day
9-20-09
It’s finally time to bottle. The easiest way to bottle is to use a short piece of rubber tubing to connect the bottling wand to the end of the spigot of the primary fermenter. In this way, the primary fermenter also doubles as a bottling bucket. All that needs to be done then is to prepare the priming sugar solution and put it in the bucket. Next, start the auto siphon and gently transfer the beer from the secondary carboy into the bucket, being careful not to splash or disturb things to introduce any additional oxygen into the beer.
With a collection of empty sanitized bottles and new caps prepared, the bottles can be quickly filled and then sealed. Filling the bottles is simply a matter of raising each bottle up onto the wand and then removing it once the bottle is full. Each bottle can be filled all the way to the top. When the wand is removed, it will leave the correct amount of head space in the bottle. Finally, cap, label, and store the bottles for a few weeks of bottle conditioning.
Unfortunately, there is no FG reading as I’ve closed a drawer on my hydrometer, making a mess of shattered glass on the floor. I can only guess it has held within a point of the last reading a month ago.
The final yield count of batch #2:
- 20 bombers
- 5 12oz stubby’s
- 1 1pt 0.9oz