Batch #6 – All Grain #2 (05-02-10)
The American Homebrewers Association celebrates National Homebrew Day with an event called Big Brew. It is held on the first Saturday of May each year. The idea is that you get a group together and everyone around the world who is participating brews at the same time. The AHA has a section of their site dedicated to tracking participants and the overall results of the event. They also provide a set of recipes to choose from so that everyone is brewing the same thing.
My brew day actually took place on the next day. Due to lack of prior planning and time constraints, I didn’t source the recipe ingredients until the actual Big Brew event day. There were three recipes available to choose from for this year’s event, each available in both extract and all grain variants. The options were an American wheat, a Scottish 80 Shilling, and a Rocktoberfest. I had just kegged a Scottish ale in the last week – my Easter weekend brewed batch. The Rocktoberfest was a Lager requiring controlled low temperature fermentation which I am not yet equipped for. This left only the recipe simply titled American Craft Beer Wheat All Grain. I’ve named my interpretation of this recipe ‘El Jefe’.
Grain Bill
- 4.65# 2 Row Pale Malt
- 3.35# Wheat Malt
- .2# Munich Malt
Hop Schedule
-
.25oz Chinook Pellet Hops – 13% AAU @ FWH (First Wort Hop)
-
White Labs WLP320 American Hefeweizen Yeast
Steps
- Mash @145° (Strike @ 155°)
- Rest @60 minutes
- Mash Out @169°
- Rest @15 minutes
- Sparge @173°
- Boil @70 minutes
- Primary @ 7 days
- Secondary @ 7 days
Profile
- O.G. 1.045
- F.G. 1.008
- ABV 4.82%
- IBU 13.8
I prepared the yeast starter on the day before the brew day. To do this I first boiled 600 mL of water with 3oz. of DME for 10 minutes and then cooled it down to a pitching temperature below 80°F. Then I pitched the yeast vial in my 2L Erlenmeyer flask with the starter wort and fitted it with a #10 drilled stopper and airlock. About 28 hours had elapsed by the time I had completed my brewing session and was ready to pitch the the starter. The generally recommended amount of time for propagating a starter is 24-72 hours. Of course it depends on the particular strain and size of the starter. Another important factor for creating a successful starter – and one which can speed up the process – is proper aeration of the wort. This is best accomplished using a stir plate. Not having a stir plate, I simply shook up the mixture every few hours.
After the first all grain disaster where the manifold separated from the spigot, some repairs needed to be made. Securing the manifold with additional zip ties and taking more care when stirring the mash prevented the same problem from recurring. While the manifold stayed in place this time, wort flow during the sparge was still not moving at a rate I was happy with. Still, I was able to slowly collect the necessary pre-boil wort volume.
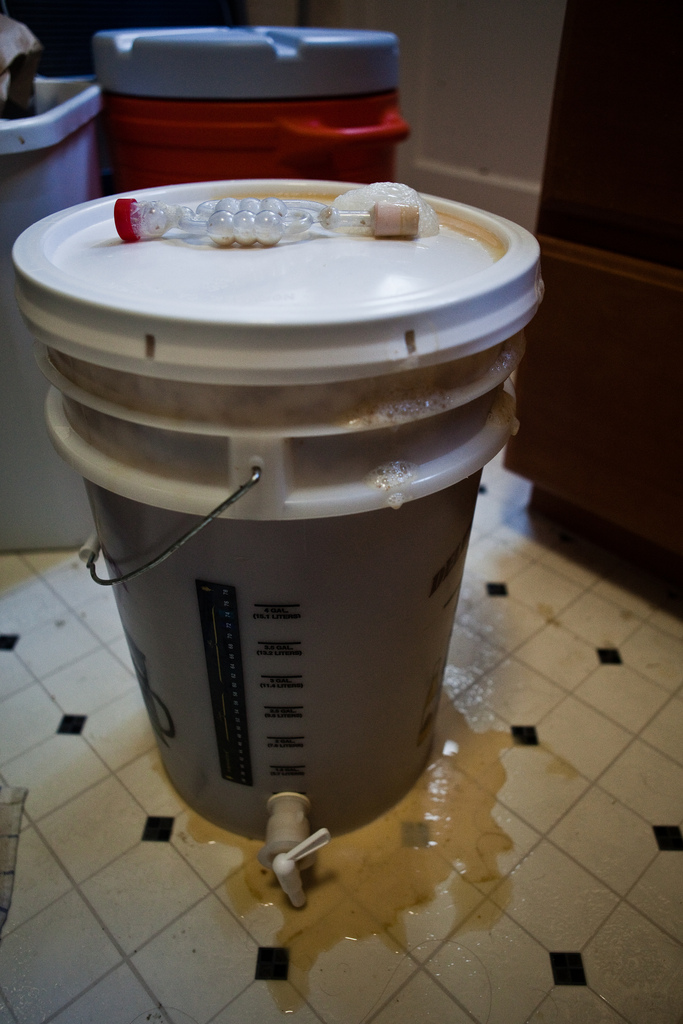
It wasn’t until a day into fermentation when disaster reared its ugly head. Strong fermentation managed to clog the airlock. Pressure continued to build inside the bucket during the day while I was off at work. The seal in the lid eventually gave way to relieve some of this build up. The real disaster of an exploding bucket of beer was narrowly avoided. I was instead greeted with a sticky mess of overflow where the seals had given to the pressure. The primary fermentation phase was finished off with a proper blow off tube.
Admittedly, wheat styles are not my favorite to begin with. When I bring home a bomber or six pack from the store, I hardly ever bring home a wheat variety. Even so, I found this batch to be refreshing and easily drinkable. It was a great introduction to the style and as usual I learned a lot throughout the brew process. Even so, I probably won’t make this particular recipe again. Besides, there are plenty of other wheat variants I still haven’t touched.
These write ups after each session help me see weak areas in my process that need improvement. With each subsequent session, I’m able to slowly address some of those issues. Hopefully, this leads to more consistent results and ultimately better beer. This time around, one area I tackled was boil kettle volume measurement. I purchased a cheap metal yard stick at the hardware store. I calibrated it to my brew kettle by recording the measurements of known quantity increments of water. I now have a simple rudimentary dipstick that can be used for measuring the pre and post boil wort volumes. Having these data points available can help with the reproducibility of the process along with calculating things like actual kettle boil off rates and overall brewhouse efficiency for my particular equipment configuration.