Batch #11 – All Grain #6
I’m kicking off the 2011 brewing season with what I had anticipated on being my last brew of 2010. I was hoping to get this brew in before the end of the year. Unfortunately, an order shipment delay from MoreBeer followed by a month long chest cold and a grain mill debacle added up to a two month brewing hiatus.
Instead of my usual internet recipe search, I’ve decided to take another big step and develop my own recipe. I began planning this recipe early in December with daily high temperatures temperatures in the low 50’s and the thermostat in the house reading 57-59°F each morning. The cooler weather seemed perfect for trying out White Labs’ San Francisco Lager yeast. This is a lager yeast which ferments at the lower end of the ale temperature range (58-65°). Using Ray Daniels’ Designing Great Beers and my copy of BeerSmith as guides, I came up with a what I hope is a suitable California Common style recipe.
The Granary
In ongoing my ongoing brewing research, I came across a blog detailing the construction of an all electric brewery. While I doubt I’ll be taking on that sort of project any time soon, it did cover several other helpful topics. Especially helpful was a section covering milling grains. From this I learned that a six gallon bucket could easily store around 25 pounds of grain. The other important discovery from this blog was Gamma Seal Lids. These lids consist of two components, an outer ring adapter which snaps onto any 5-7 gallon bucket and the inner threaded lid which easily spins closed to provide an airtight seal on the bucket.
I already had a spare 5 gallon homer bucket from home depot. I ordered an additional 6 gallon bucket from MoreBeer along with two of the Gamma Seal lids from Amazon. Included in my MoreBeer order was enough grain for my next two planned brews. Since my plan was to maintain enough grains in my inventory to brew something whenever I felt without a trip to the store, my order included more volume than what I needed for each brew. If I needed a pound of biscuit malt for a planned recipe, my order might instead be for three pounds. This strategy would hopefully give me a selection of base and specialty grains already on hand to pick from when planning future brews.
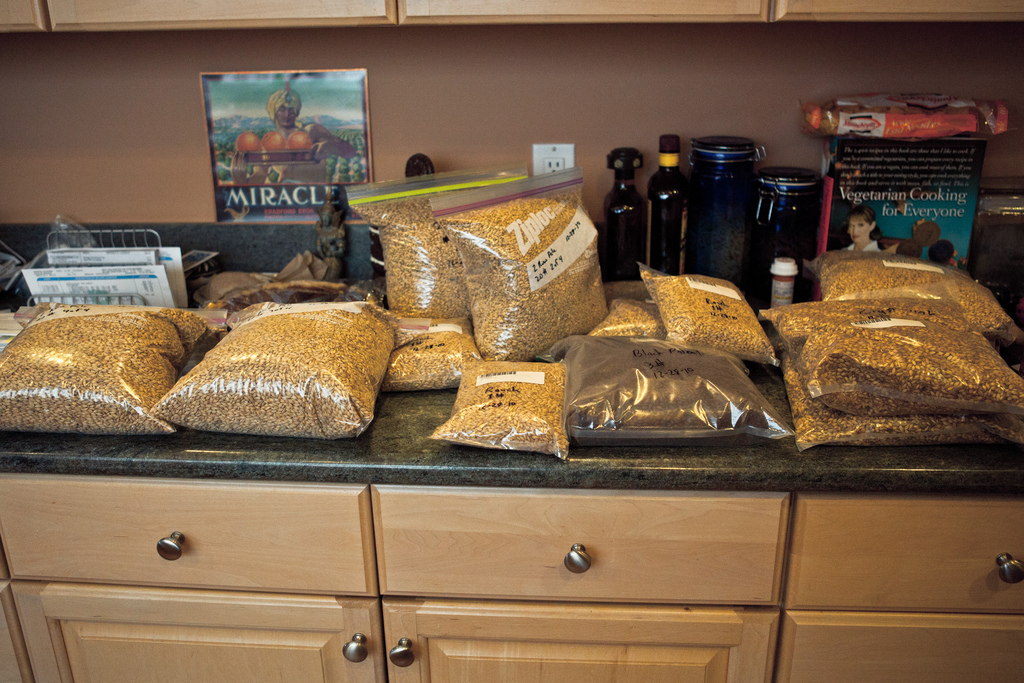
In all, my initial grain order added up to around 38 pounds of malt. When the packages arrived, I labeled each vacuum sealed bag with date, grain type and weight using a sharpie and stored it in one of my gamma sealed buckets. Grains which came in paper sacks and not sealed plastic bags were transferred into gallon sized Ziploc bags. These bags were also labeled with series number and overall grain weight. Each 1 gallon bag can hold around 5 pounds of grain. My 20 pounds of 2-row base malt was split into four numbered bags. Once the smaller vacuum sealed bags were opened, any unused grain in these bags also gets placed in gallon Ziploc bags labeled with dates and remaining quantity.
Mill Mishaps
In the past I’ve had a bit of bad luck with grains milled by my LHBS. They weren’t always crushed very well and have led to poor efficiencies on more than one occasion. All of the grains I’ve purchased this time are unmilled. Grains which haven’t been milled have a much longer shelf life than those which have already been crushed. While crushed grains might become stale after a few weeks, the unmilled grains should be fine for at least several months. Since I don’t know when I’ll be using some of these grains, I want to make sure they’ll remain as fresh as I can for as long as possible.
There’s just one problem with my plan – I don’t have a grain mill. My first idea was to fabricate a cheap DIY mill out of a pasta maker. I was able to pick up the pasta maker from a Chinese kitchen supply store for $20. After a bit of disassembly I was able to knurl the rollers with a dremel. The idea is that this should provide a surface with enough friction to grip the grains and push them through the rollers to crush them. After reassembly, I fabricated a crude hopper from scrap pine lumber.
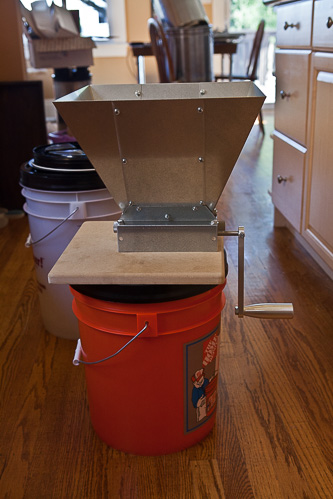
As it turned out, my tests were less than ideal. The first hopper build didn’t work to contain and direct the grain as I wanted. Instead I tried a quick hopper built up from cardboard and tape. While this hopper proved to be much more effective than the initial wood and screw construction, the mill itself showed its weaknesses. As evidenced by extensive forum threads there are many people putting these together and getting great results. I just couldn’t seem to make it work for my needs. Some of this could be attributed to my usage of the hand crank instead of adapting the system over to a drill operated mechanism. It could also be my lack of DIY construction skill. Ultimately, I abandoned the DIY mill and settled on a commercially built Monster Mill.
The Commoner
Batch #11 – All Grain #6
Brewed: 02-05-11
Grain Bill
- 8.75# 2 Row Malt
- .5# Munich Malt
- 1# Crystal 60L Malt
- .5# Biscuit Malt
Hop Schedule
- 0.5oz Northern Brewer @ 60 minutes
- 0.5oz Northern Brewer @ 30 minutes
- 0.5oz Northern Brewer @ 15 minutes
- 0.5oz Willamette @ 10 minutes
Yeast
- WLP810 White Labs San Francisco Lager
Brew Stats
- Boil: 60 minutes
- Mash: 60 minutes
- Mash Volume: 3.5 gallons
- Strike Temperature: 165°
- Mash Temperature: 154°
- 1st Sparge Volume: 2 gallons
- Sparge Temperature: 168°
- 2nd Sparge Volume: 2 gallons
- Mash Efficiency: 72%
Vitals
- O.G.: 1.053
- F.G.: 1.016 (Est.)
- A.B.V.: 4.87% (Est.)
- IBU: 35
Final Thoughts
It seems like things in my brewing sessions are starting to smooth out now. I’m finally starting to get the hang of the mechanics of the brewing processes. I was still a little disappointed with my mash efficiency, but I think tightening the gap on my mill a little to get a bit finer crush will help out next time. It’s great just knowing this is a variable I now have under my control to adjust.
I also had a little bit of trouble getting my mash temperature right at first. It took a couple extra infusions of hot water to get the correct temperature. Hopefully I’ll get better at judging my strike temperature with more practice. I was at least able to successfully monitor the temperature and make the appropriate adjustments to recover the situation on the fly. Also, with the help of a mesh bag to hold the hops in the kettle I didn’t have any post-boil pump clogging issues. The wort cool down and transfer went quickly and easily. Overall, I managed to get pretty close to my target volume and gravity numbers.
At the end of the day my final concern came down to yeast viability. The vial sat in the bottom drawer of the fridge for over a month with the temperature controls on the fridge at one point being turned completely off and then completely on. I didn’t get around to making a starter and just pitched and hoped for the best. Then there was the usual long wait and wondering if I would need to place that inevitable emergency yeast order if the airlock didn’t start showing signs of life within. Eventually after a nearly 24 hour lag, the airlock bubbling started and I knew I’d have beer.