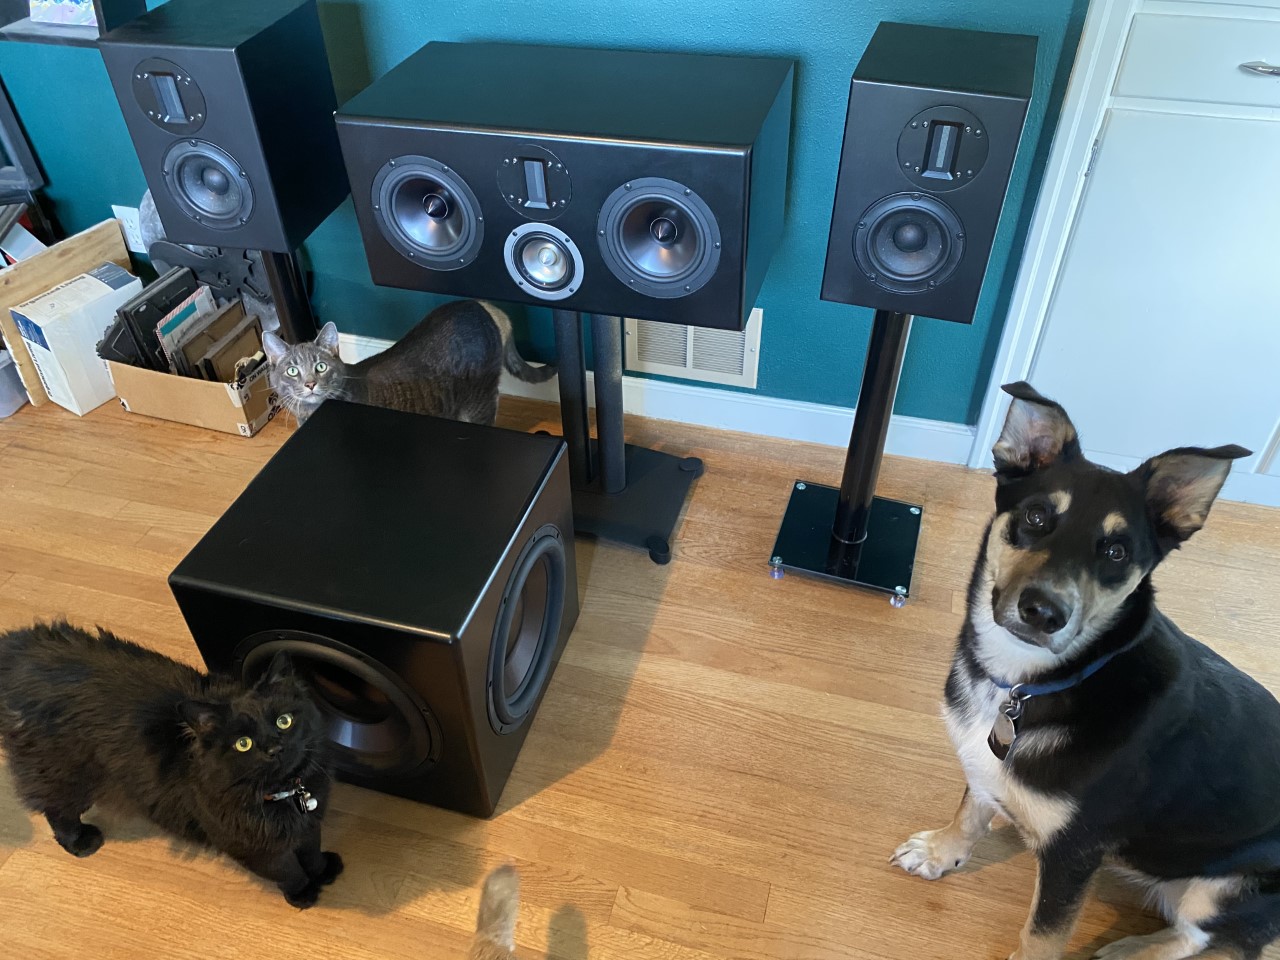
A set of 5.1 Home Theater speakers mostly based on the Jim Holtz/Curt Campbell Statements series of speaker designs.
As part of a larger basement “Home Theater” project, I’m also custom building the speakers for the surround sound system. These are the first 4 of 6 in total (It will ultimately be a Dolby Atmos 5.1.4 setup, but the 4 height speakers are just a basic ceiling mounted model).
They’re all (except for the sub) based on a series of DIY speaker designs called “Statements” found here - http://www.speakerdesignworks.com/index_page_2.html The lineup here includes a pair of Micro Statements for the surround channels, and the Statement Center Channel. A pair of Monitor Statements will provide the front channels.
The subwoofer is based on a Parts Express flat-pack kit (but not using the actual kit). It features a non-ported enclosure with a 12" driver, a pair of passive radiators on either side, and a 500W plate amp mounted on the back side. This is by far the heaviest of the group, probably in the neighborhood of 50#.
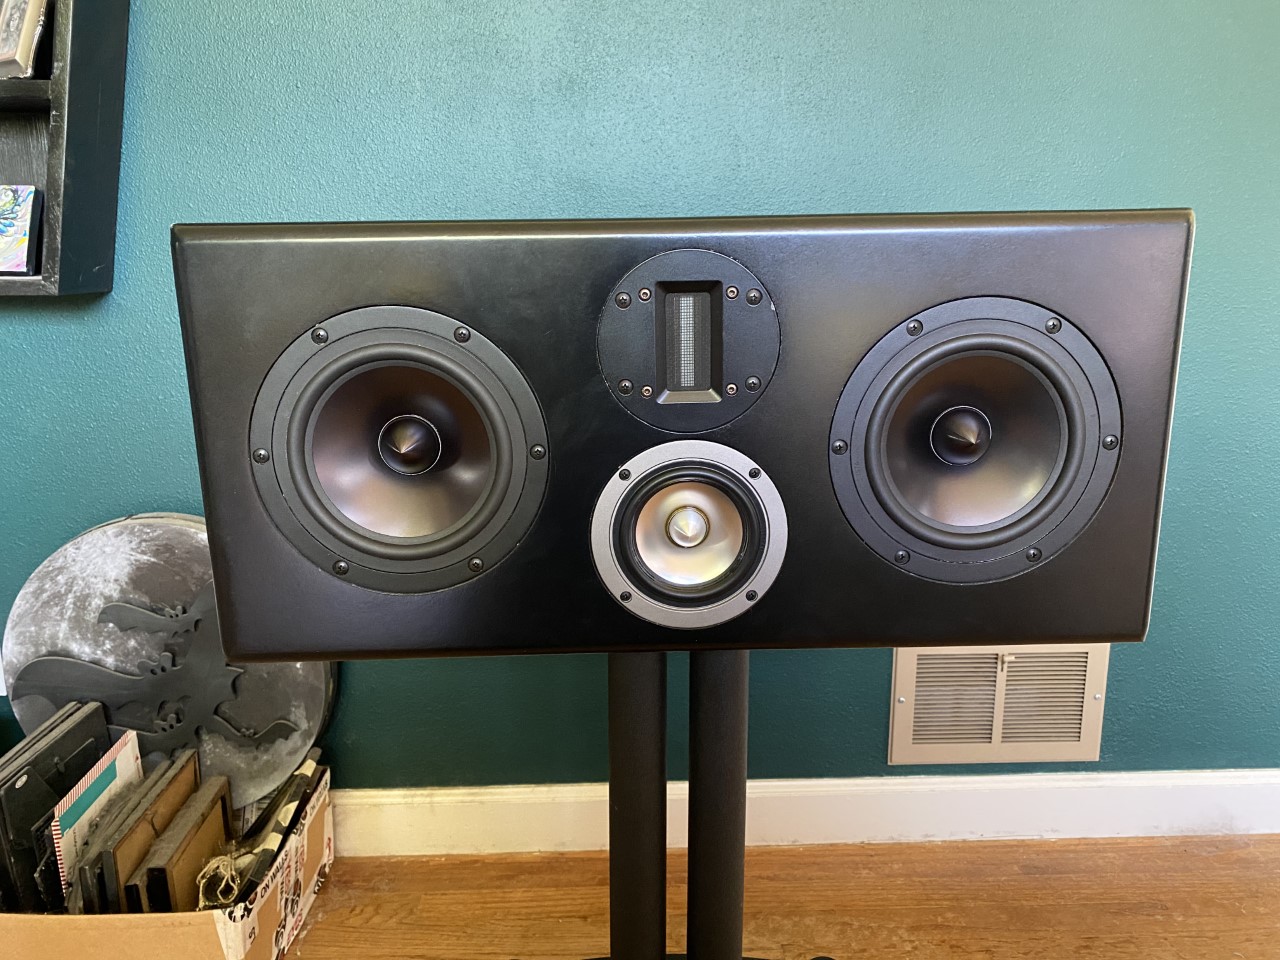
Finished center channel. Speaker stand made by Sanus.
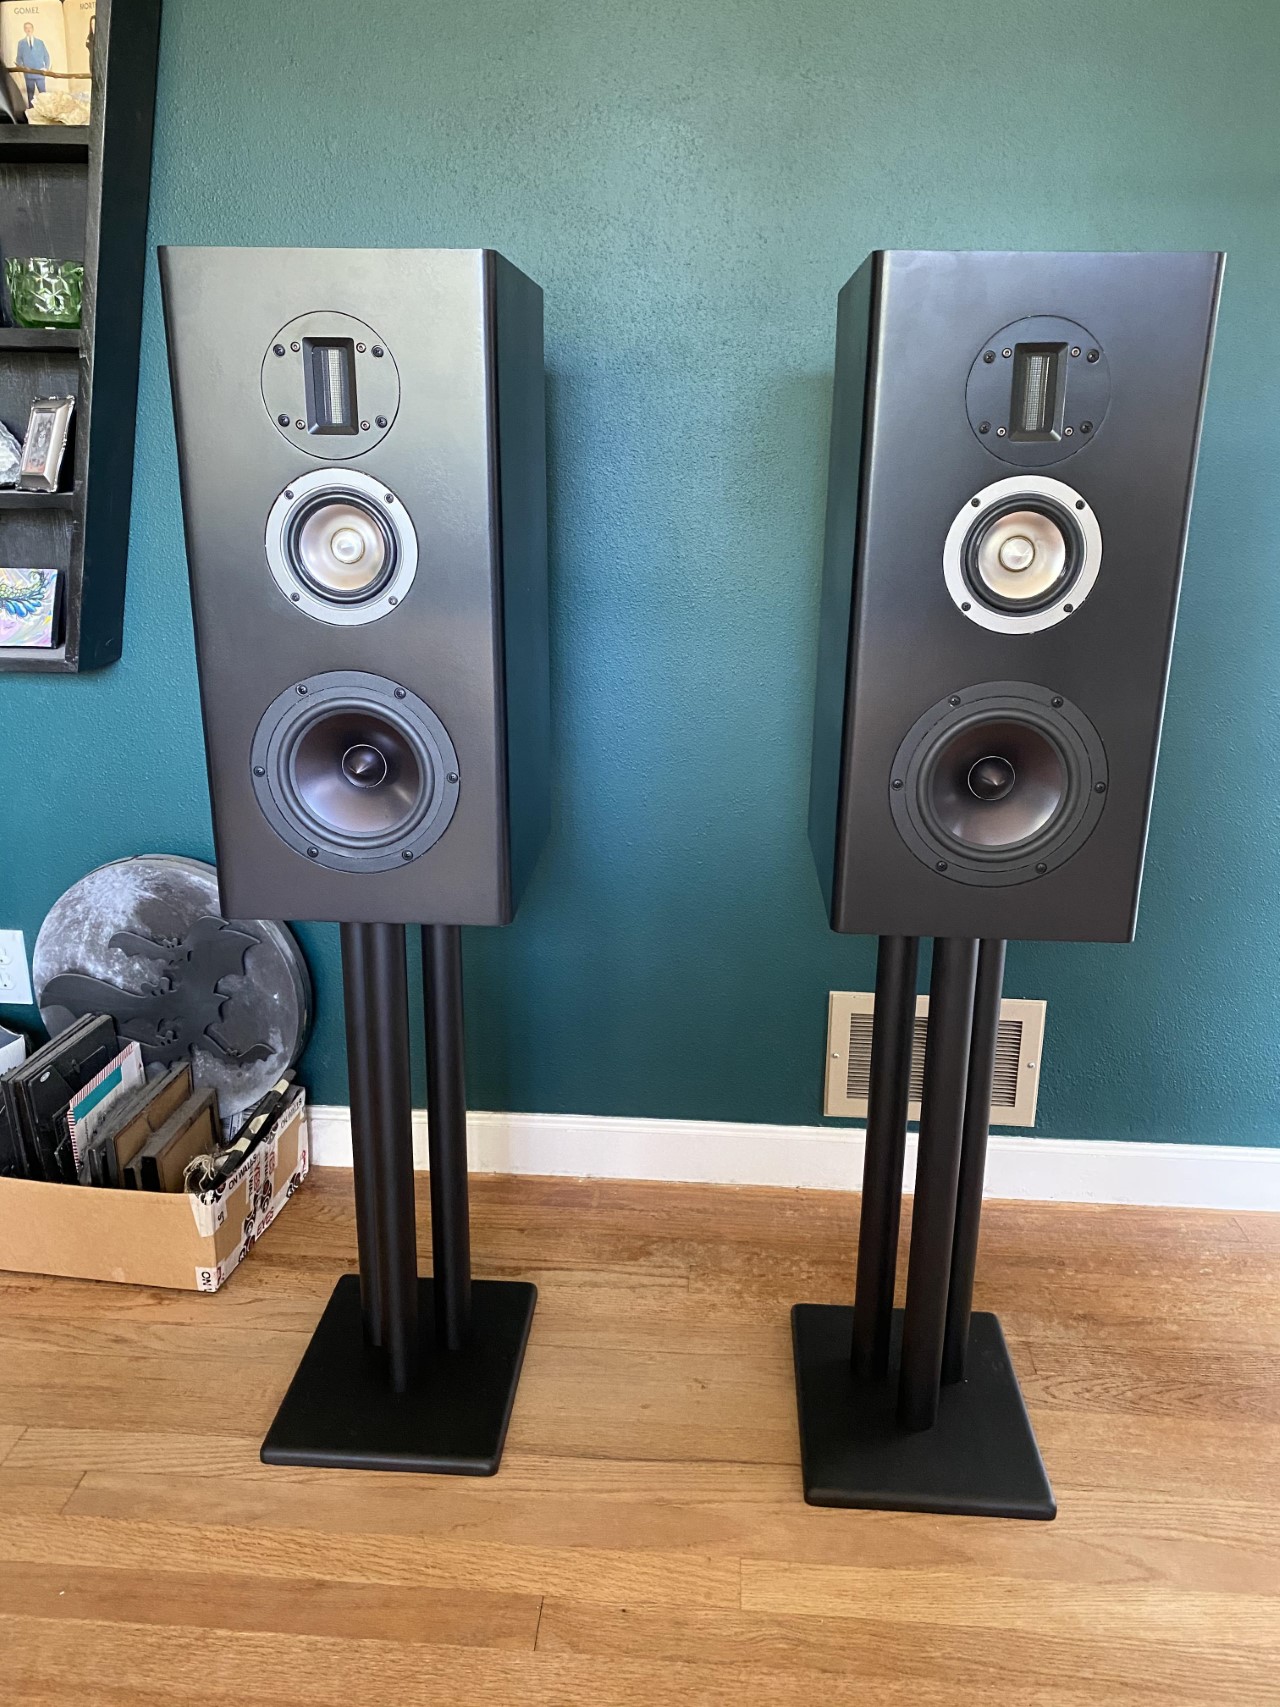
Monitor Statements, fully assembled. The stands are made by Pangea Audio. Speaker stands turn out to be surprisingly difficult to shop for when you’re dealing with speakers this big and heavy. The unfinished cabinets before installing any components come in at around 28# each. The three pillar design is plenty robust, but the top plate isn’t nearly big enough. They also only come with carpet spikes and no rubber feet. They do the job, but ended up not being my favorite stands.
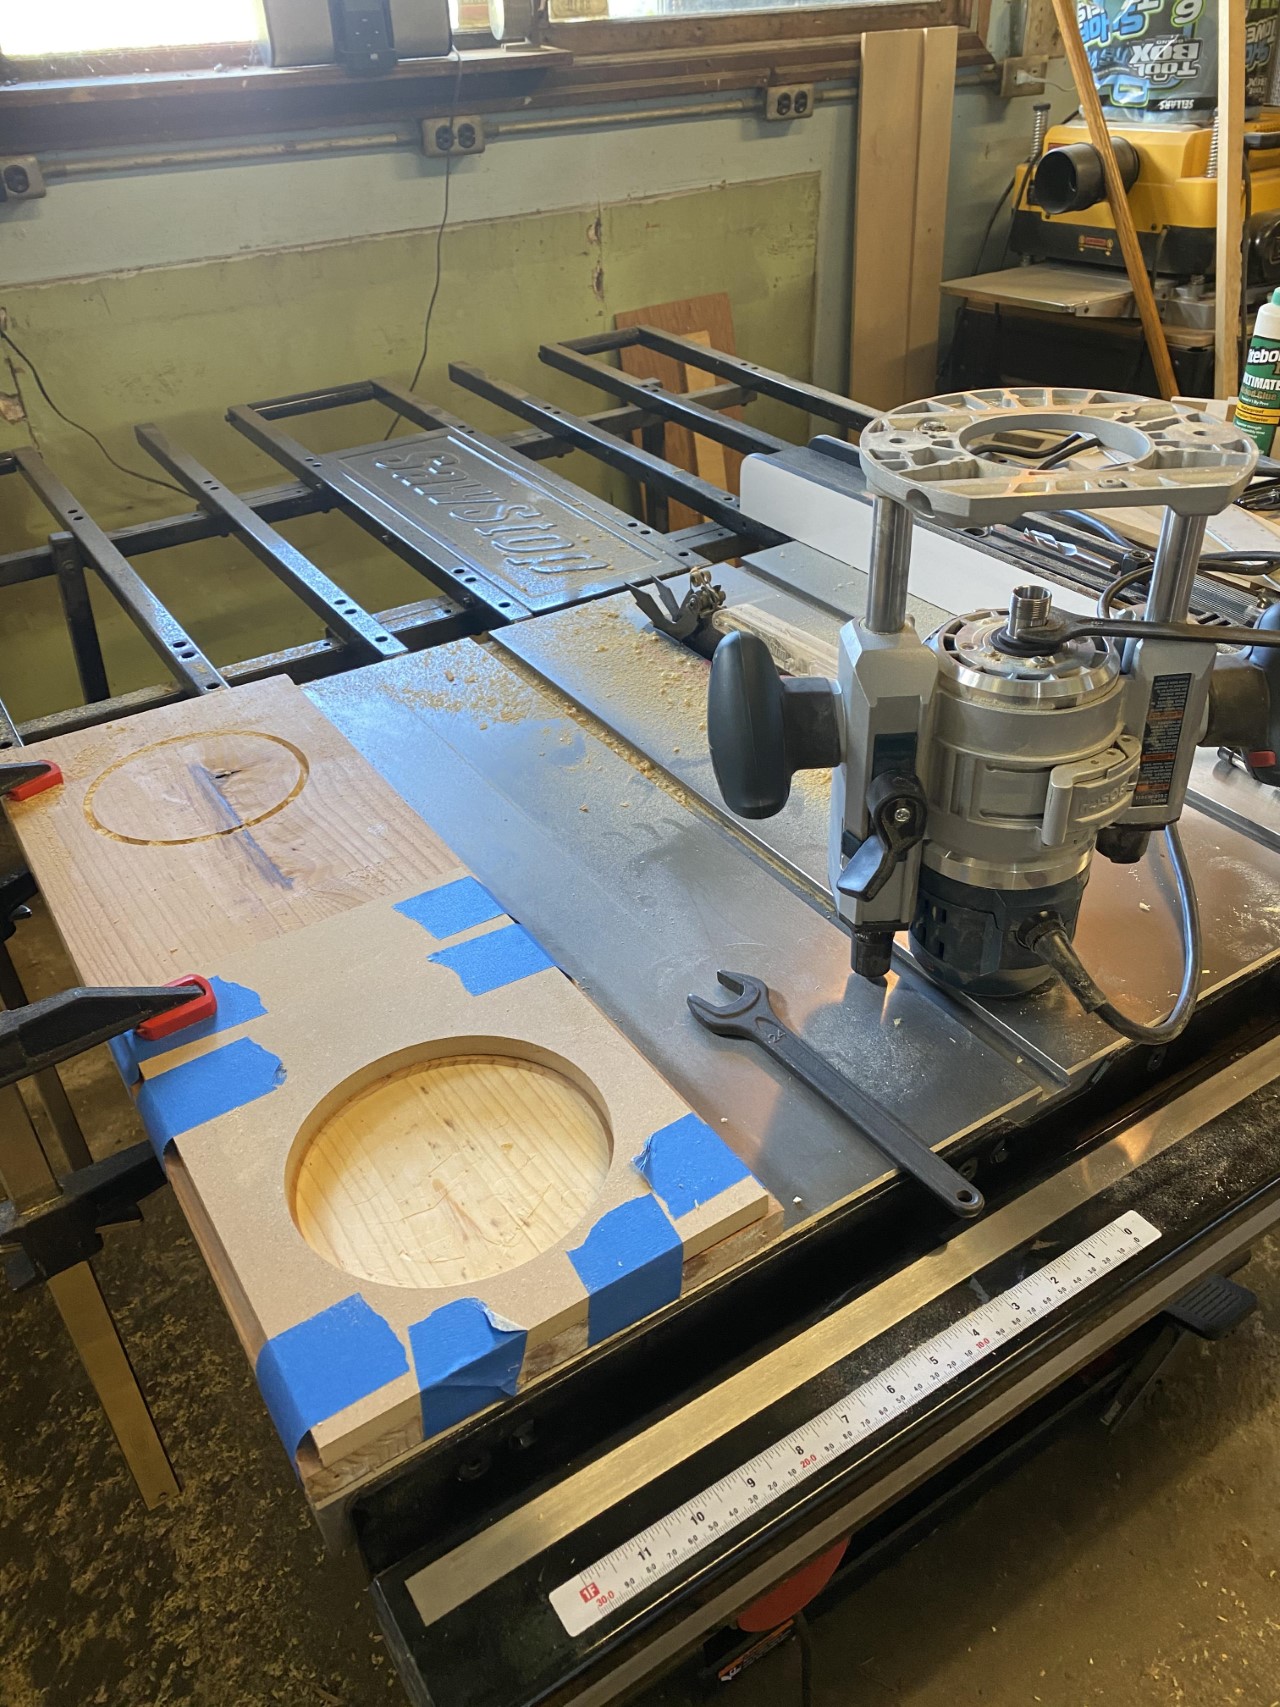
Test. Test. Test.
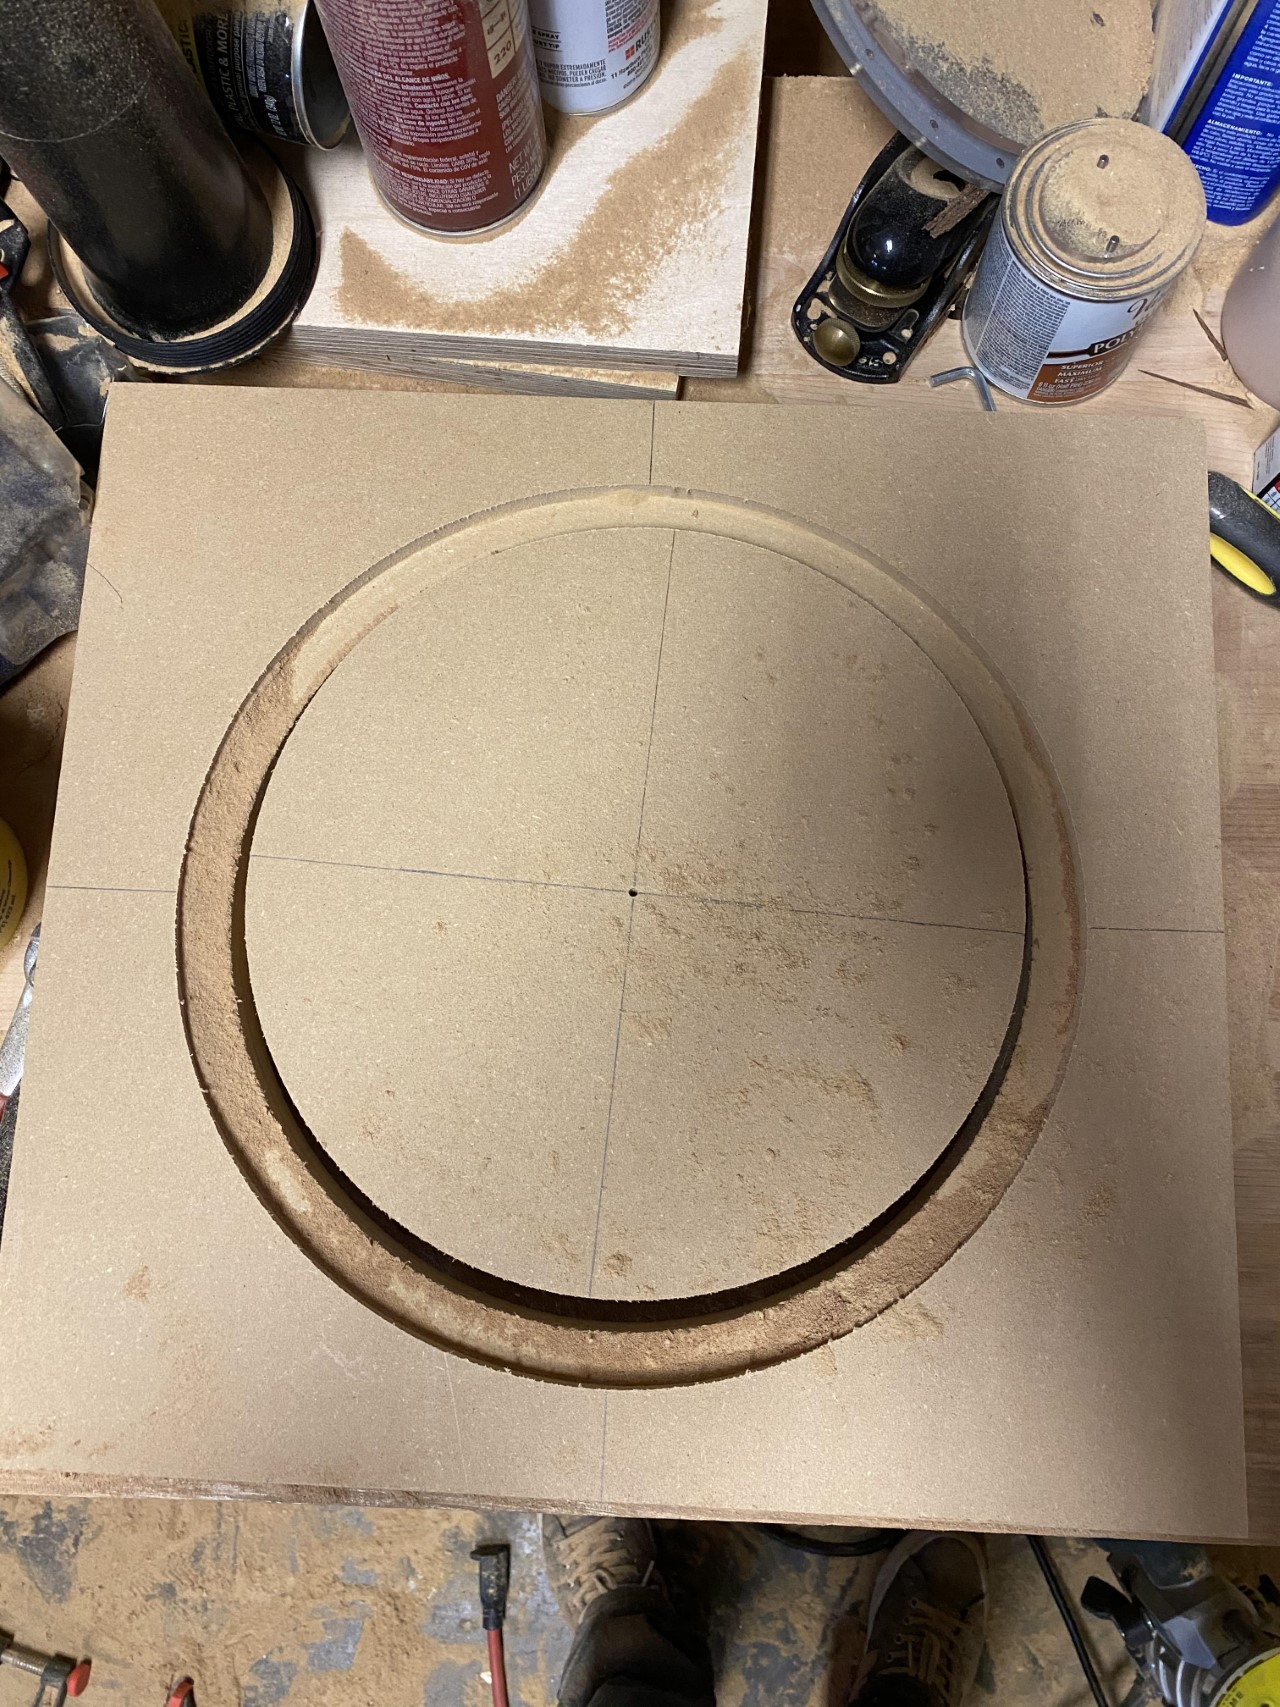
Always make test cuts before doing the real cut. It’s taken me a few mistakes to learn this the hard way.
Here I’m testing a template for cutting a speaker recess. Most of the speakers are recess mounted which means not just routing a simple hole with a circle jig (Jasper makes really nice jigs for this), but also making an outer recess around that hole. I use scrap 1/2" MDF for the templates and math it up to determine the template hole size to work with a template guide bushing and straight router bit combination. Sometimes the math is wrong or the plan ends up not matching up with the actual speaker size. It’s easier to test first than have to patch a bad cut on the actual part.

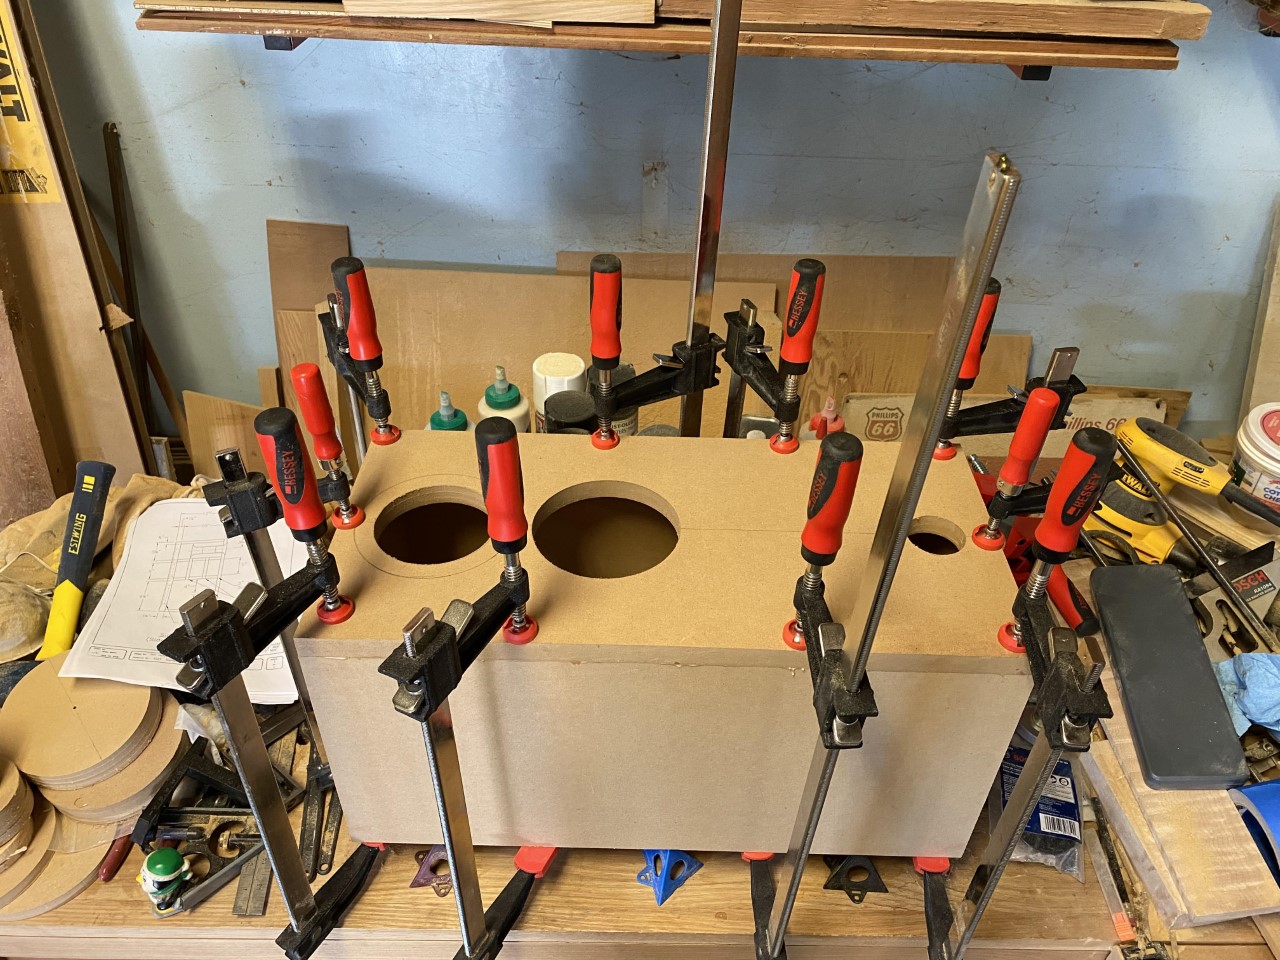
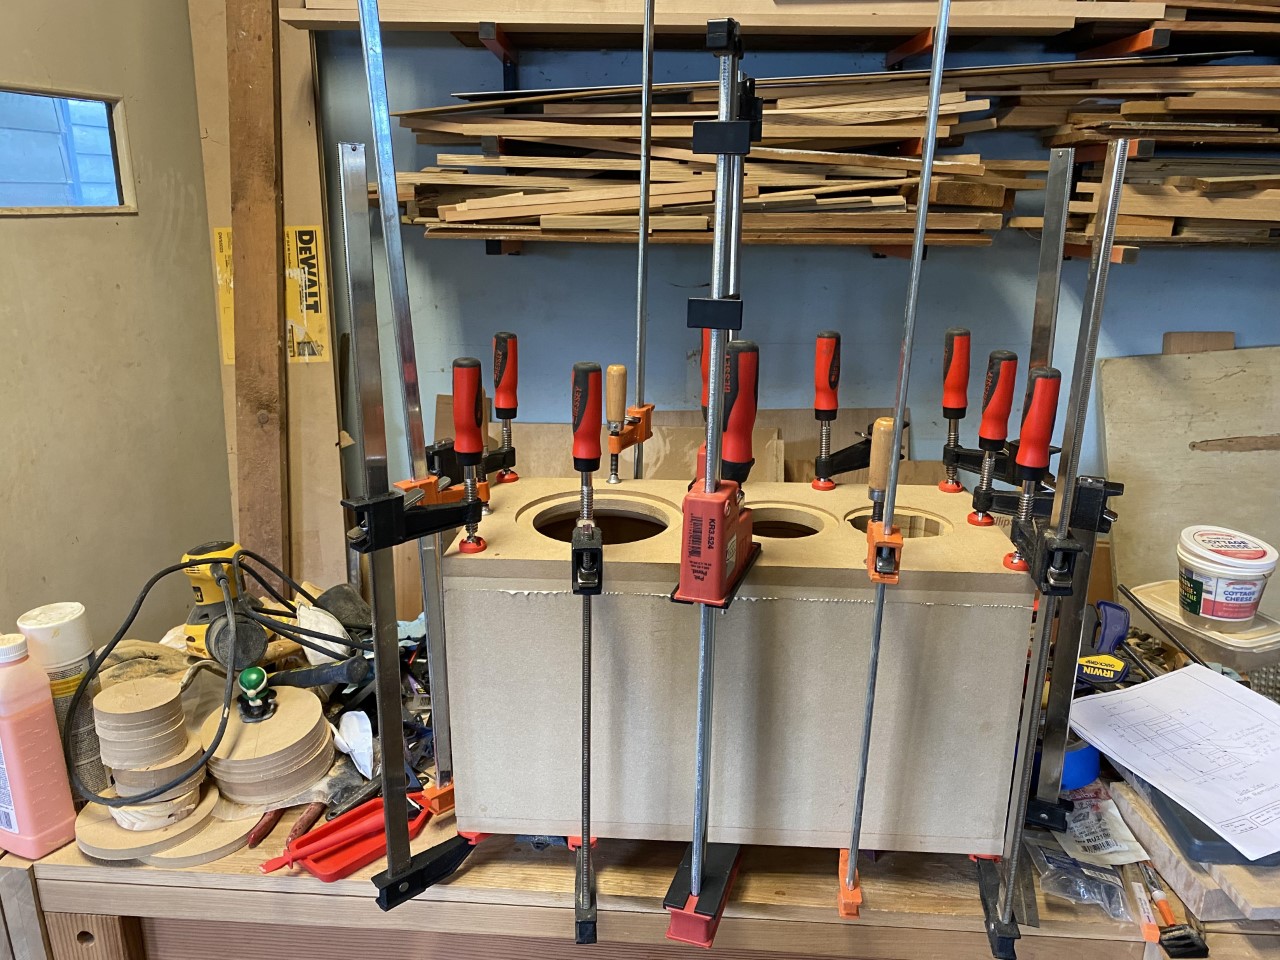
90 degree corner clamps are super helpful for lining up edges during glue ups. They’re not 100% perfect - you’ll still want to use a square and make adjustments as necessary. The Bessey’s are nice and chunky - definitely recommended to have in the clamp arsenal.
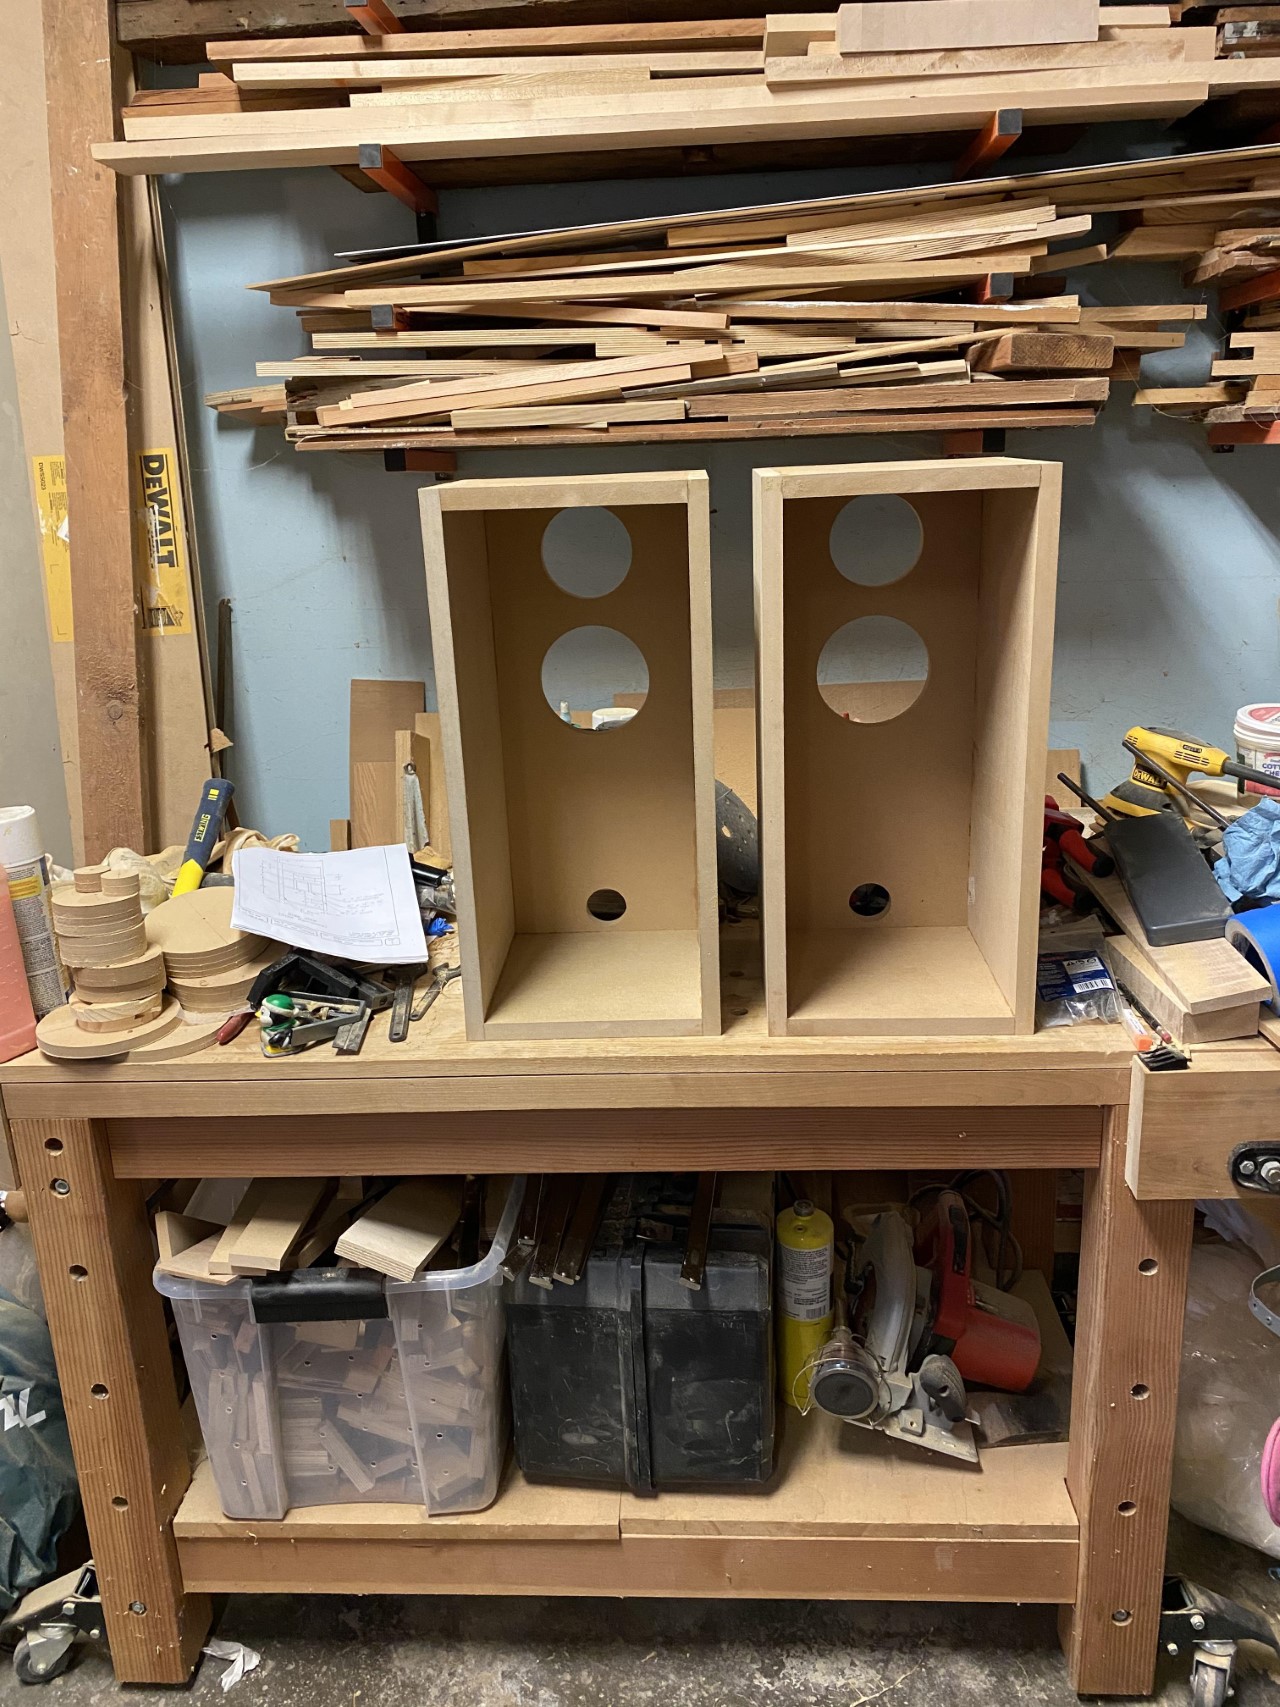
This is a glue up of one of the Micro Statements. Speaker cabinet construction tends to be a lot of very simple butt joints (as with this one) with some very occasional rabbets.
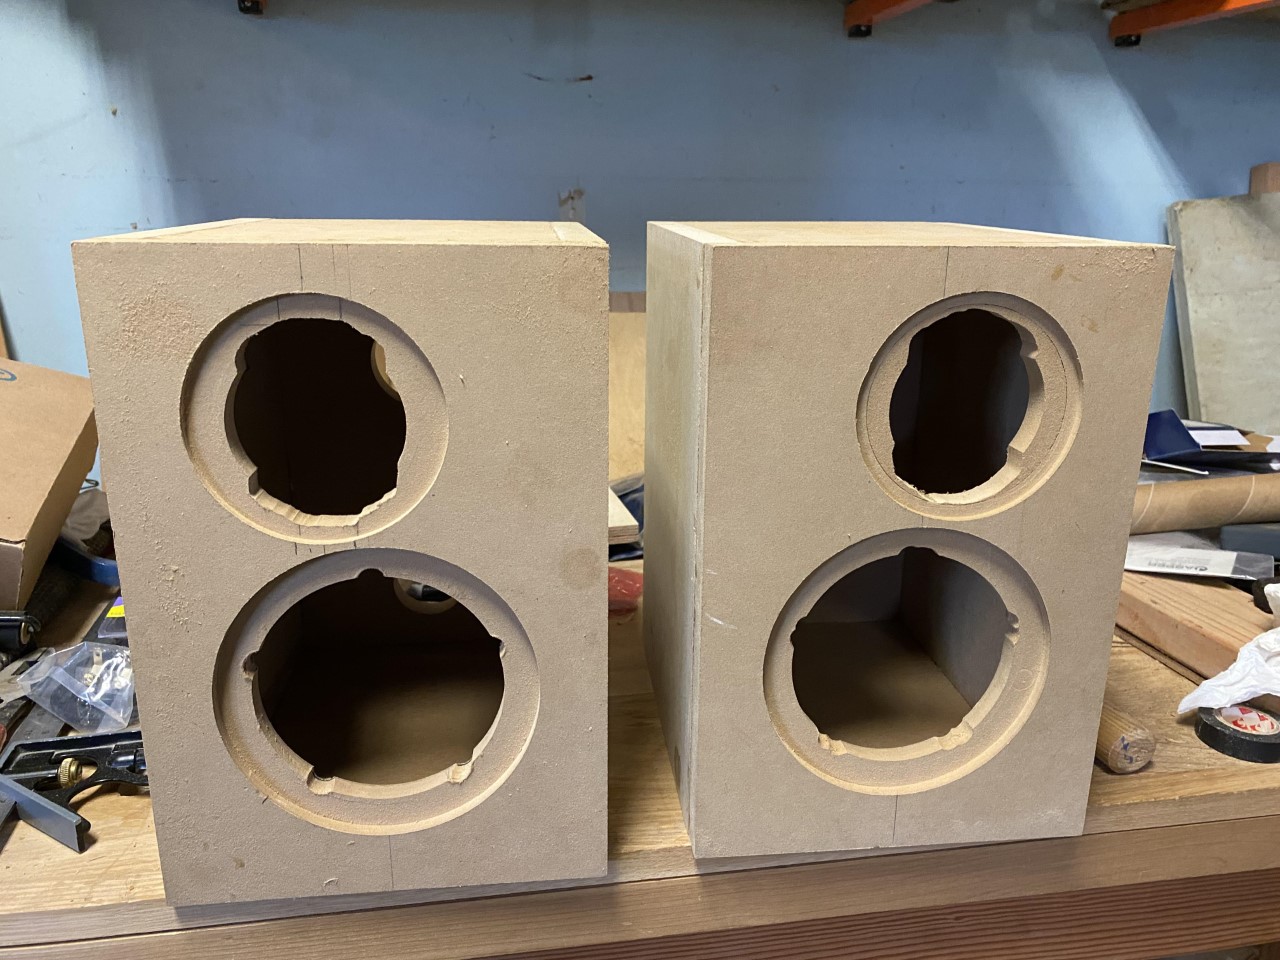
Micro statement cabinet construction. The front baffle edges haven’t been rounded over yet. The speaker holes have some extra cuts to account for the shape of the drivers. The woofer notches were just made using a large drill bit in the drill press before the front was glued on.
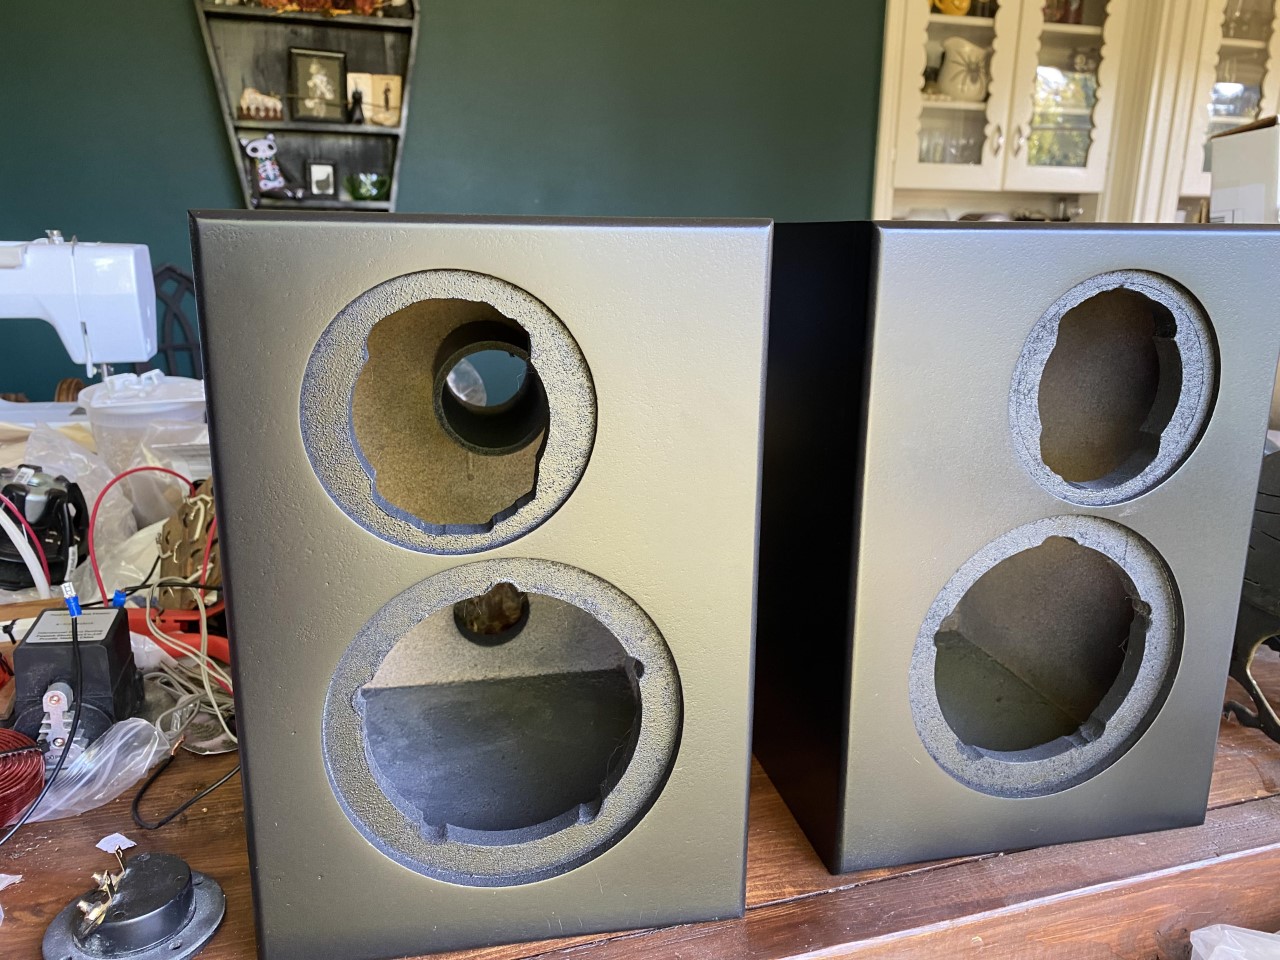
The tweeter cut outs were done free hand using a straight router bit. Each one took multiple passes, checking for fit and cutting away until the speakers fit in, properly oriented. It’s not pretty (if I wanted pretty, I’d look into a CNC or similar), but you’ll never know it once you get the speaker mounted.
The dimensions on the plans for the tweeter specify a larger cut out that shouldn’t require this much of a mess, but I found the hole to actually be too big to provide room for the screws to attach the speakers. This can be made out on the right box where I cut to spec and ended up having to glue a plug back in for a smaller hole to be cut. (Learning to test the hard way).
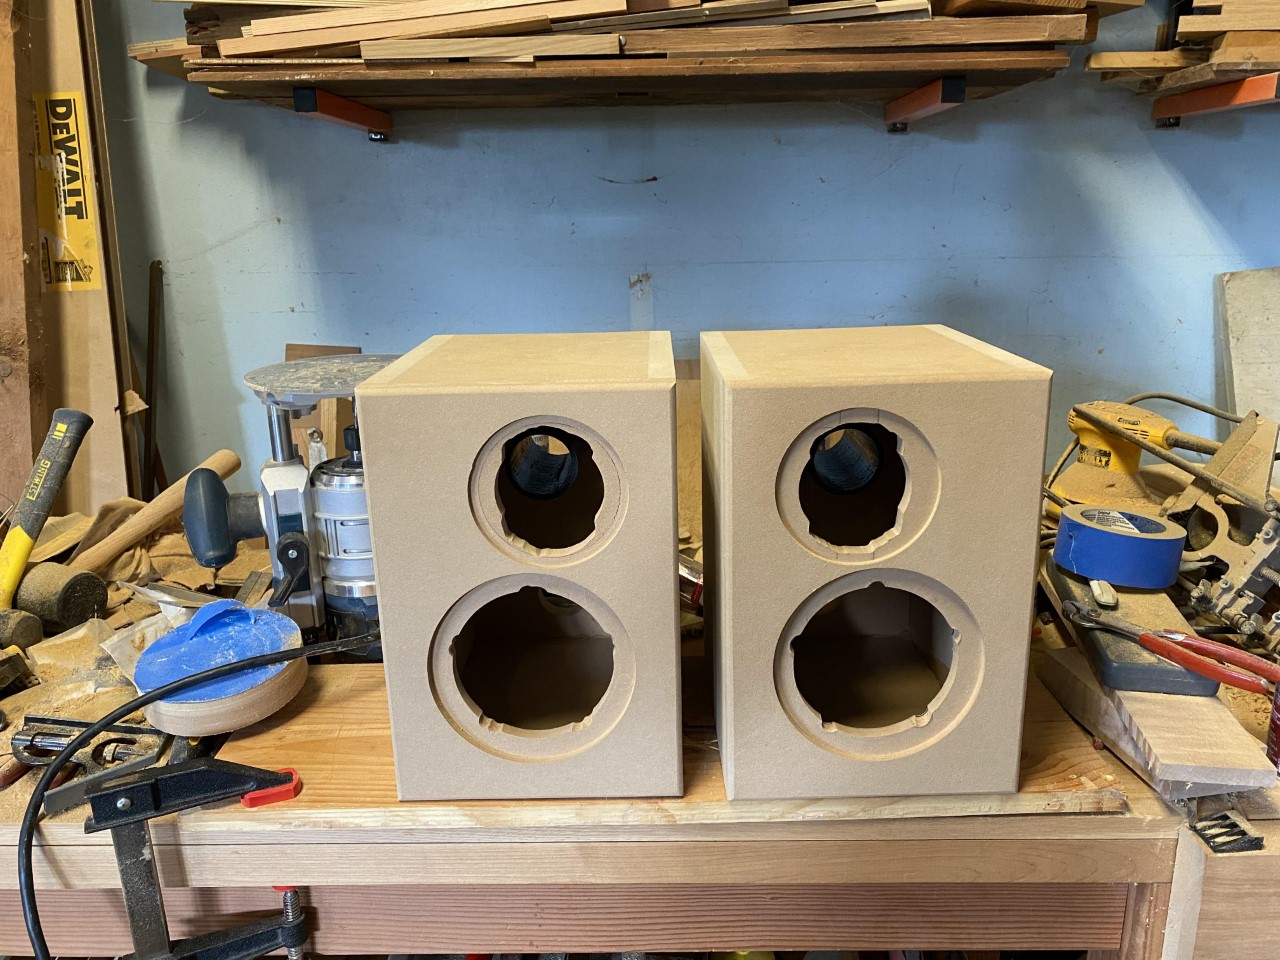
Micro cabinets with the front baffle edges rounded over.
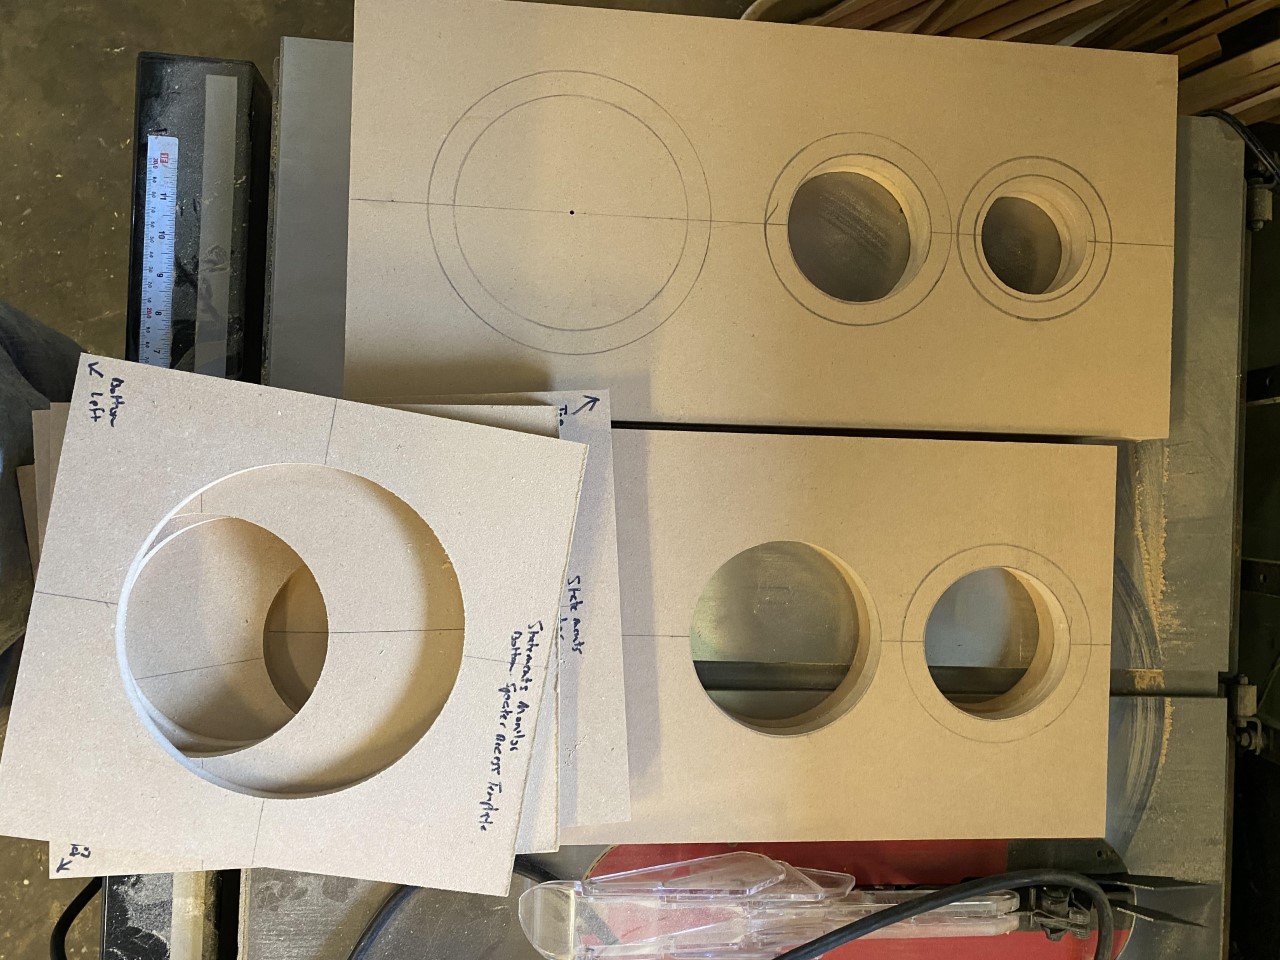
Front and back monitor panels marked up and partially cut along with a stack of router templates.
Gluing up the back panel on one of the monitors.
Monitors partially assembled.
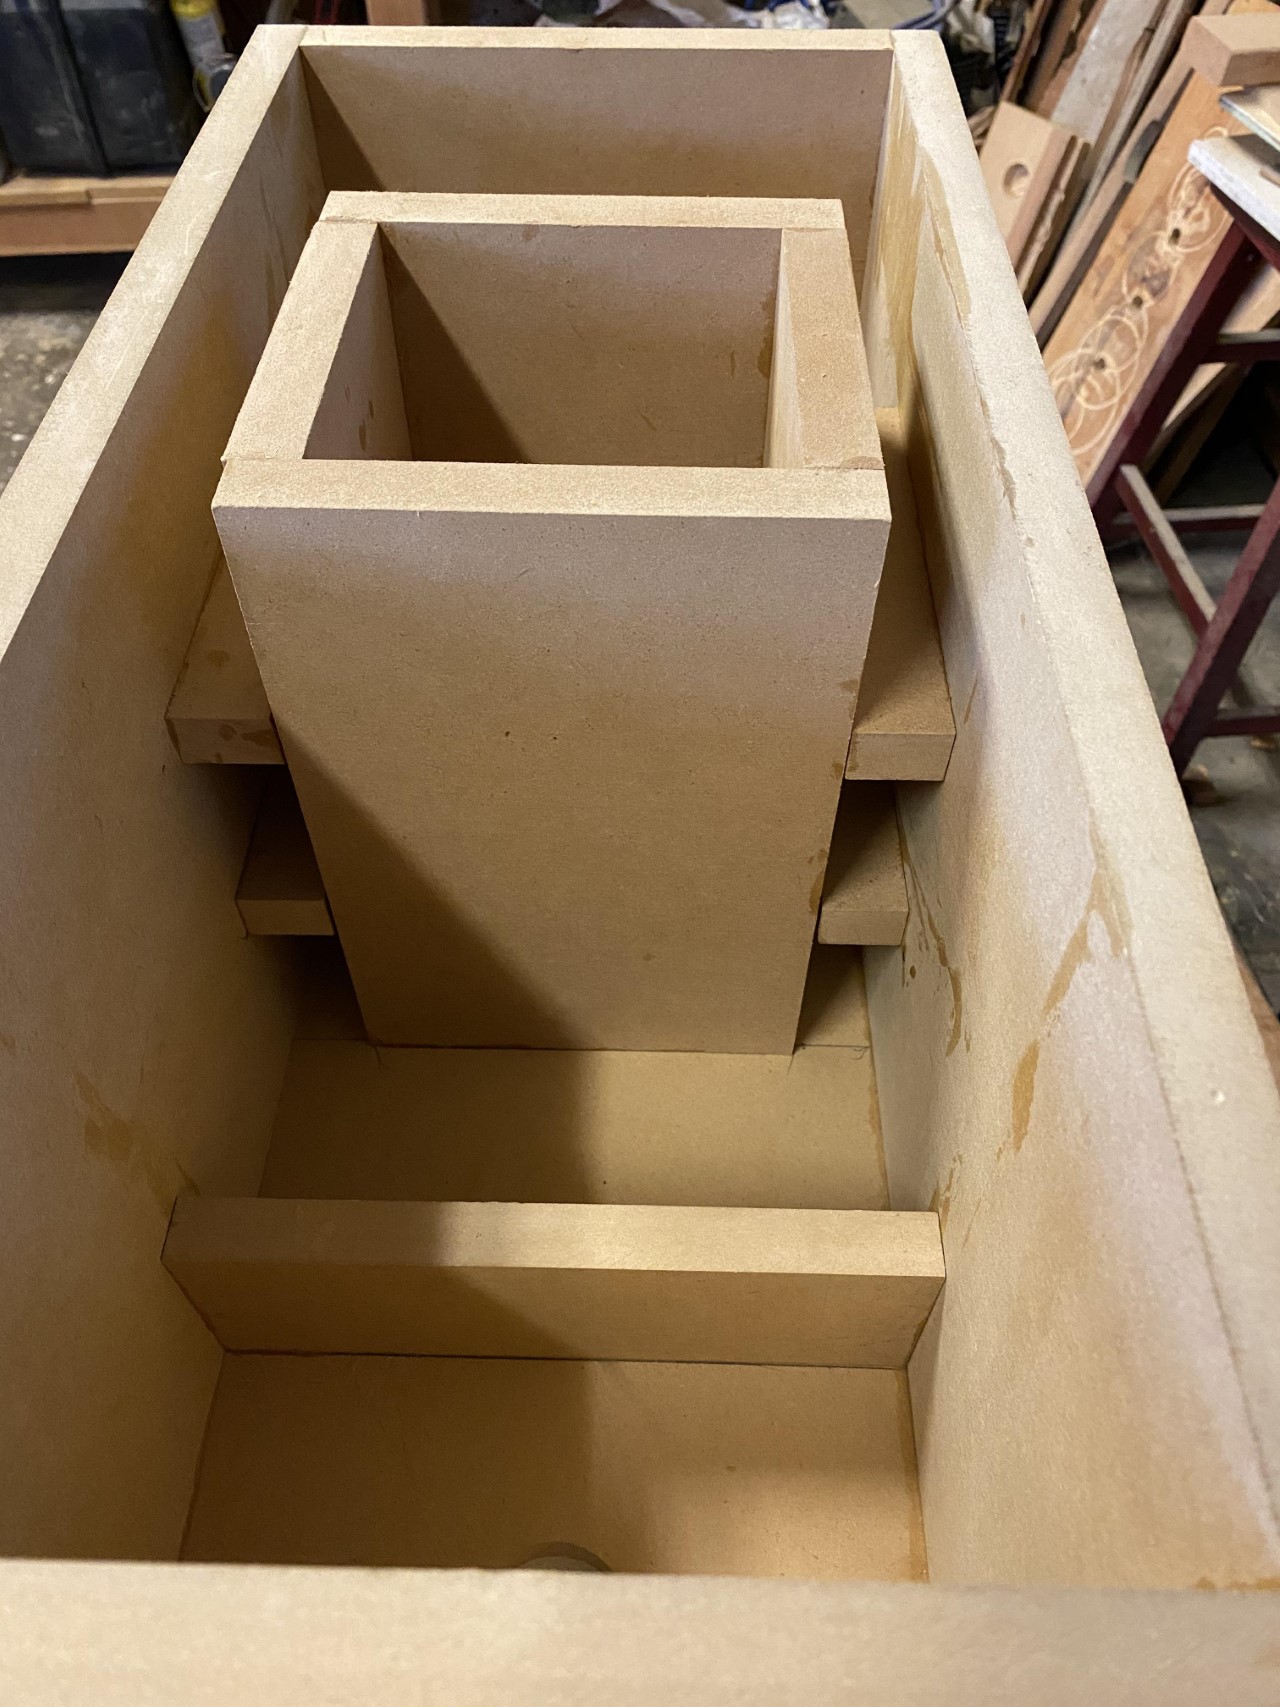
Gluing up the mid pass thru and bracing on one of the monitors.
The mid driver in the Monitors (and also the Center Channel) have their own open backed port that’s closed off from the rest of the cabinet. There’s also some additional internal bracing which I feel is probably unnecessary, but that’s what the blueprints call for. It may also be that I did the assembly in not the intended way. Having glued up the the exterior of the box first, it was an extra challenge figuring out how to best fit the port and side braces. It also didn’t help that the MDF is not exactly 3/4" thick. So exact plan measurements don’t quite match reality. It may have been a better strategy to build up from one side to the other rather from the back to front.
Gluing the front baffle on one of the monitors.

One of the monitors, cabinet assembled. No roundover on the front baffle yet. Same horror show on the ribbon tweeter recess.
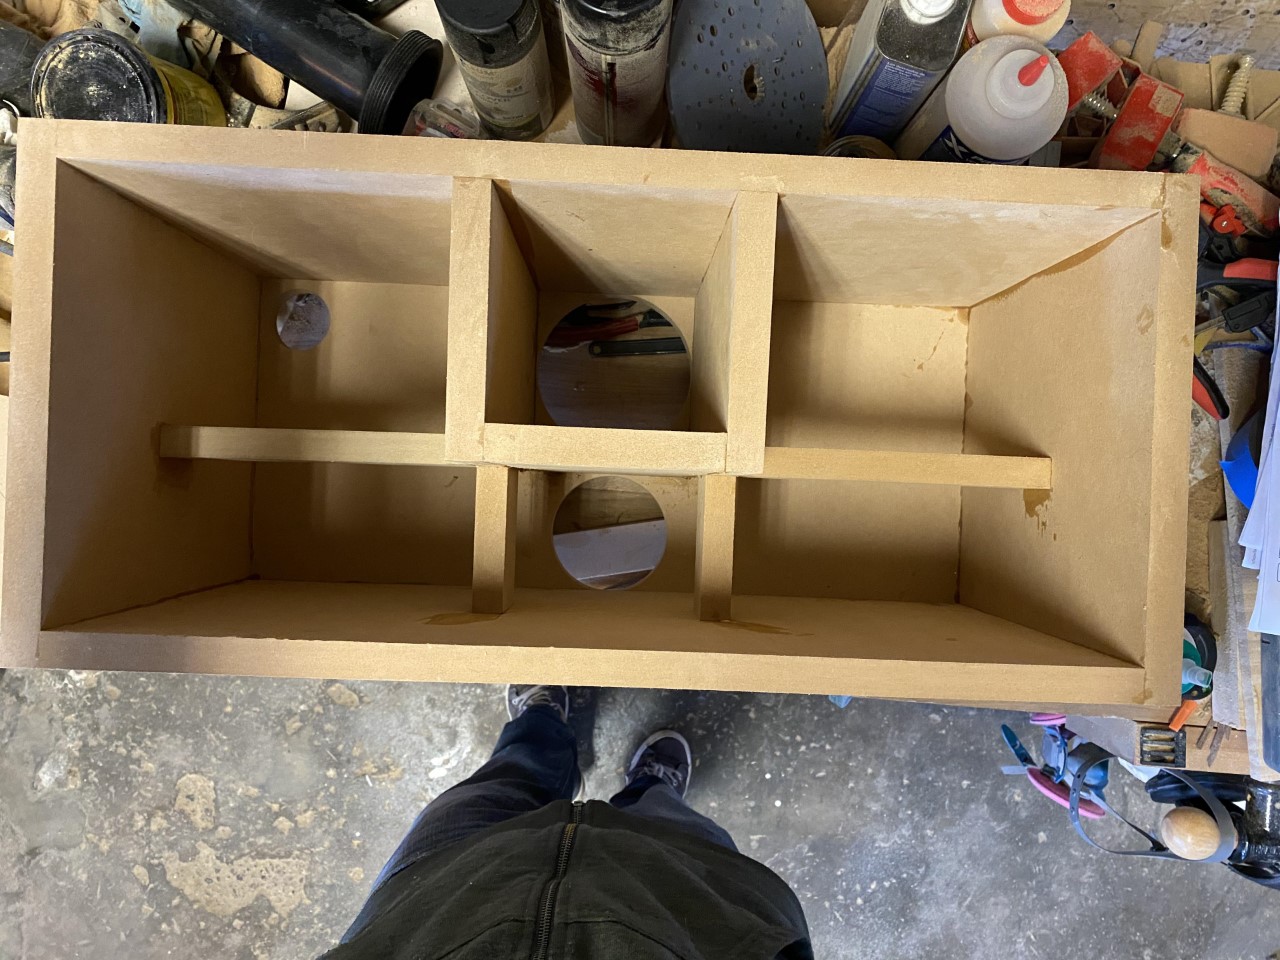
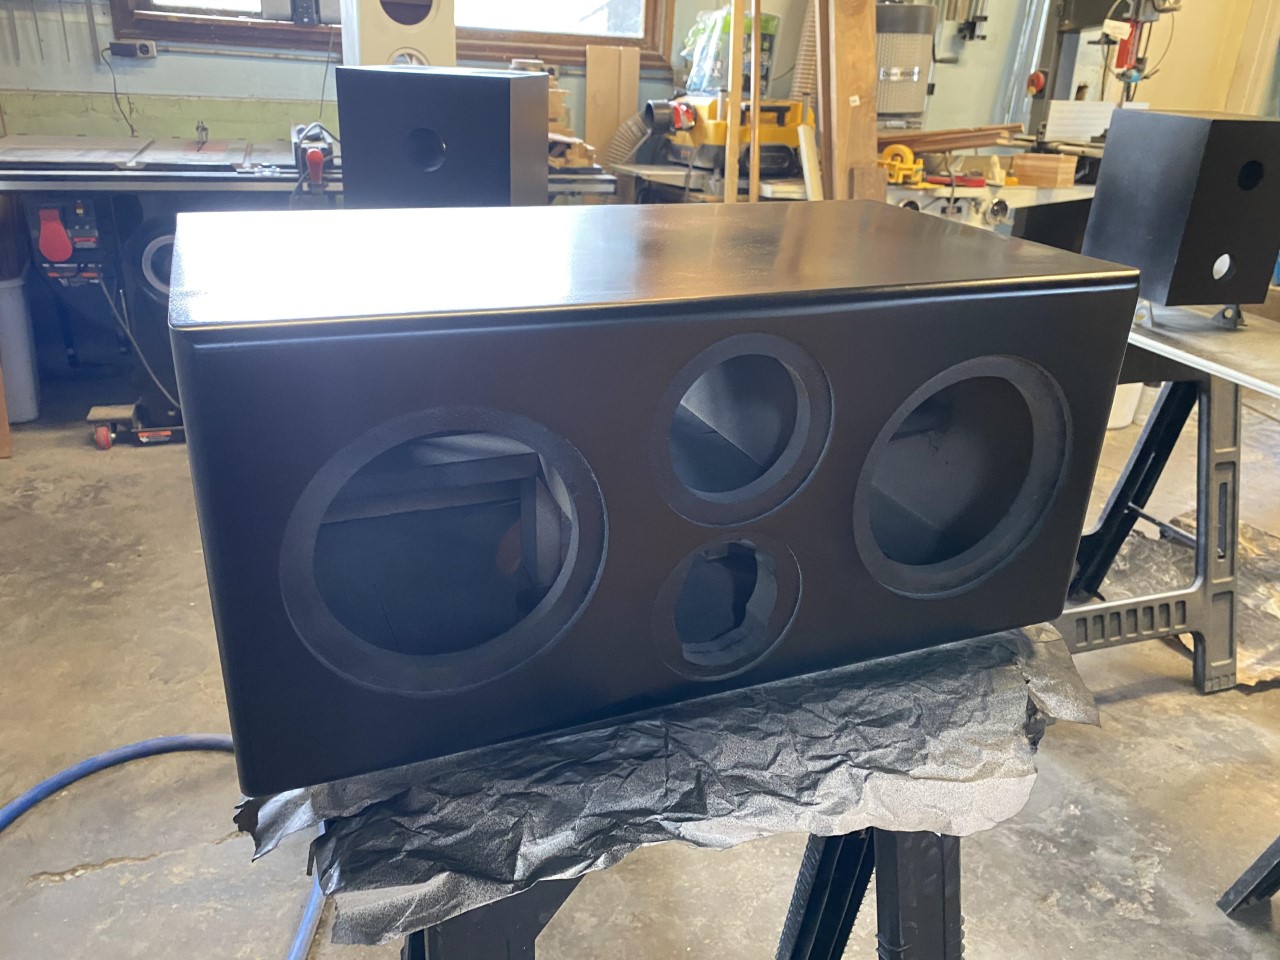
Internal bracing and mid pass thru of the statement center channel. This is an upside-down view. The bottom hole will fit a port and the top hole is the pass thru for the mid speaker. The top left hole will fit the terminal cup (eventually the bottom right corner). Once again, very similar design to the Monitors.
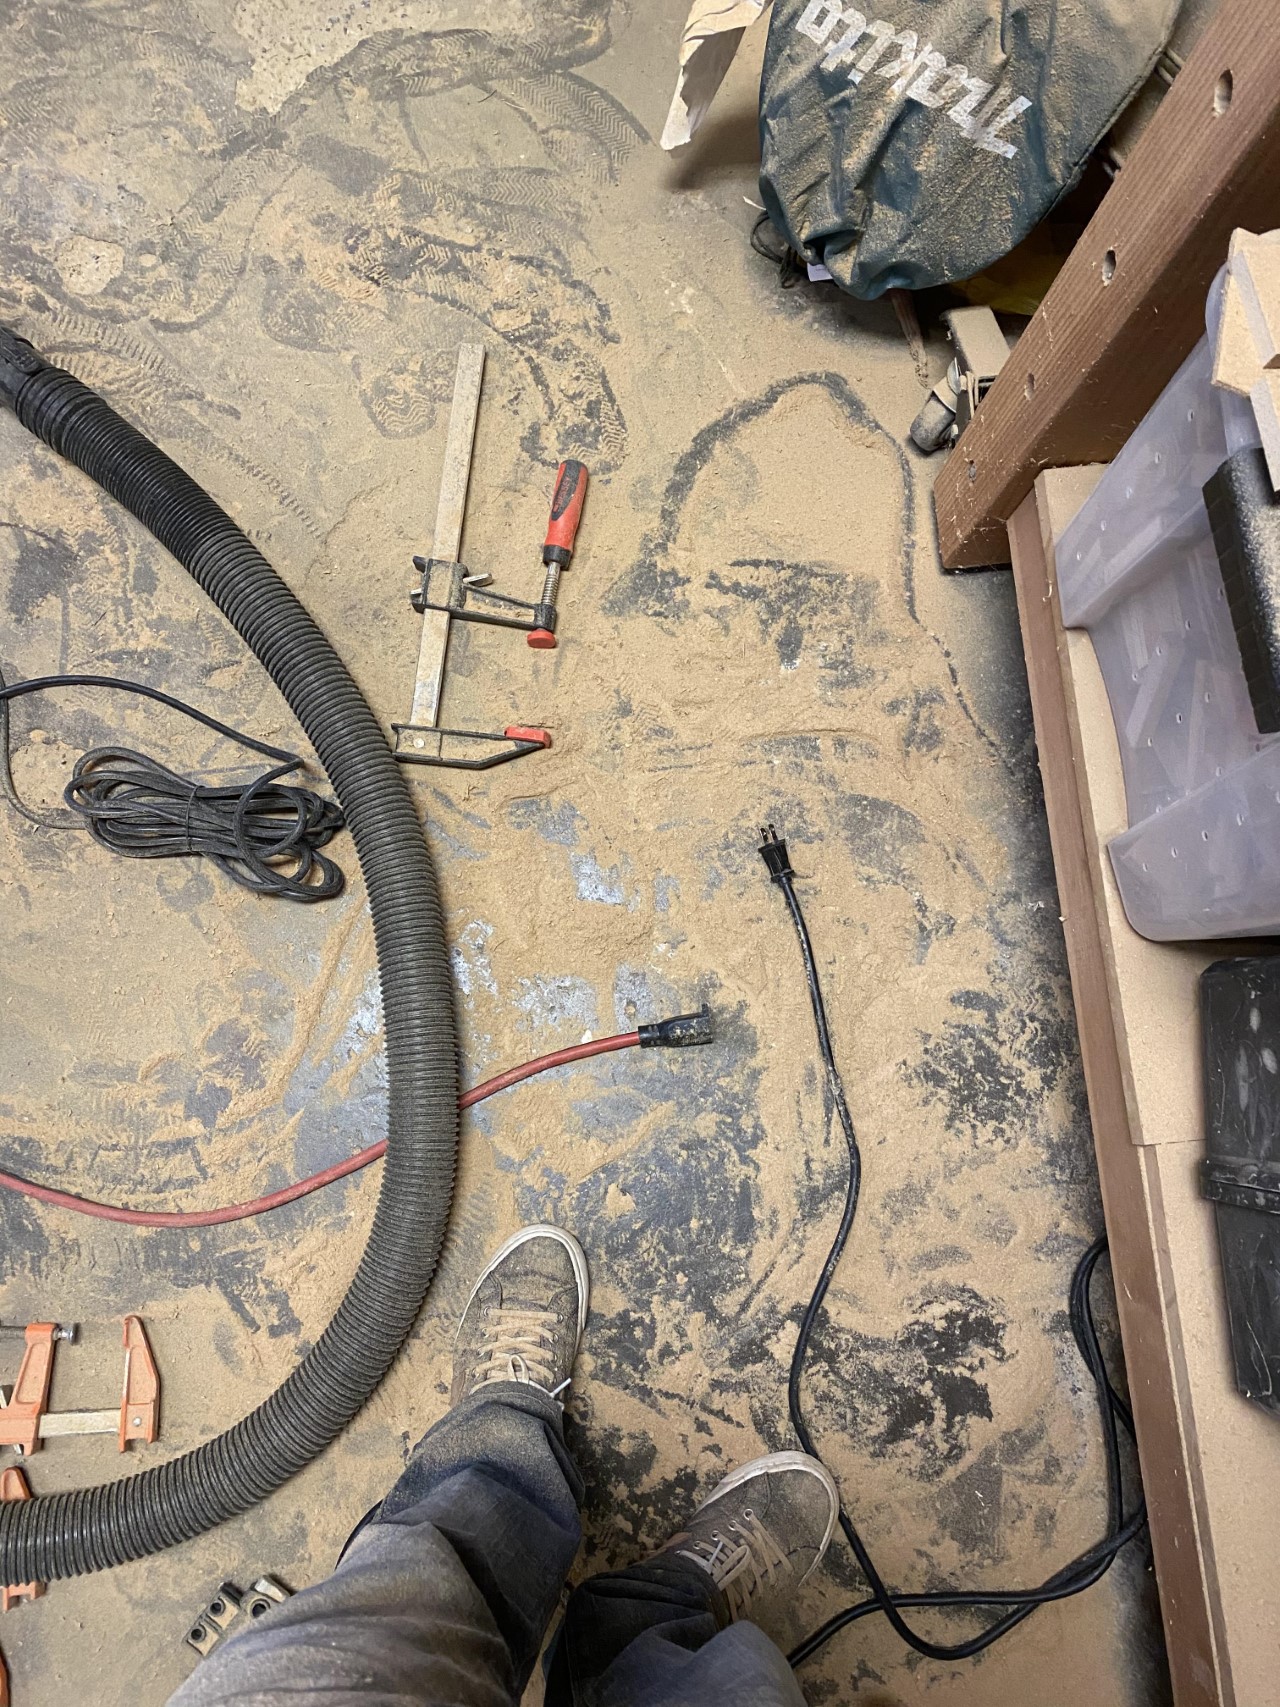
All of the routing for holes and recesses creates a ridiculous amount of dust. MDF is especially egregious. Mask up.
The sub front baffle, cut out in progress. Even though most cabinet construction is 3/4" MDF, front baffles are typically a laminated pair of 3/4" and 1/2" MDF pieces making a 1-1/4" thick front face, providing additional rigidity for mounting heavy speakers.
Rather than use up a large piece of MDF to create a template for these giant holes, I just used a circle jig and made multiple passes at subsequently smaller diameters to get the recess width I needed before a final full depth cut for the actual cut out. This was the last speaker and it took me that long to figure out that approach. This is probably a much better way to do it than dealing with templates an guide bushing math. It also avoids the issue of template alignment.
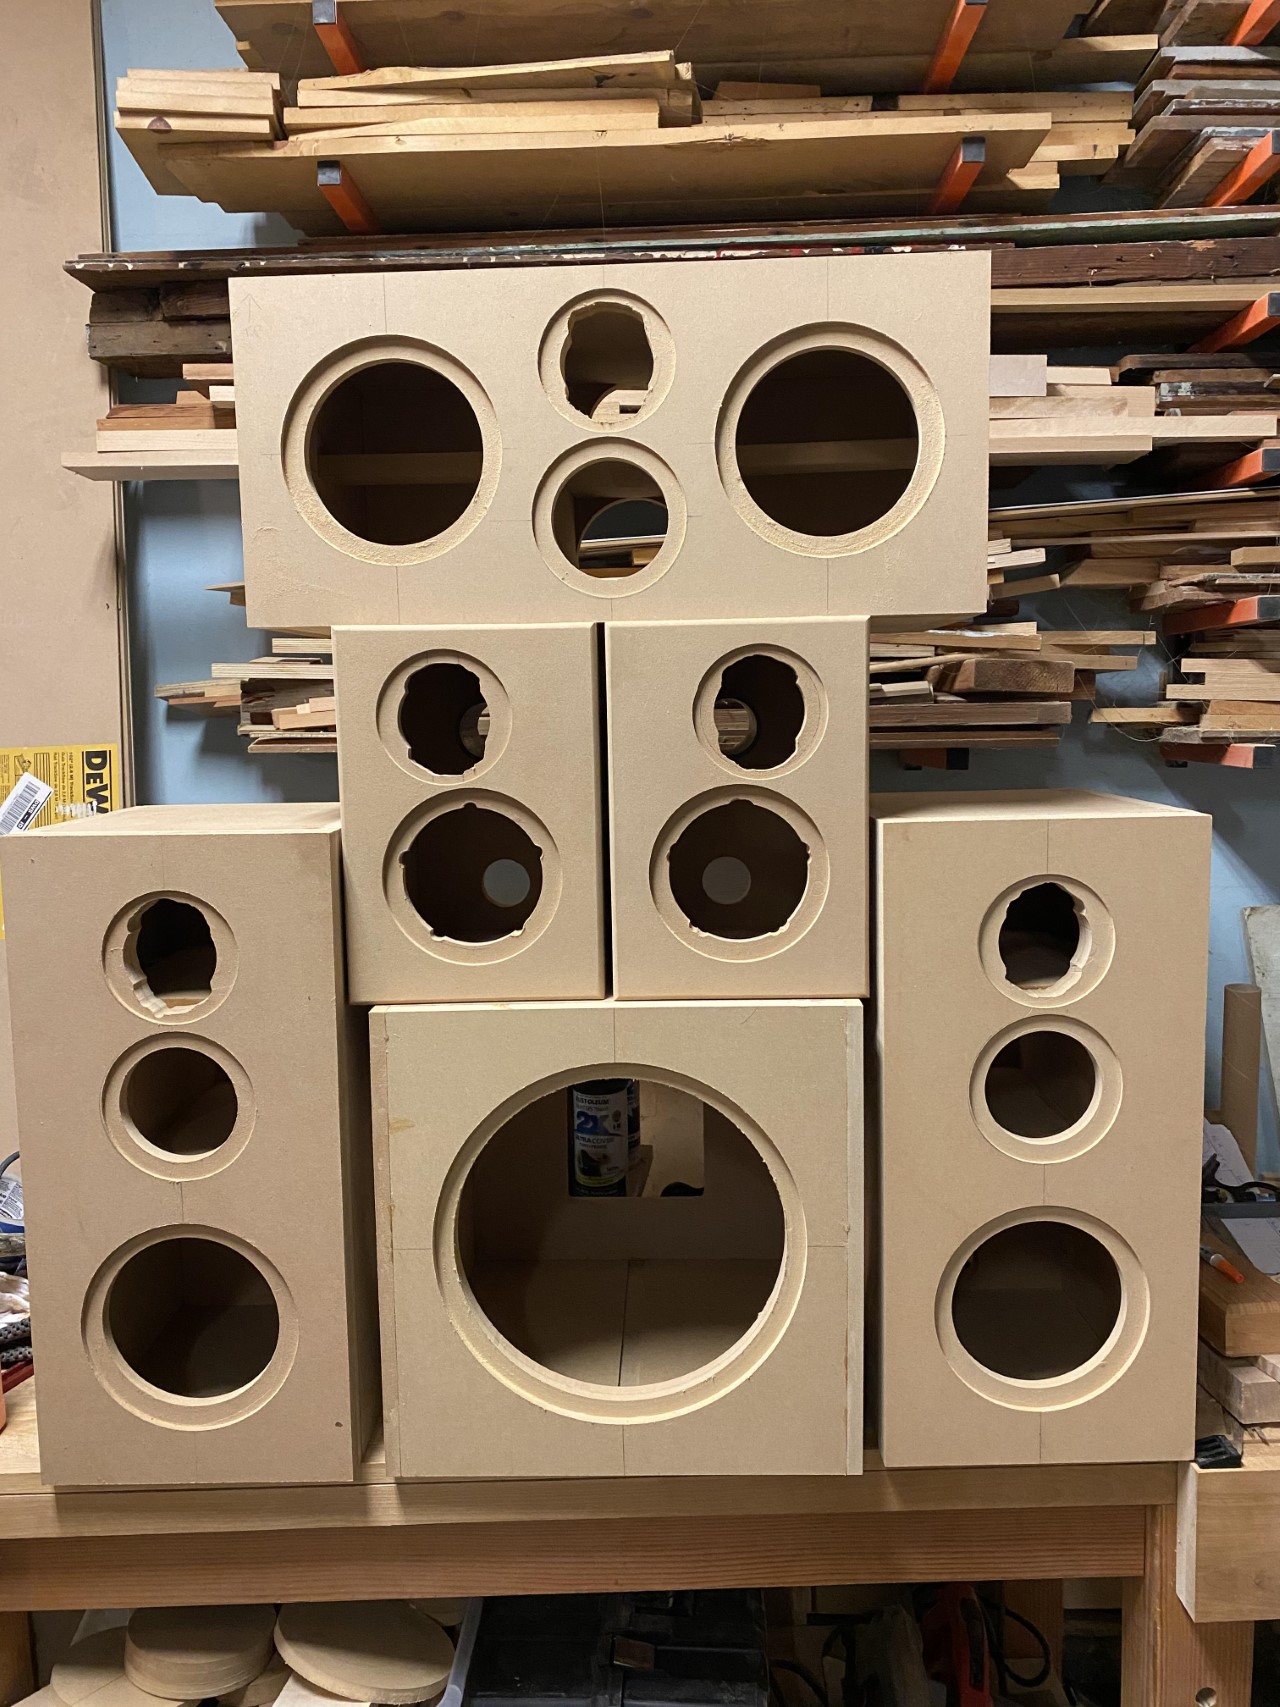
All 6 speaker cabinets are assembled. Only the micro cabinets have roundovers so far.
Into the finishing process.
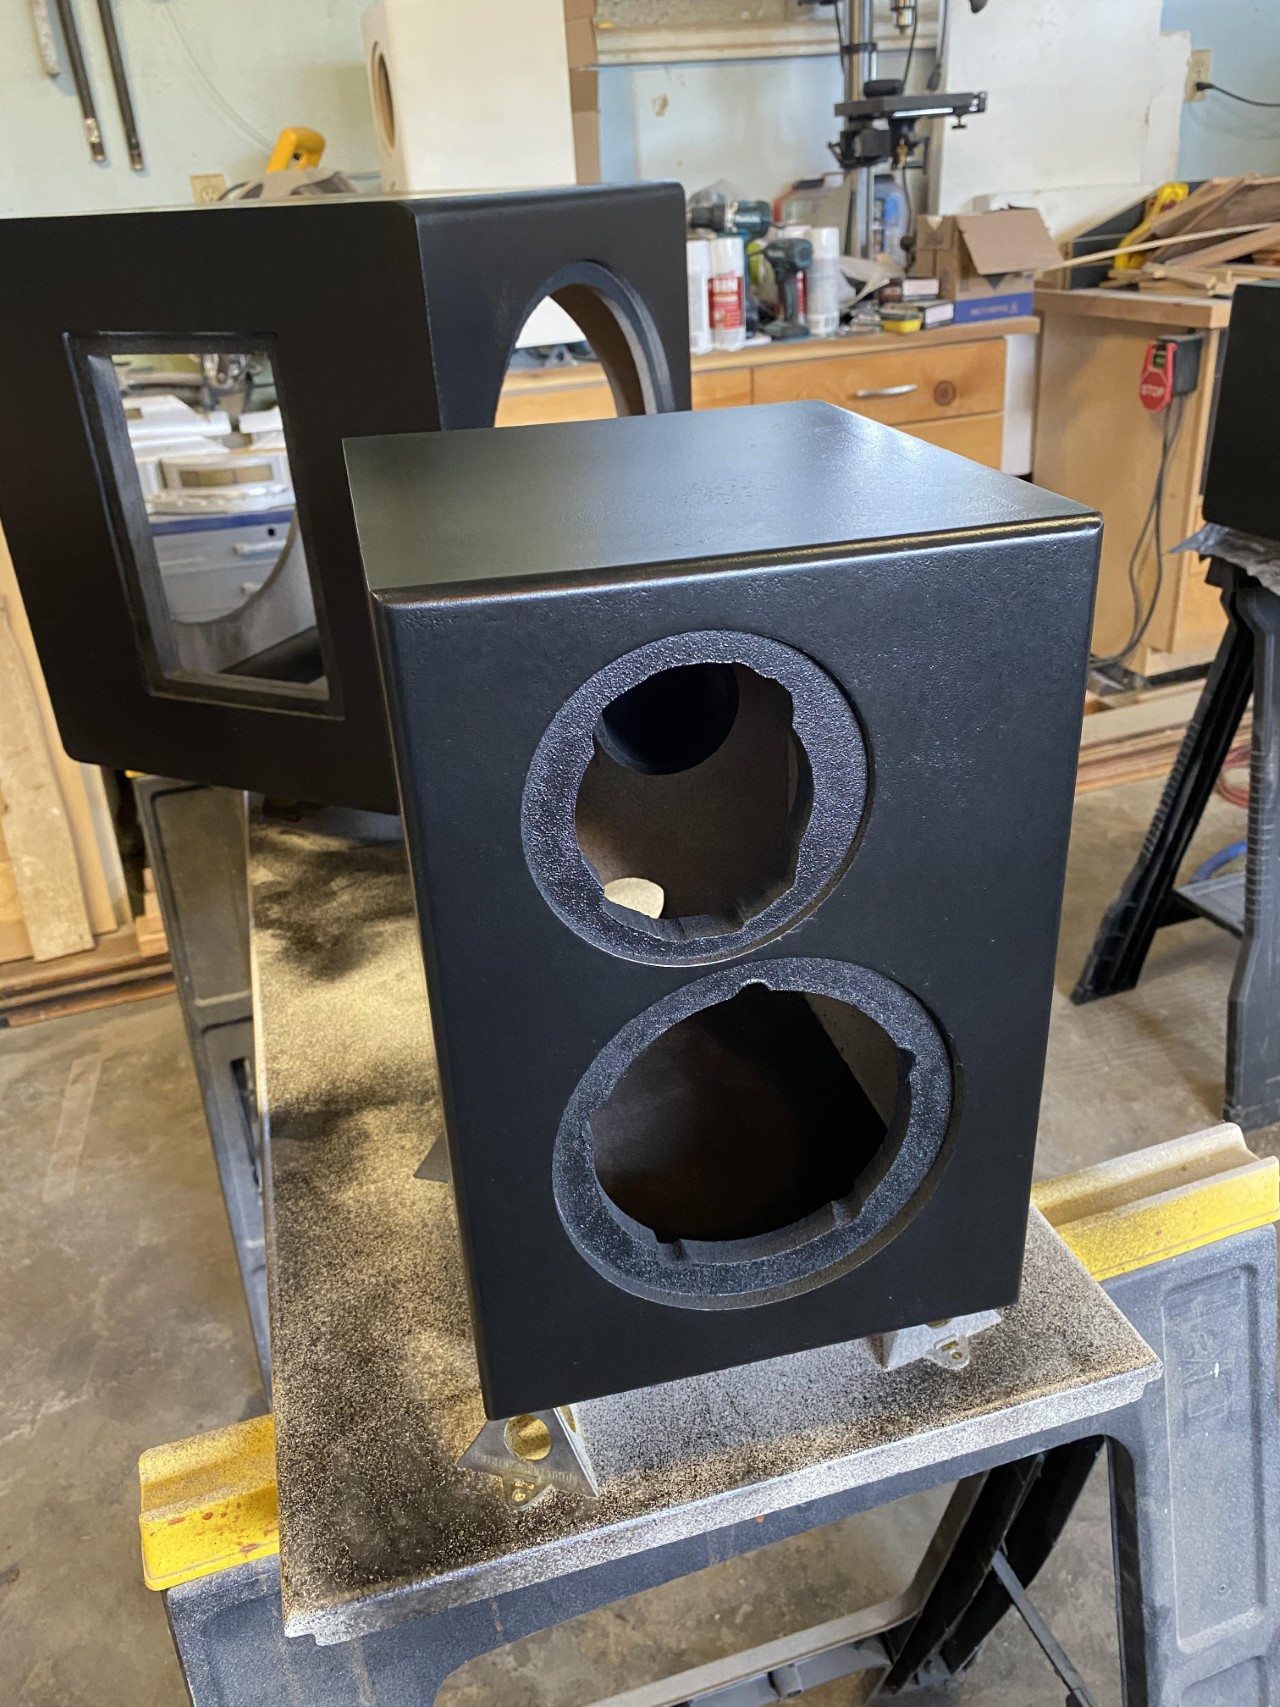
It starts with an initial sanding up to 220 grit and fixing any spots with wood filler that might need it. Then several coats of shellac-based primer followed by even more sanding. I like the Zinsser BIN primer that comes in rattle cans. Of all the options, it’s the easiest to apply. Sealing is one of the most challenging parts when it comes to working with MDF. And so there are number of ways to approach it. Sealing is important both for getting good even paint coverage and also to help prevent “telegraphing” where the edges show through the paint. There’s a bit of that happening on the top of this one. Without sealing, the MDF will just suck up paint - especially the edges. Zinsser is a lacquer-based primer that works well for this. Other common alternatives include a 50/50 mix of water & wood glue, bondo (extremely effective against telegraphing, but be prepared to enjoy sanding), and other specialty wood sealer products. This may also be part of the reason you’ll find so many speaker builds using veneer, sidestepping the issues that come with a paint finish.
Center Channel painting progress.
When I started, I was using rattle cans (Rust-Oleum Painter’s Touch 2x Canyon Black). I’d used rattle cans on the C-Notes I’d built previously and it was fine. However, I wasn’t happy with the results I was getting this time around. Plus I found I was burning through cans at an alarming rate. Then came the real derp moment. I have a HVLP spray system (a Fuji 2-stage turbine) - why wasn’t I just using that to begin with? The remainder of the painting, I switched to the spray gun and an oil-based paint (Rust-Oleum Black Semi-Gloss). A single quart can, thinned down 3:1 with paint thinner was more than enough to get several good coats (with 1500 grit wet sanding in between coats) on the entire set.
Switching to an oil-based paint does come with a few downsides. It’s high VOC, so a good respirator outfitted with organic vapor cartridges is mandatory (also it turns out to be a highly recommended fashion accessory for attending late night Portland protests). It also takes a really long time to dry in between coats (sometimes up to 24 hours), making it a time-consuming process.
Micro Statements, ready for component installation.
It’s not a perfect paint finish. There’s a bit of orange peeling in some spots (I call it “character”). I decided not to go for a perfect glass polished smooth finish (and no final clear top coat either). At some point, I just get tired of the endless paint, wait, sand and repeat process. It also doesn’t help that I don’t have a dedicated finishing space, so there’s always dust and other variables to deal with. These aren’t intended to be fine art pieces anyway. They’re going to be sitting in a dark room where your attention is going to pointed somewhere else.
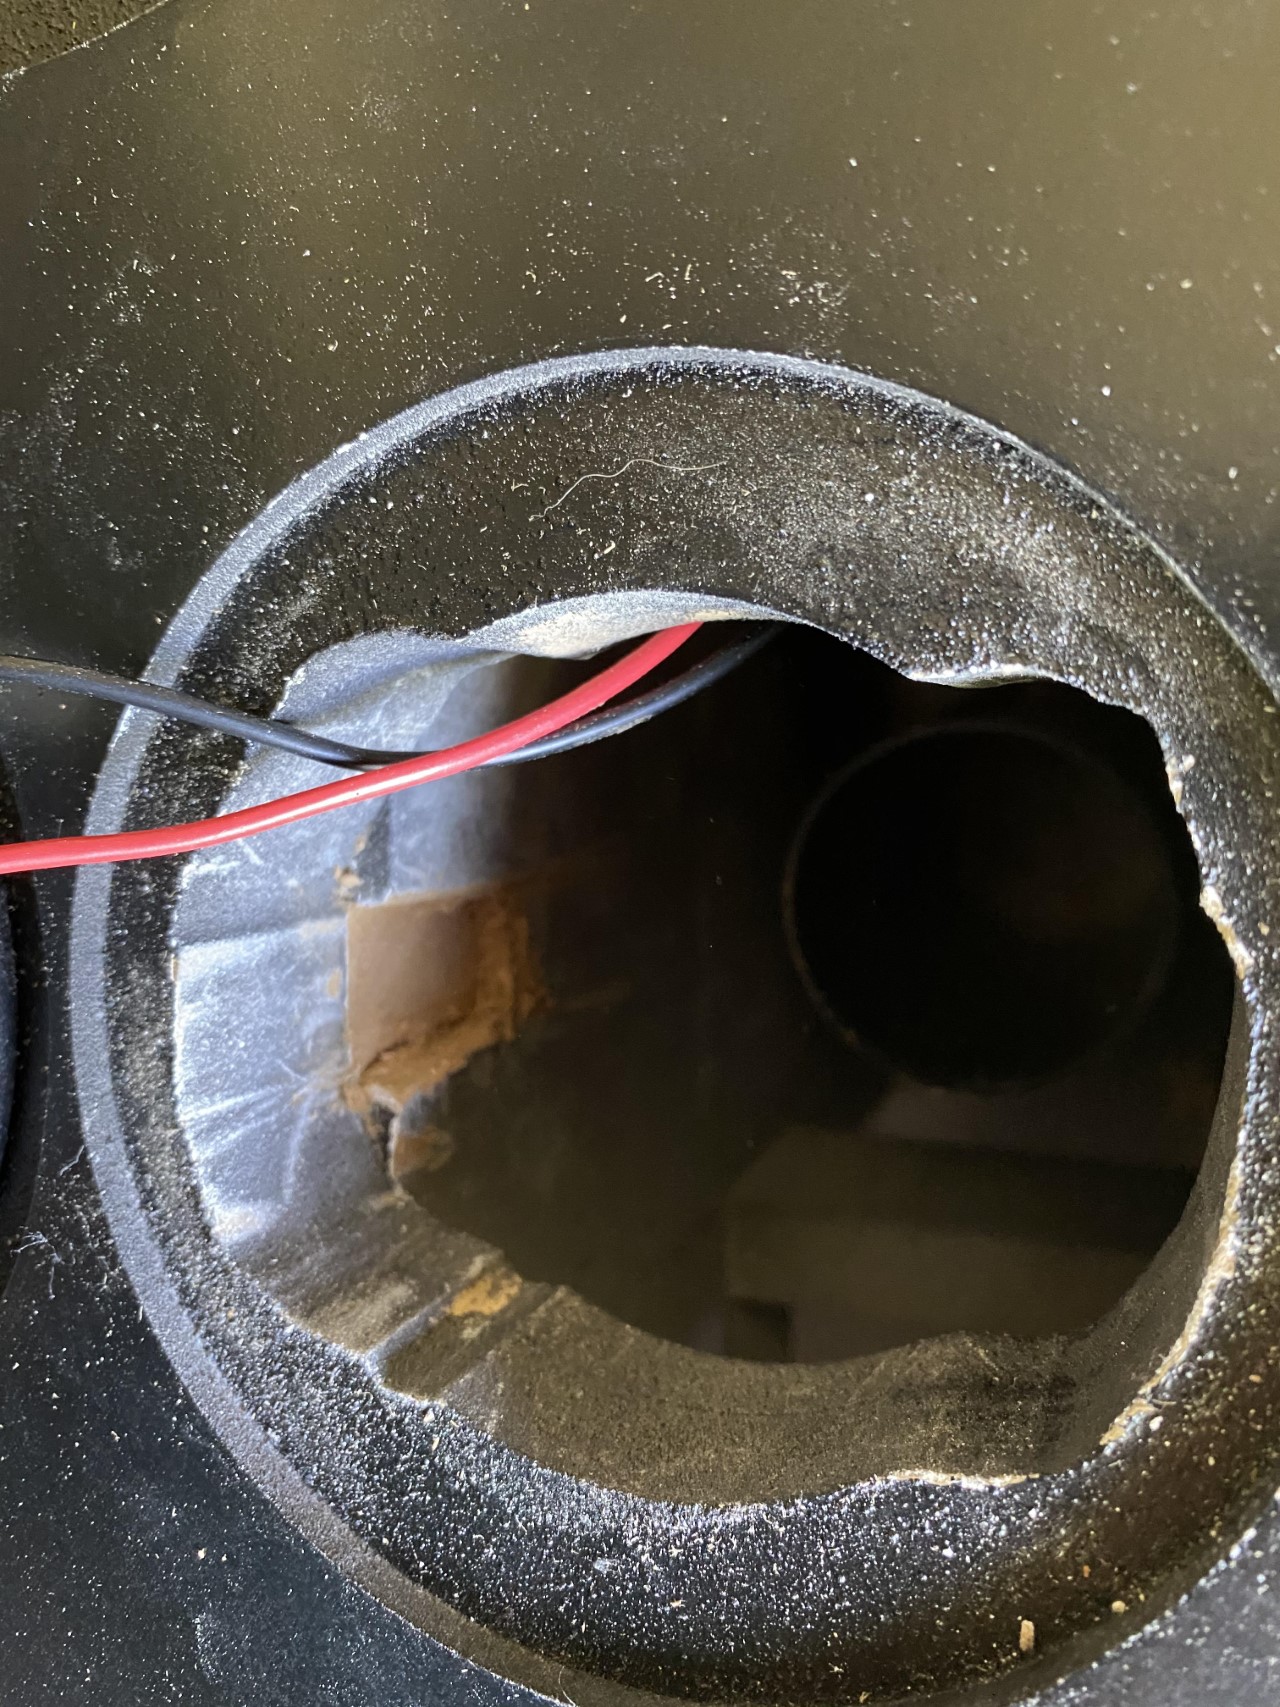
Additional bit of fun trivia - the rear port on these is simply a straight cut-off piece of 2" ABS pipe that I had leftover from a plumbing project.
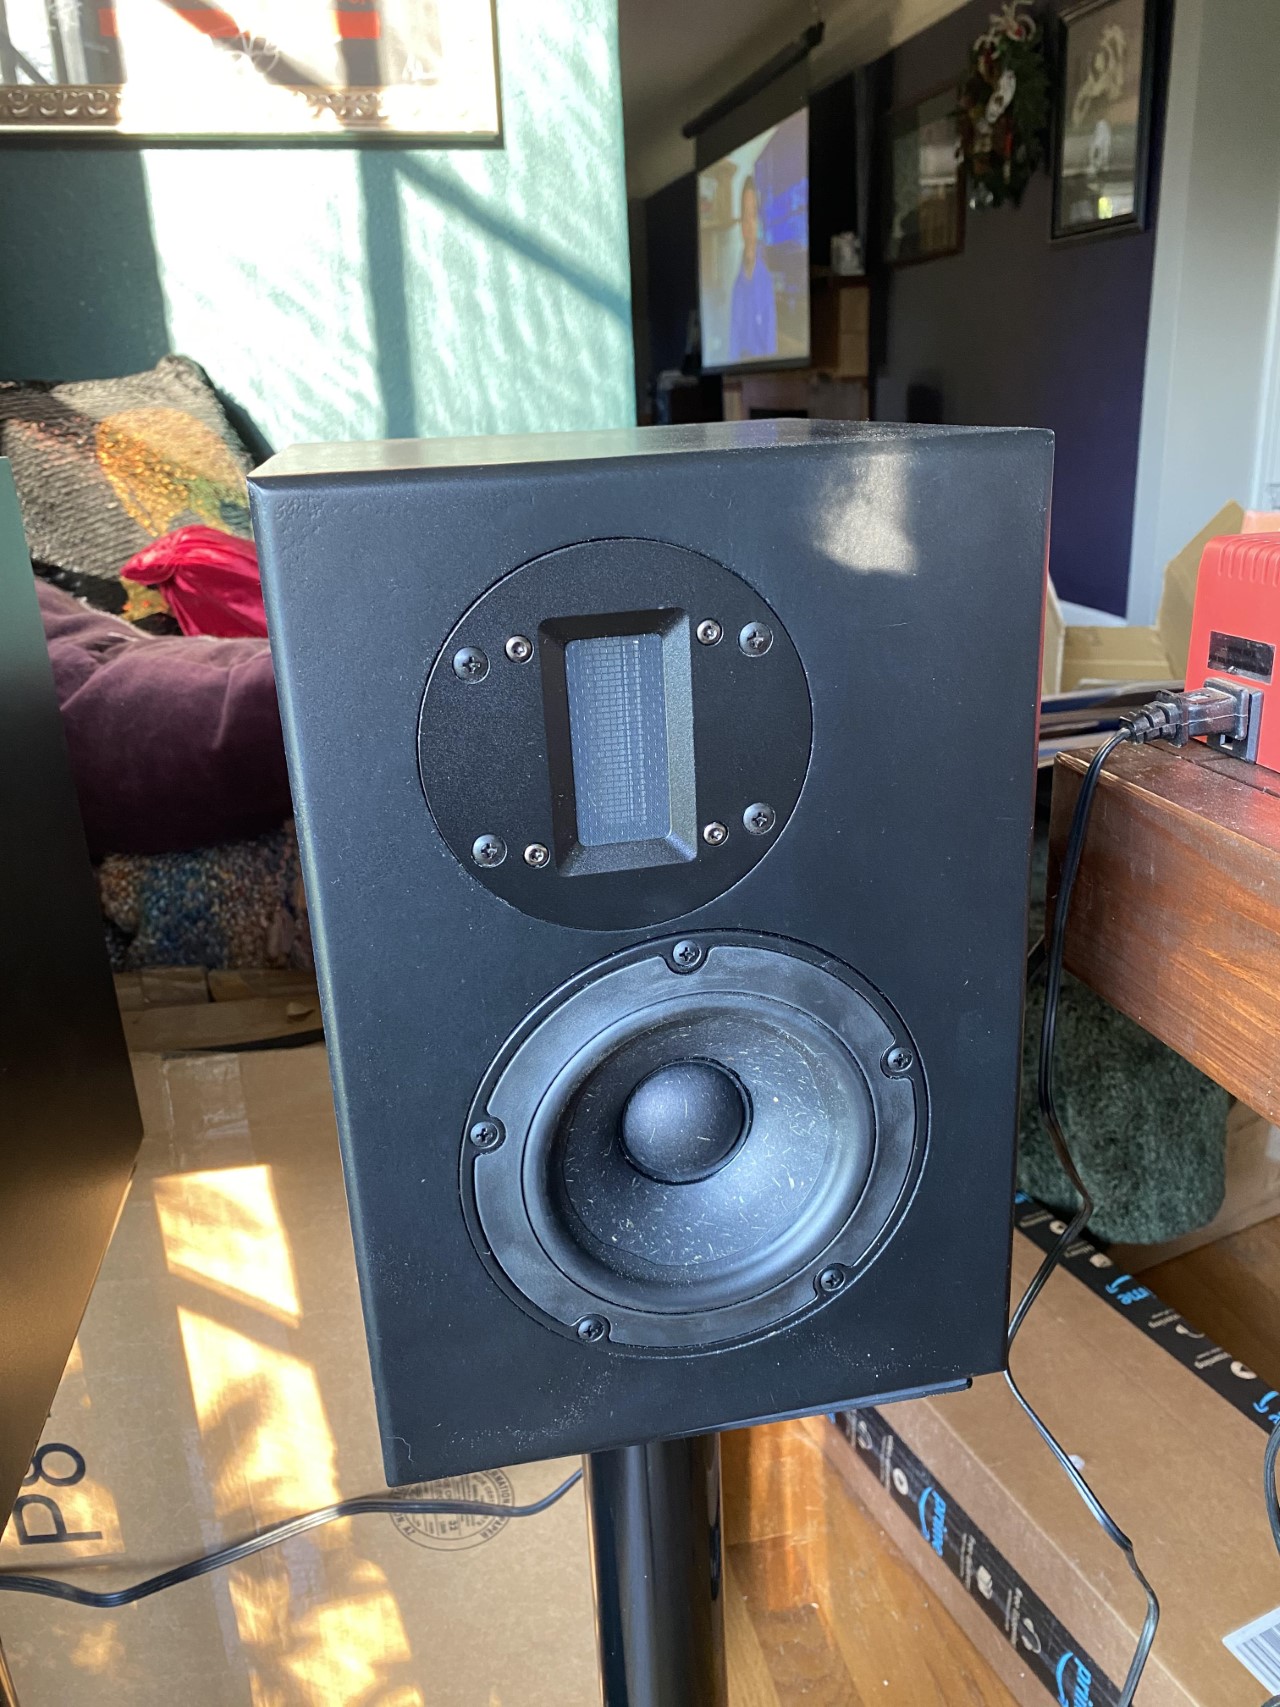
Fully assembled Micro Statement, just finished and still in need of a good dusting off.
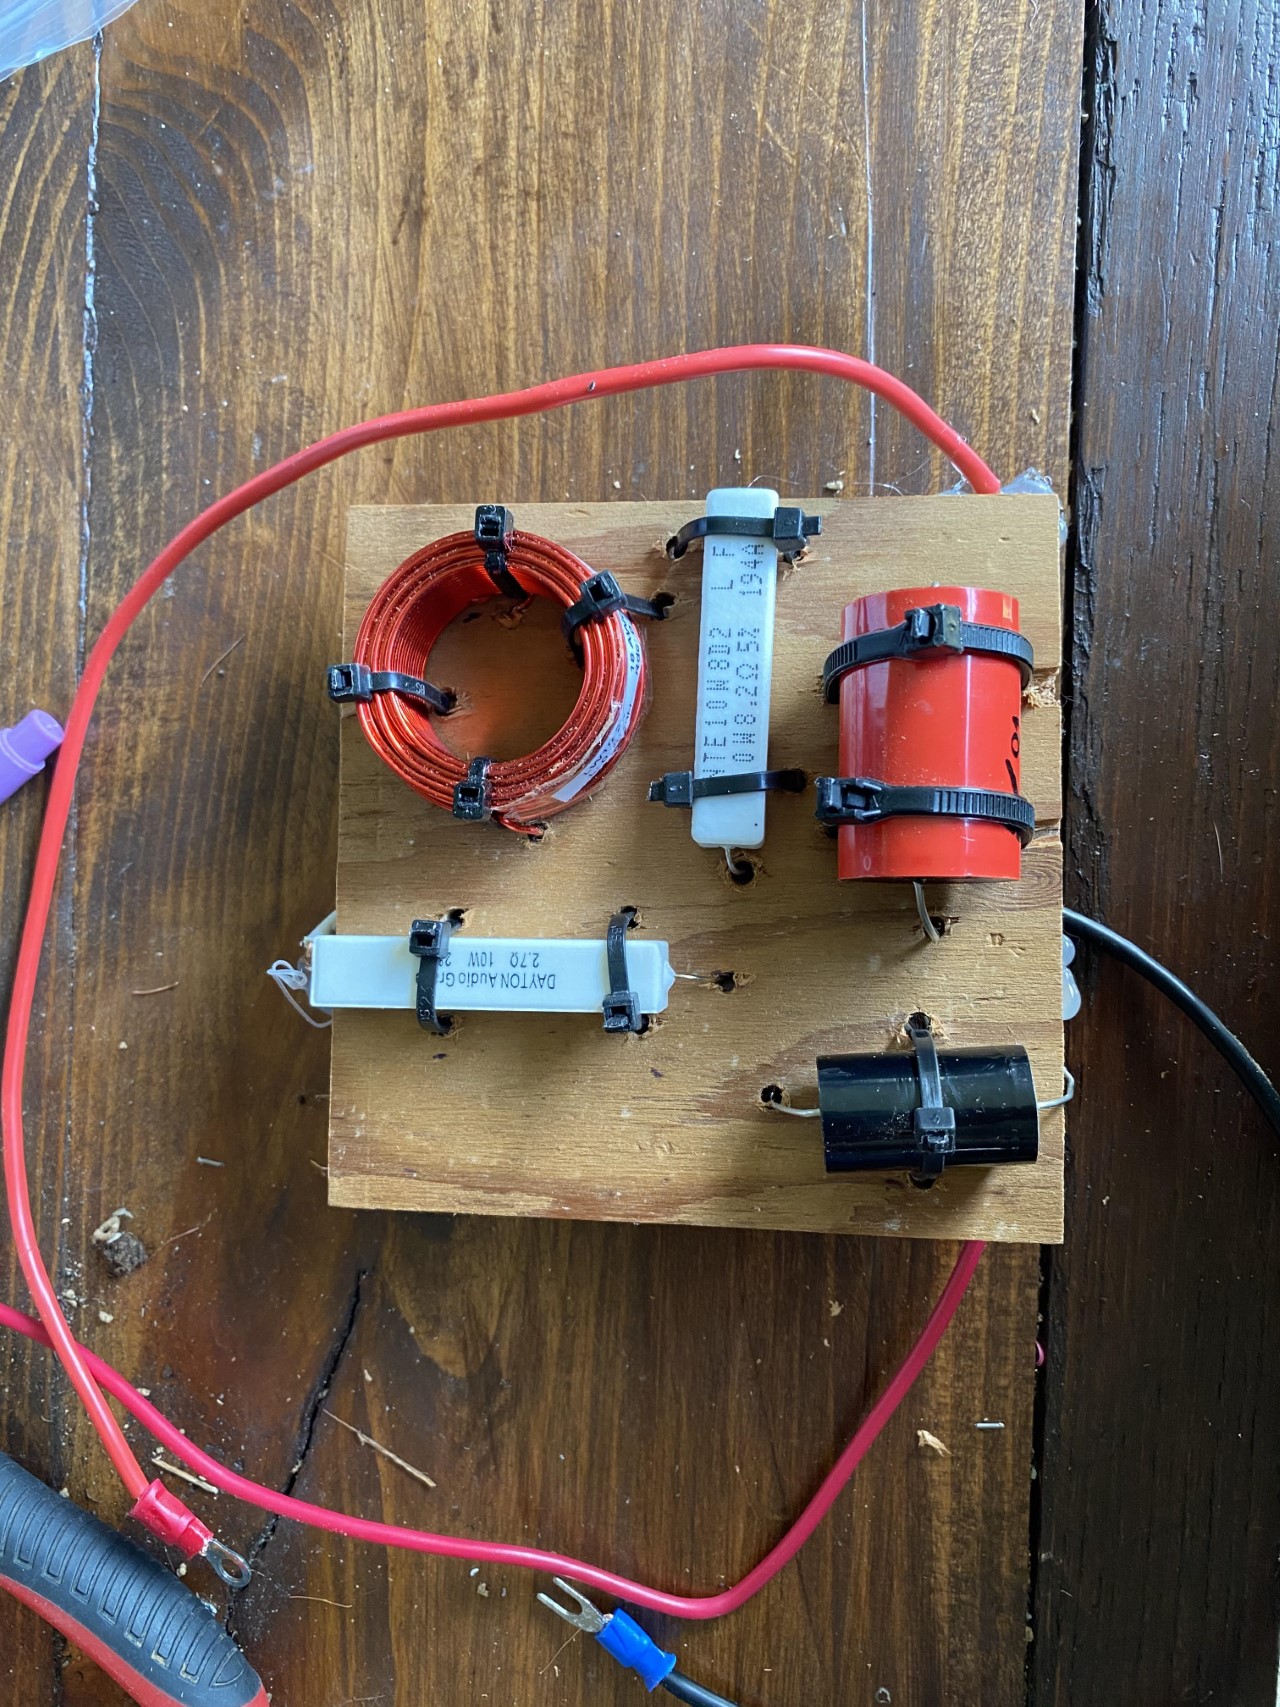
One of the tweeter crossover circuits for a Micro Statement. Once again, functional kit that will never be seen again, so it’s not particularly pretty. Scraps of 1/4" plywood for mounting (and not even my nice stuff - dirty old scrap I have lying around).
Another crossover for one of the micro statements.
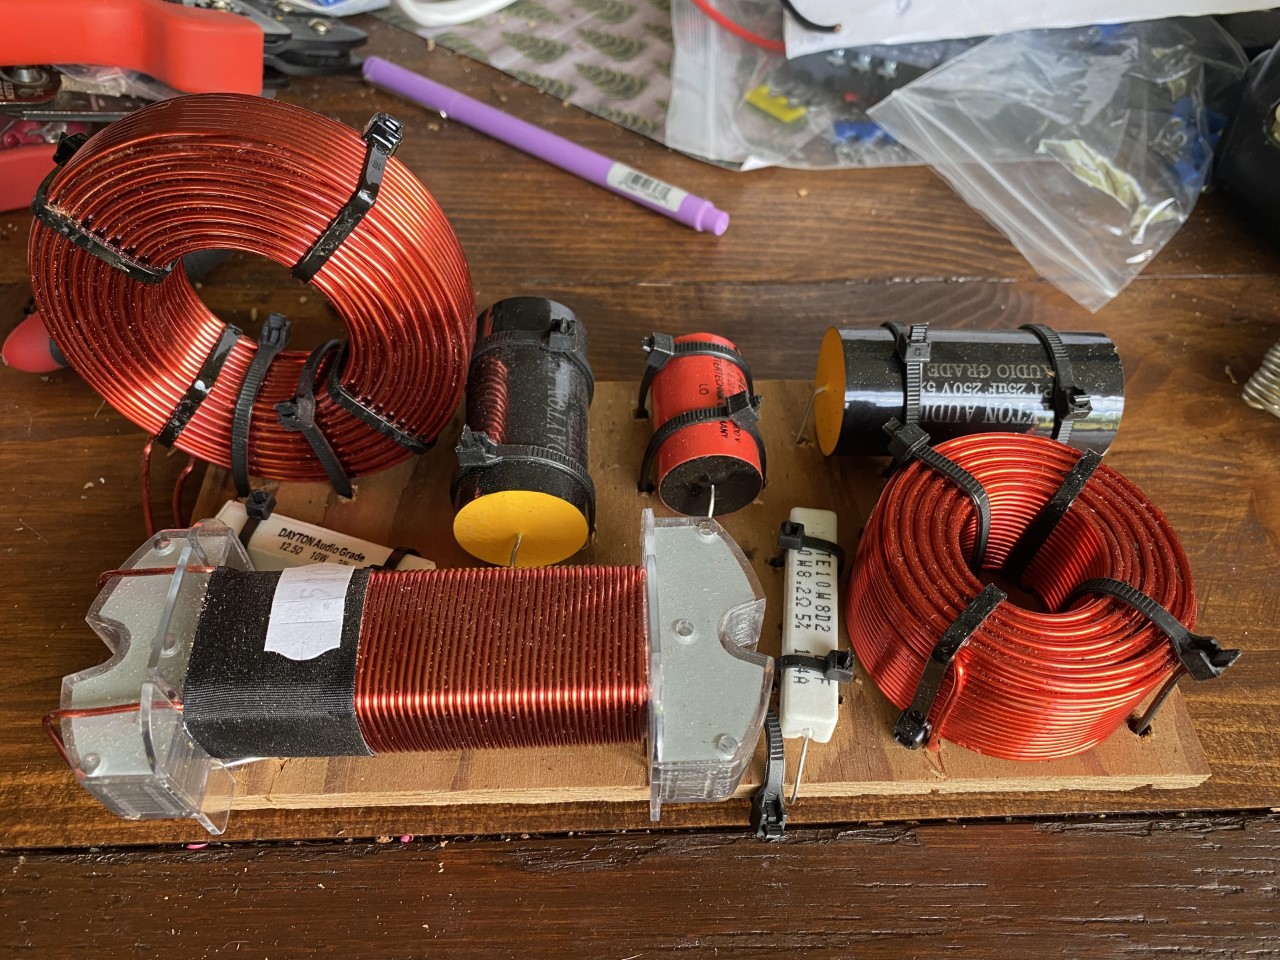
Of all of the speaker circuits, this turns out to be the largest of them all and for the smallest speakers. I tried to arrange the inductors to minimize interference, but there’s only so much space I have to work with. Funnily, apparently the original designer put together the crossover circuit almost as an afterthought and it wasn’t even mounted inside of the original prototype build. This board just barely fits through the woofer hole in the cabinet - and much in the manner you’d move a couch through a doorway that’s only small enough with the right maneuvering.
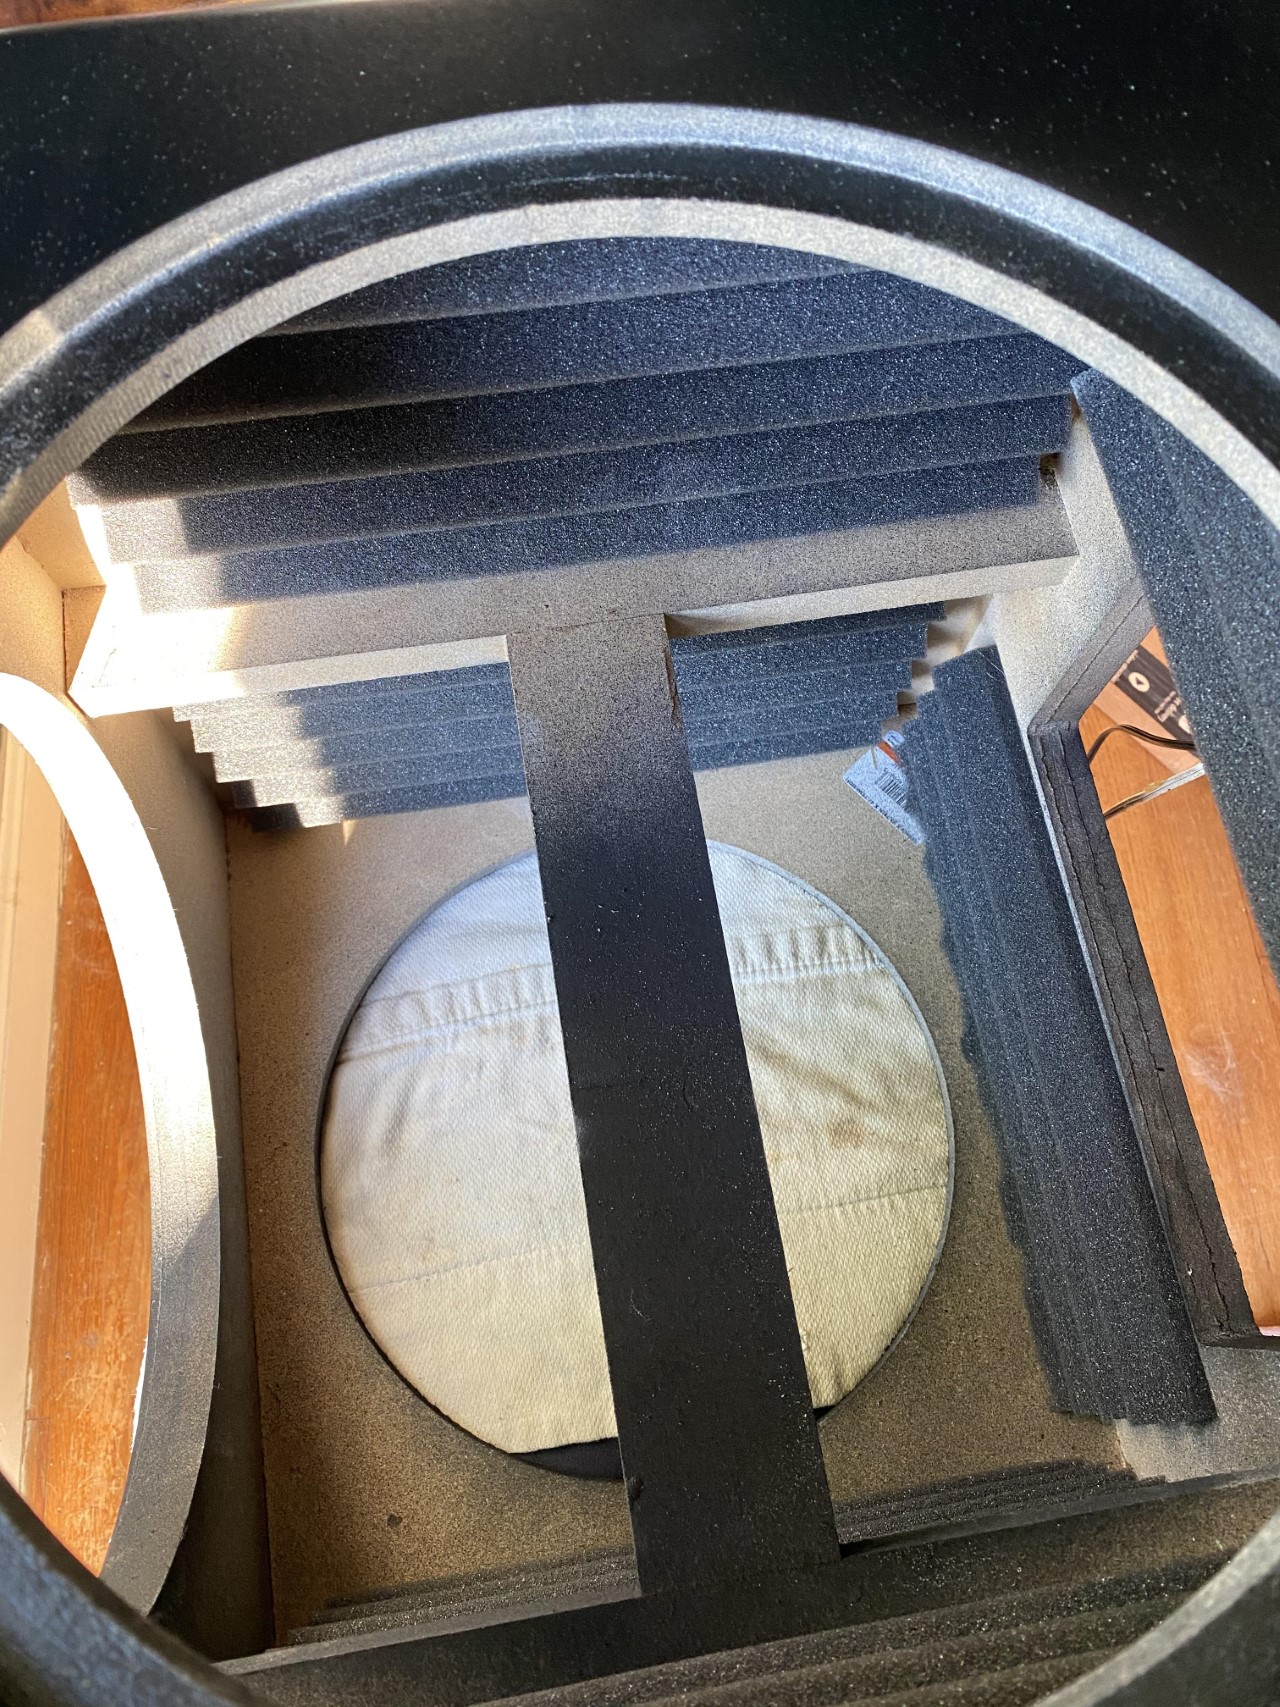
Internal bracing and foam treatment for the sub.
Of all of the speakers, the sub has the most complex joinery. Since I wasn’t working from exact plans, but sort of reverse engineering from product pictures, I had a little more flexibility. The sides got rabbets all around the edges and the horizontal sections of bracing fit into dadoes on the top & bottom faces.
For attaching the acoustic foam, I found that double-sided carpet tape or hot glue alternately did a good job of keeping it in place. Hot glue ended up being my preferred method of the two.
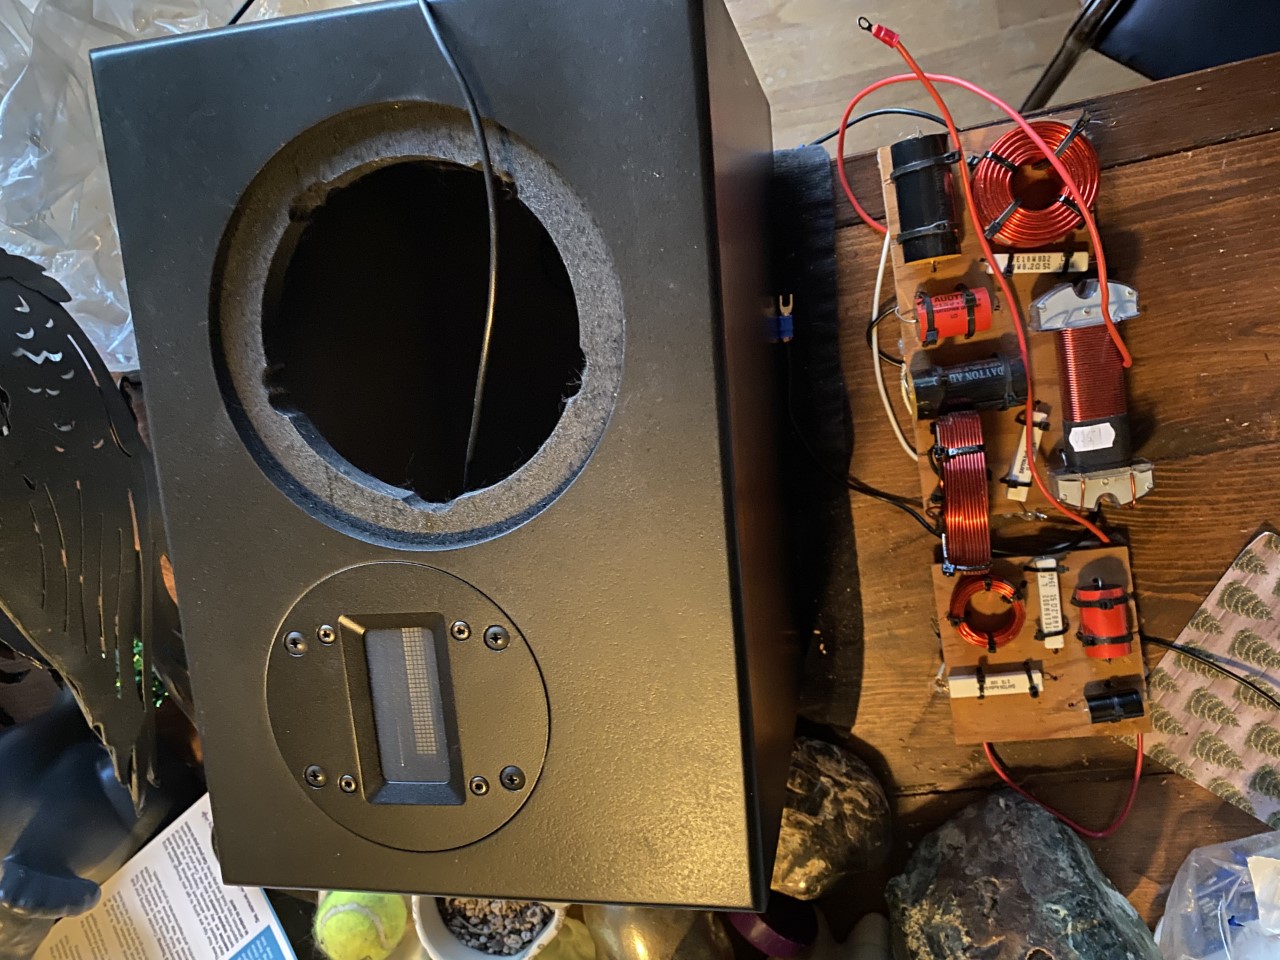
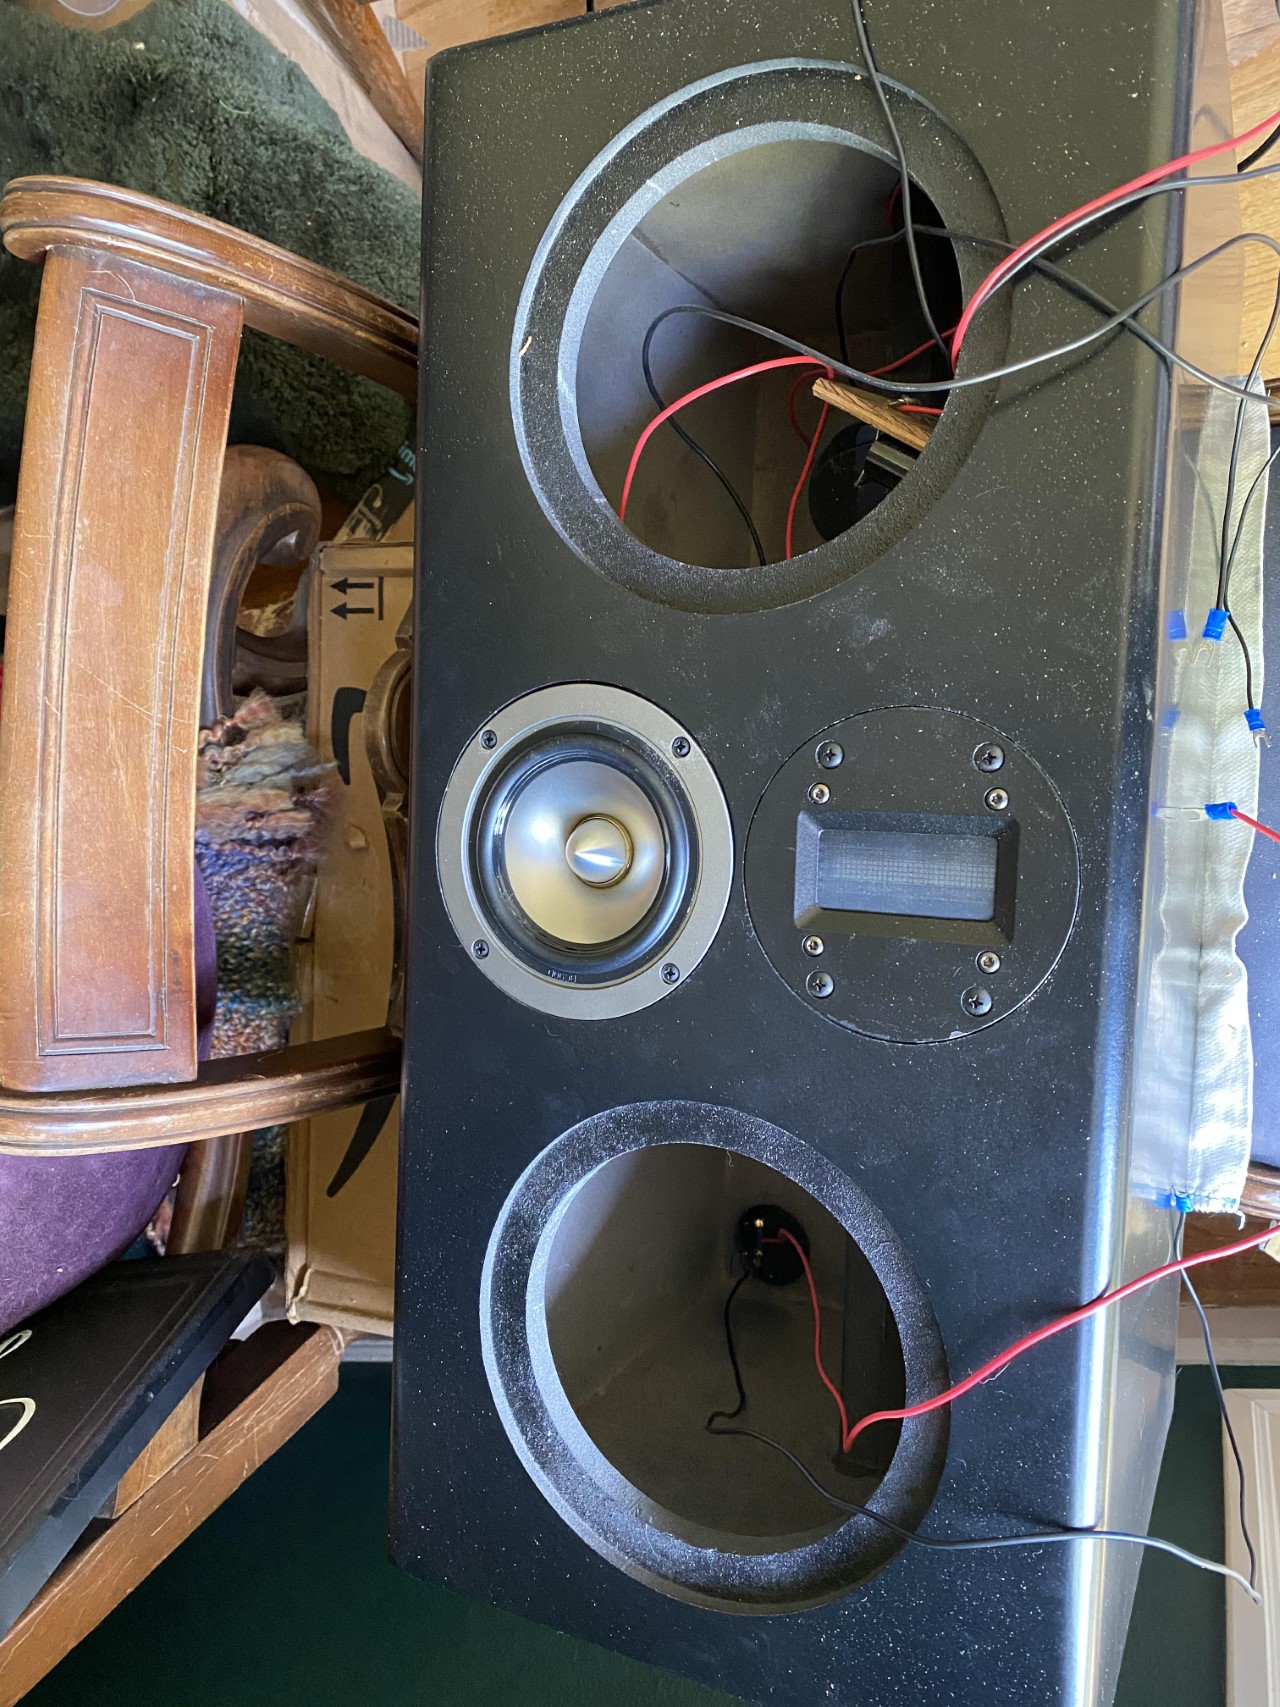
These crossovers have to both somehow fit inside of this cabinet through that hole.
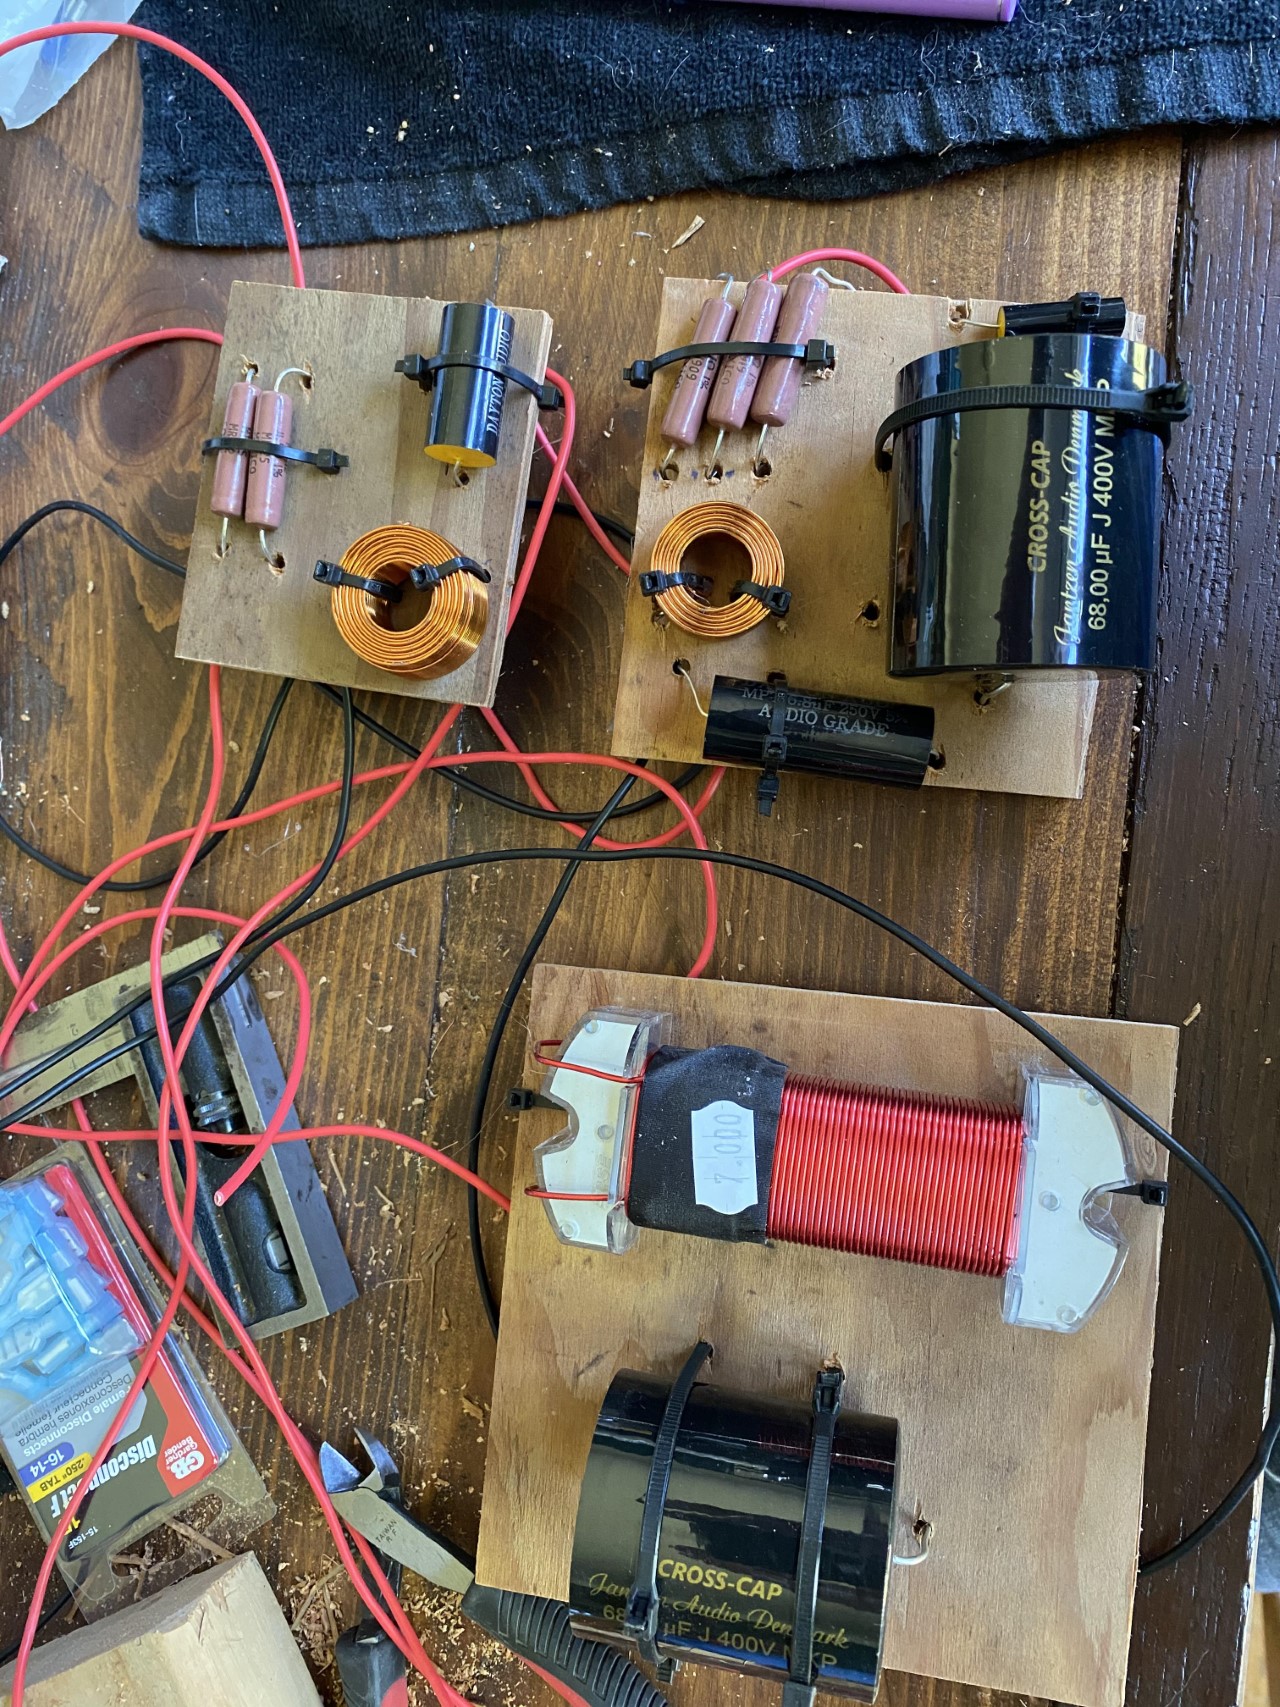
The three crossover networks for the center statement. Things are getting increasingly messy at this point.
The top wall of the mid’s internal pass thru protrudes into the area where the tweeter fits, but only very recently turned out to not quite fit all the way. A small groove needed to be chiseled away to make clearance for the speaker to fit during final assembly.
Center assembly in progress.
I ended up using a lot more wire to connect everything than I really needed (and I’m sure advisable by some people). But hey, first time doing this and I don’t consider myself to possess audiophile quality ears. Whatever less than ideal choices I’ve made in the crossover assembly and wiring, I’ll probably never notice.
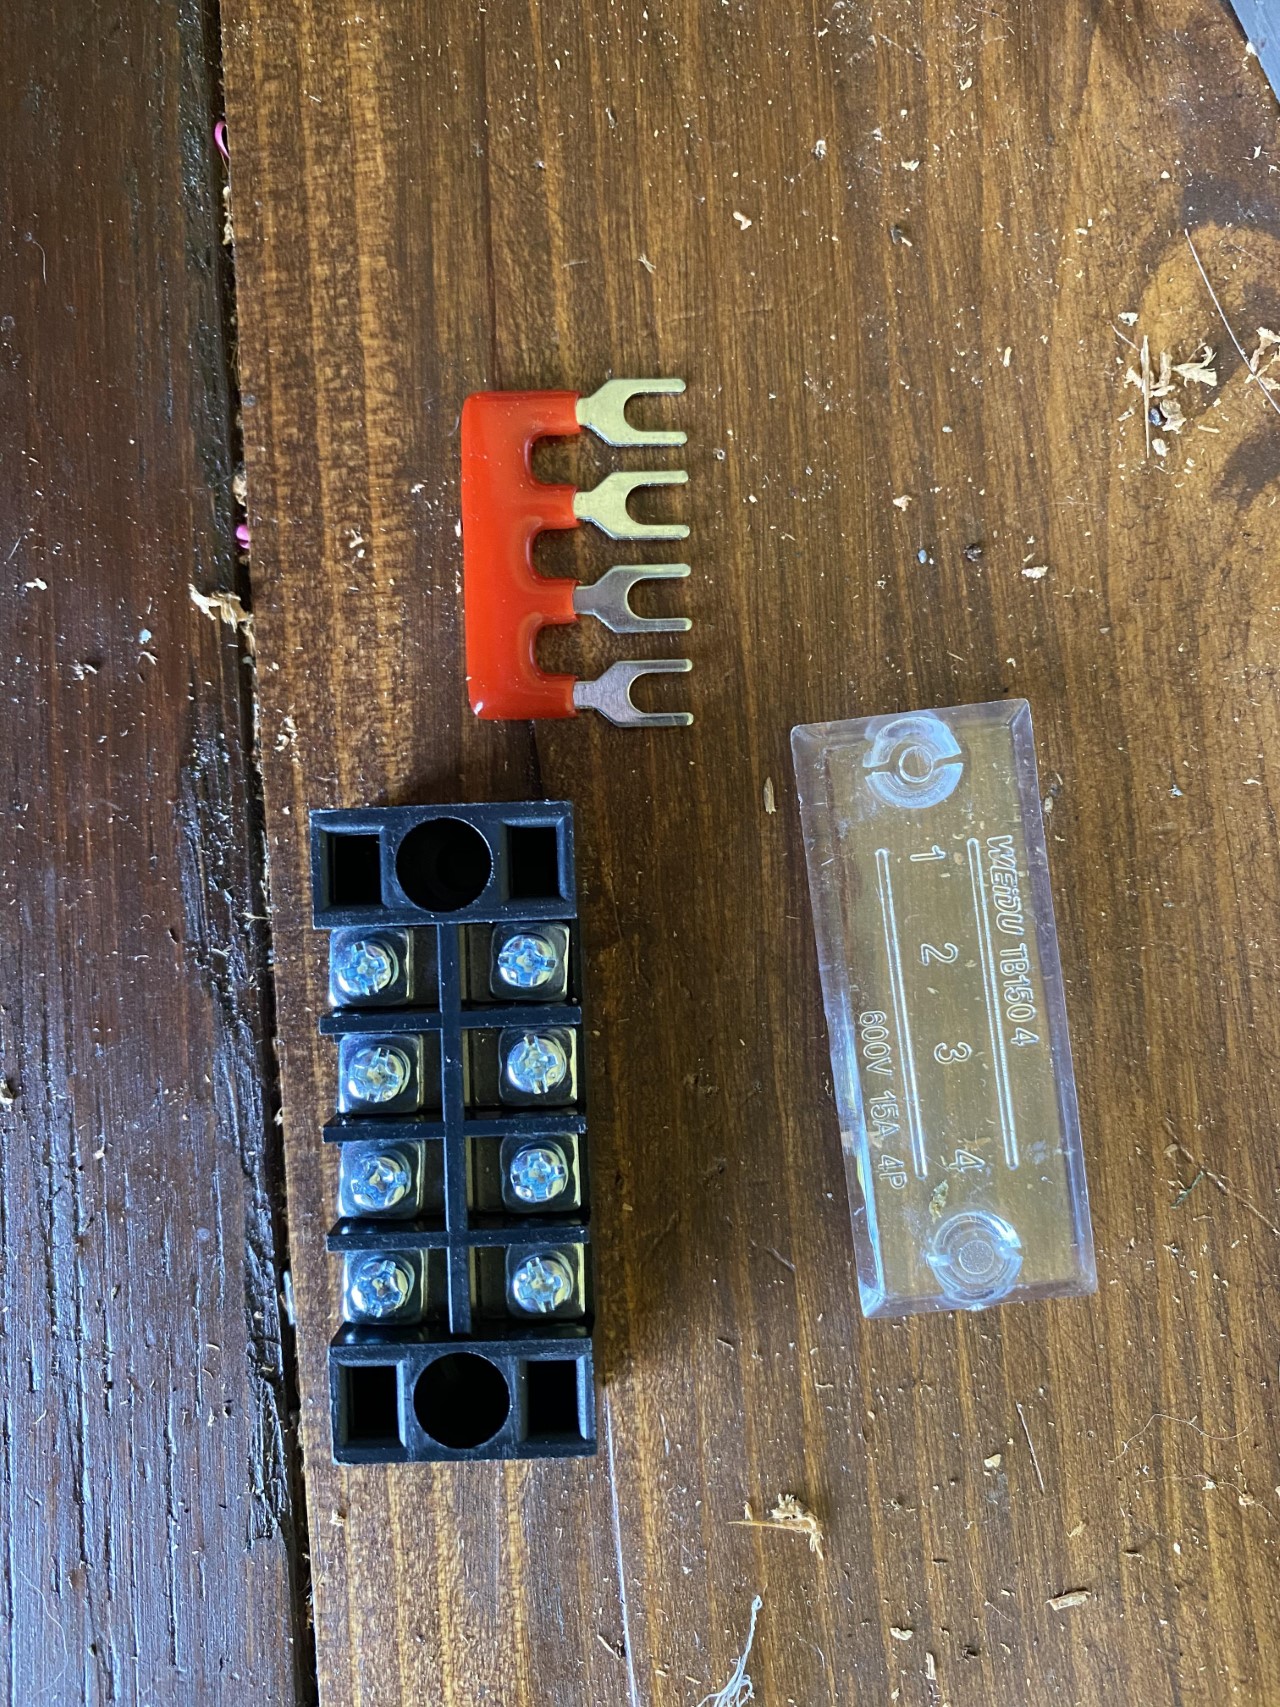
Terminal block. I found these lego-ish terminal blocks on Amazon. This is the 4 post version, but they come in a number of different terminal configurations with included jumpers and spade terminals. They’re very handy for connections between crossovers and speakers/terminals without a bunch of extra soldering of large bundles of wires.
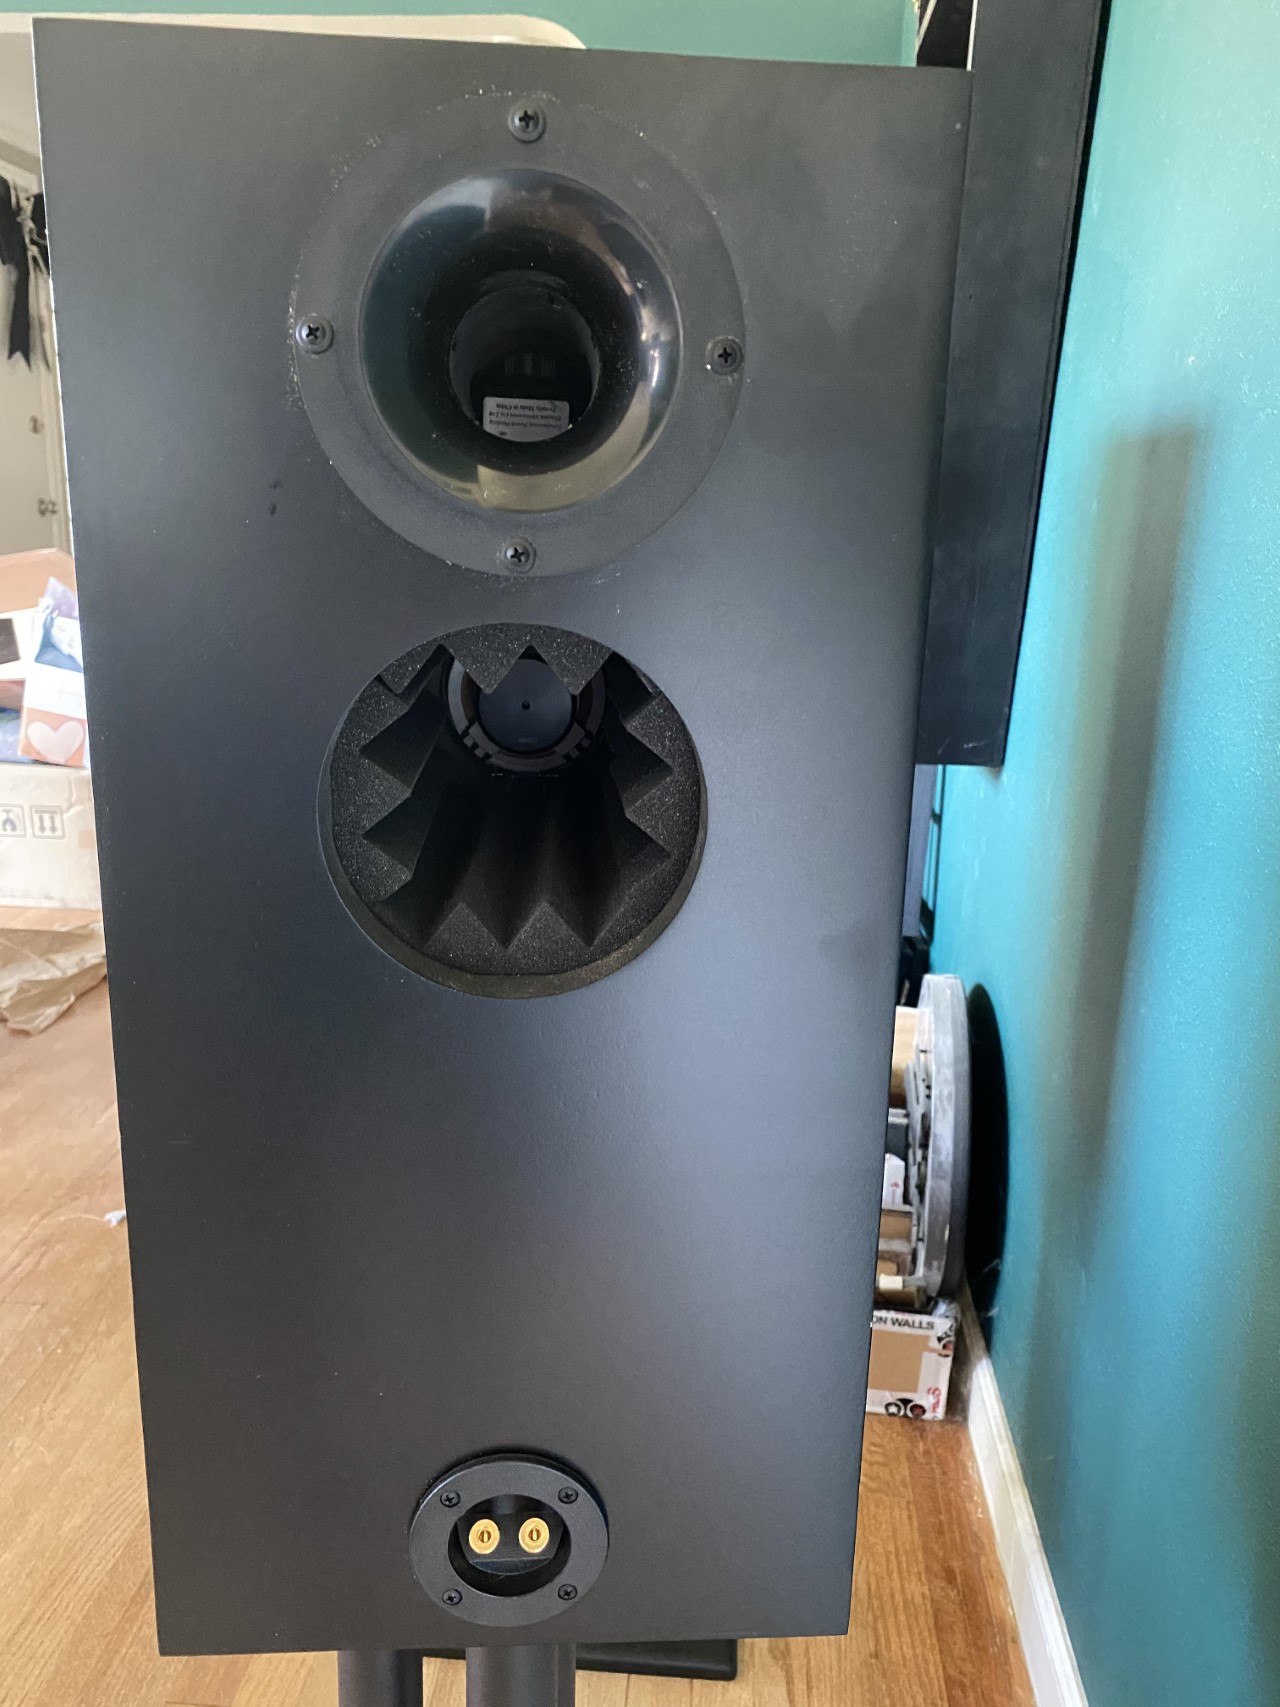
The back of one of the Monitor Statements. A 2" flared precision port on top, an open back design for the mid (lined with acoustic foam), and terminal cup at the bottom.
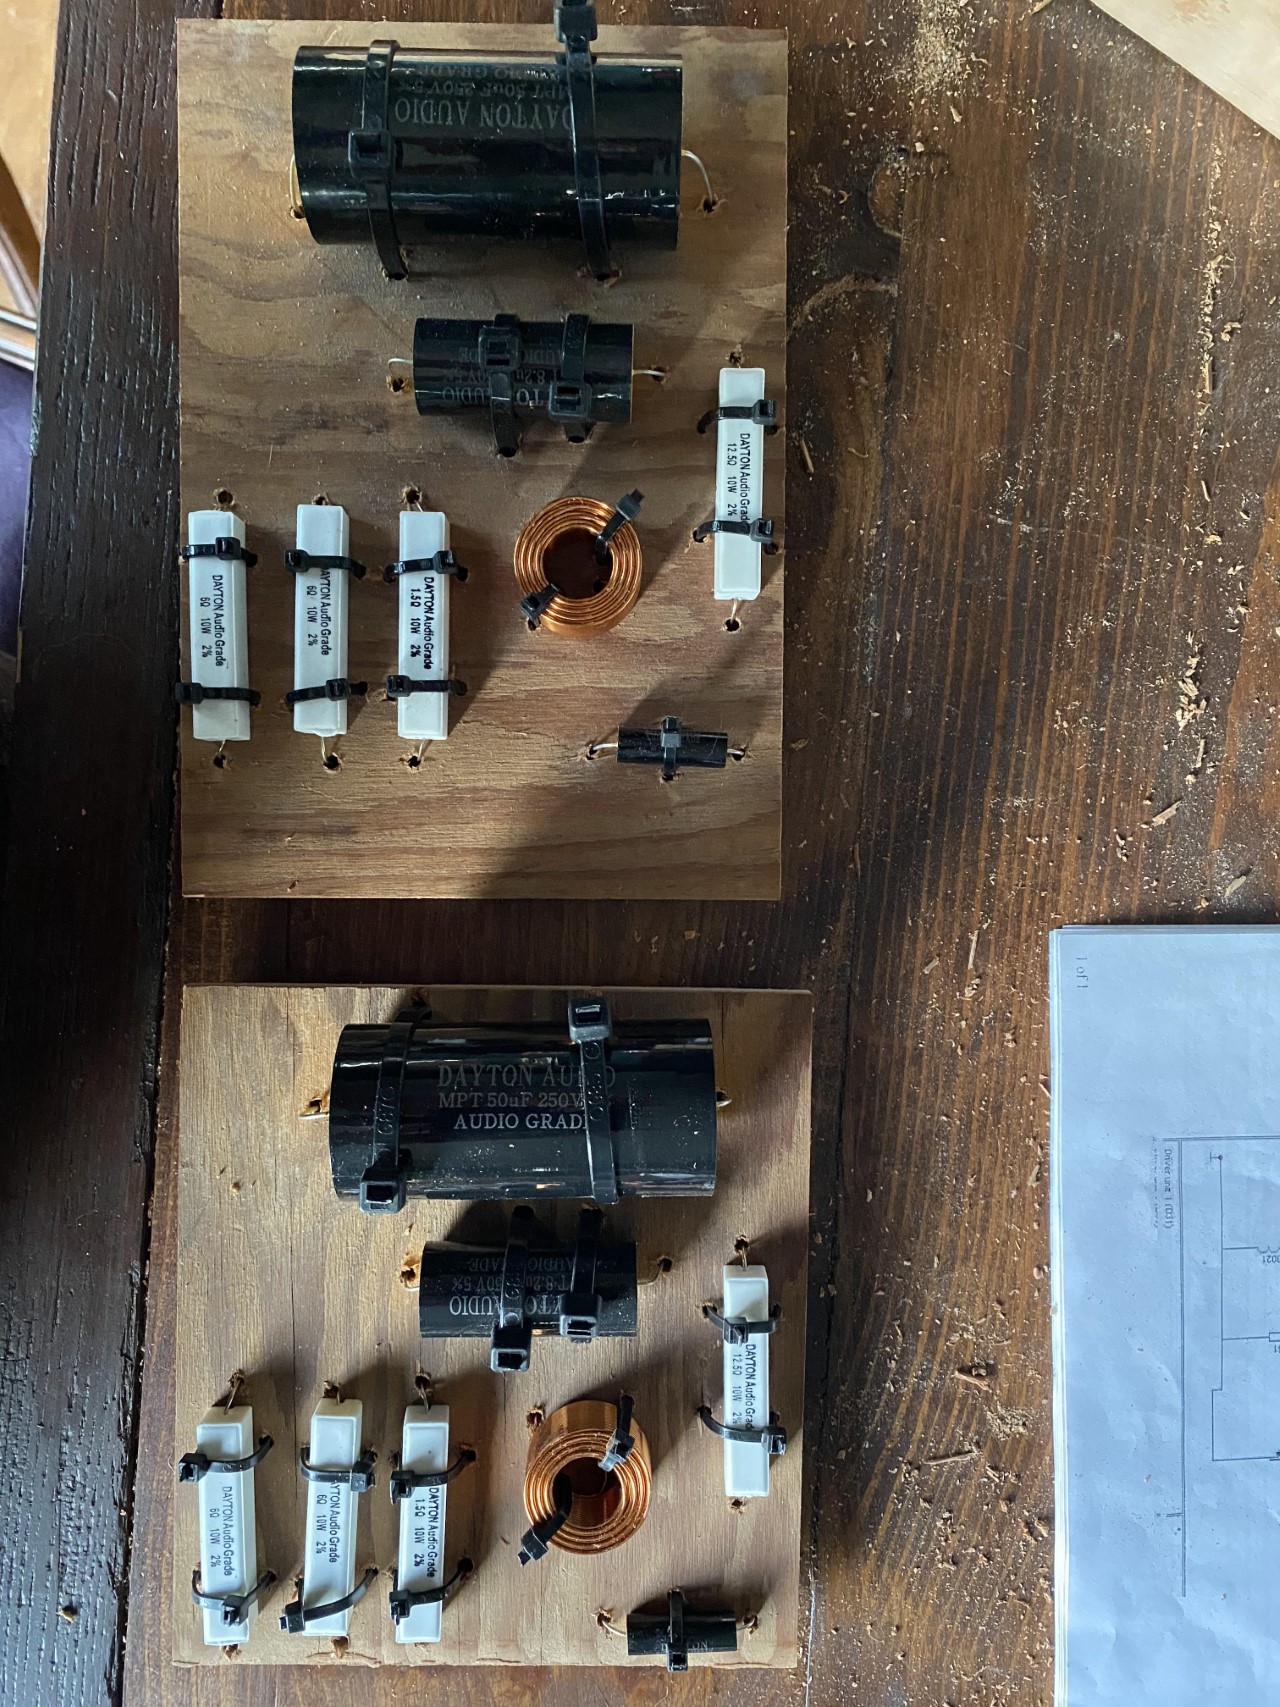
The pair of mid crossovers for the monitor statements, components mounted but not yet wired. These are using the near wall circuit design since the speakers will be near the wall. There are some other crossover designs for far wall placement (or ones that are even switchable between the two placements).