A home renovation journey where we attempt to remodel our kitchen.
Pre-Visualization
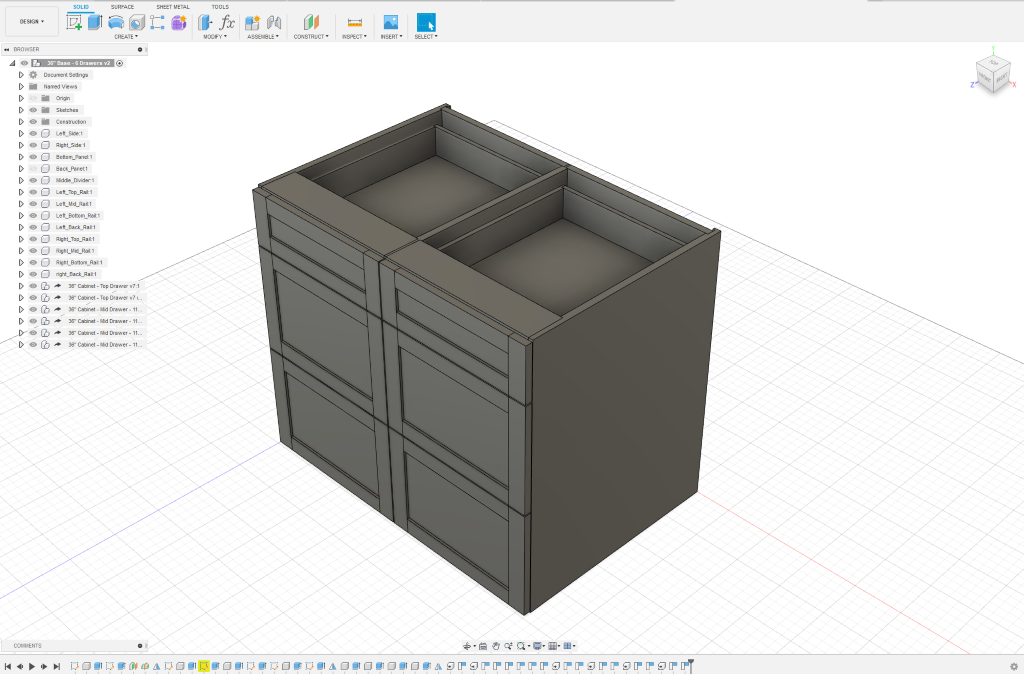
3D Viz is one of the crucial up front planning phases of the project. I spend much of my time in Autodesk Fusion 360 mocking up assemblies like this base cabinet. It lets me work through how all of the pieces interact and should be assembled before actually working with any of the materials.
Everything is modeled with the amount of detail exactly as it would exist in the real world. All of the joinery from rabbets, dadoes, mortises, tenons, and dovetails get modeled. This detail helps me understand how the component parts define the rigidity of the larger structures, deal with potential racking issues, work out design and assembly details, and provides valuable build-time information further downstream.
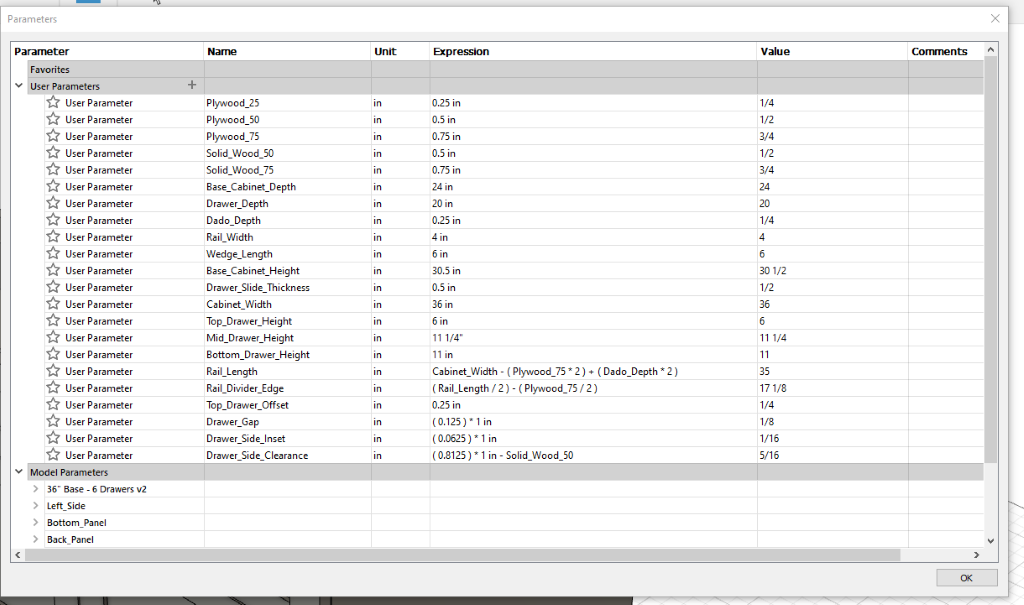 One of keys to success when it comes to CAD modeling in Fusion 360 is the extensive use of parameterization. Creating parameters to drive all of the dimensions makes it much easier to quickly make changes and get visual feedback as you’re working out the sizes of the various components. It also helps keep everything standard and minimizes the risk that one-off part sizes get introduced during the modeling process.
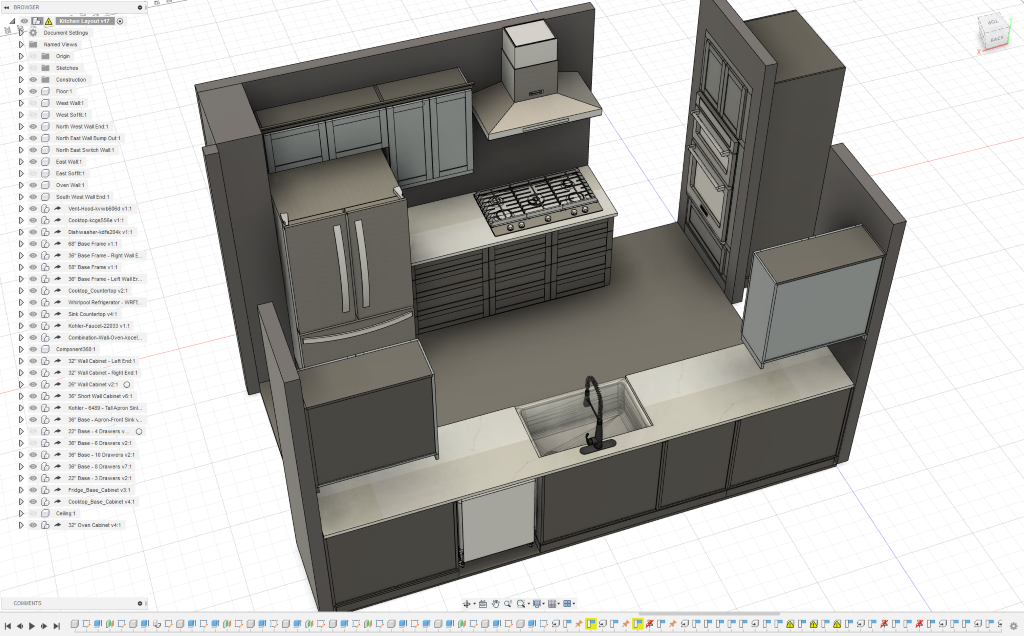 Besides modeling individual cabinets, I also create a full layout of the actual kitchen space to visualize the entire room. This is a very crude mock up of the walls, but uses all of the real detailed dimensions taken of the space. Each cabinet, countertop, appliance exists in its own separate CAD file and is linked into the overall kitchen file. This simplifies making changes to individual pieces and having them automatically updated anywhere they are linked downstream.
 Many brands offer CAD files for their appliances, fixtures, etc. You can often find models for the exact part numbers that you’ll be using and bring them into your master CAD file. You’ll also find all of the PDF’s of owner and installation manuals and specification sheets. These can be vitally helpful for defining reference parameters for things like cutouts and various spacing dimensions.
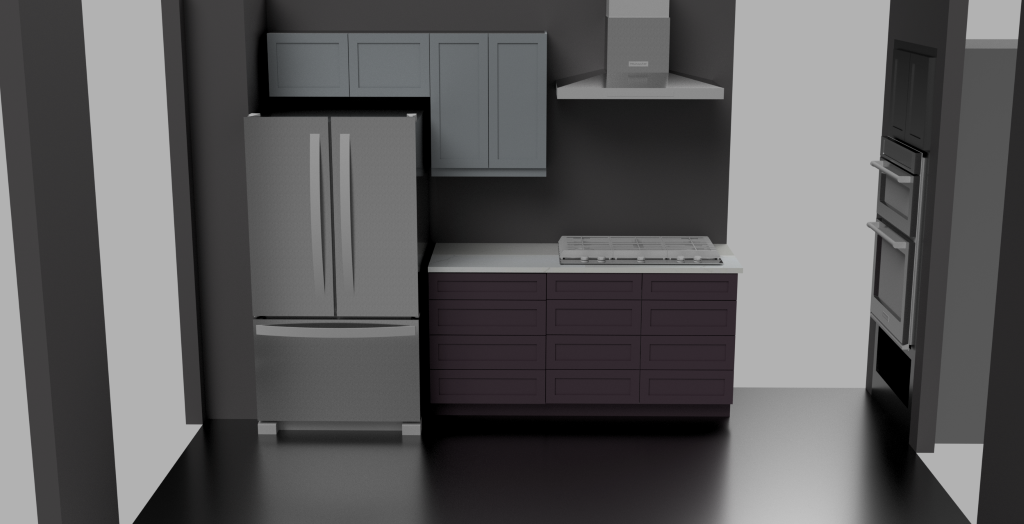 Fusion 360 also lets us create higher resolution renderings of all of my modeling work. I don’t spend a great deal of time on materials and textures here. There’s certainly a lot more that can be accomplished with this step, but this level of detail is good enough for my needs.
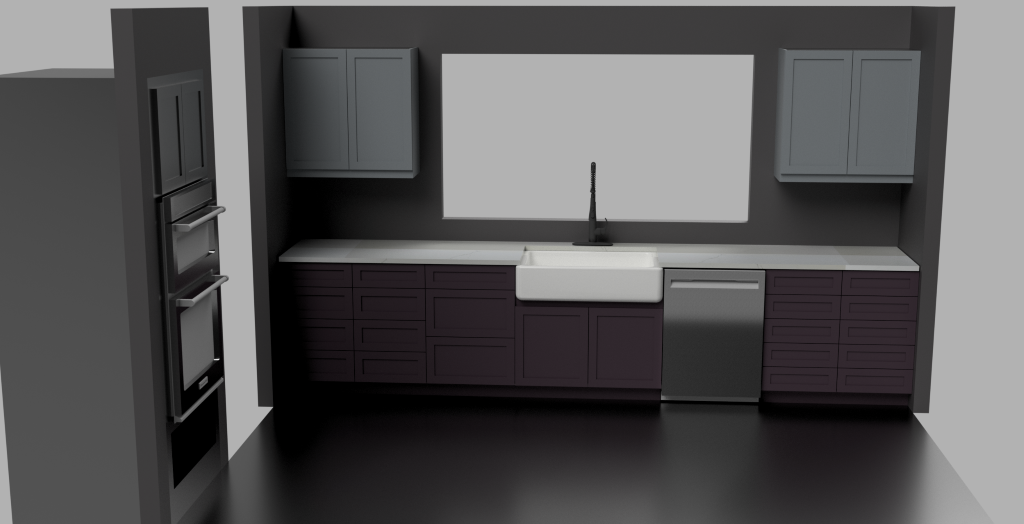 Rendering of the opposite side.
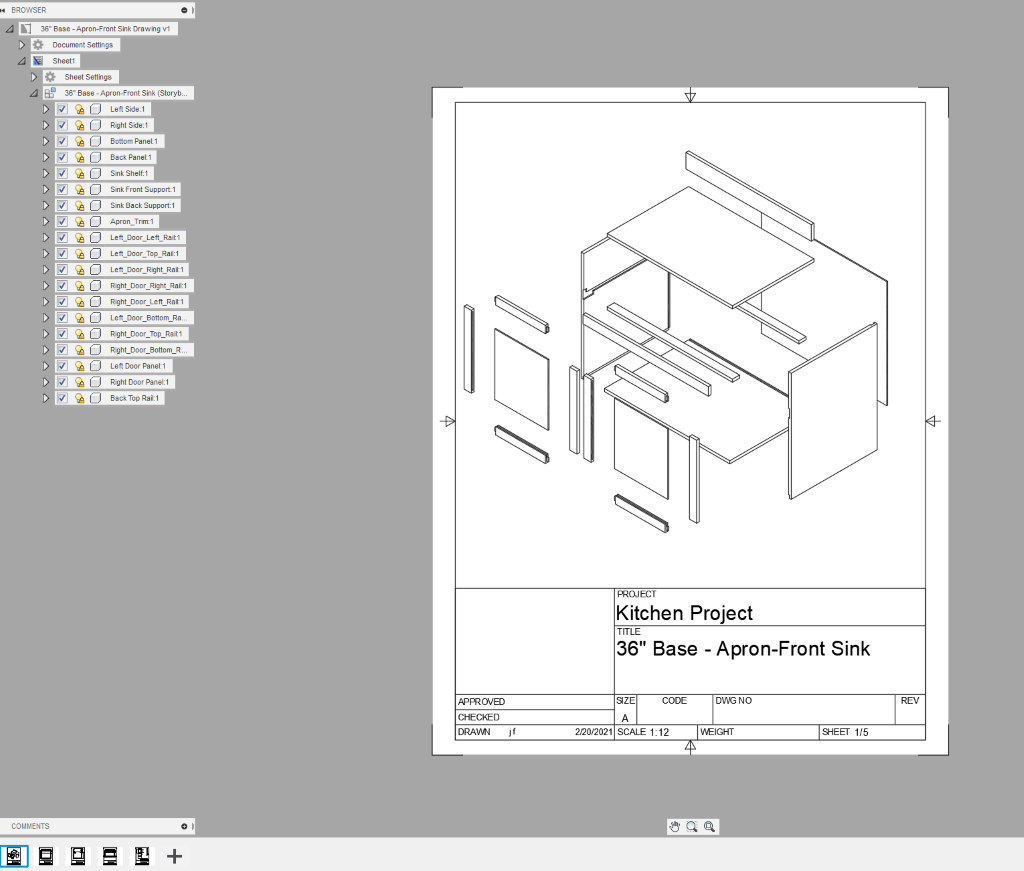
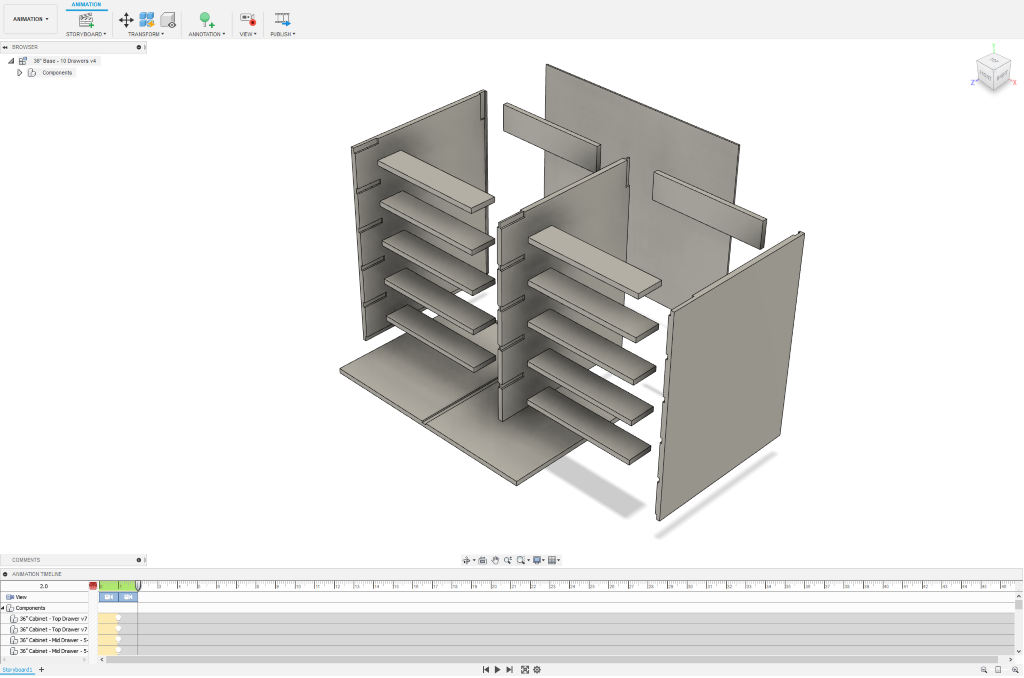 Once we’ve settled on cabinetry layout and design, I can create exploded views to help visualize assembly. Fusion 360 has a suite of animation tools at its disposal, including fully animating complicated assemblies. Quickly creating these static exploded views just scratches the surface, but again, it’s enough for my needs here.
Planning
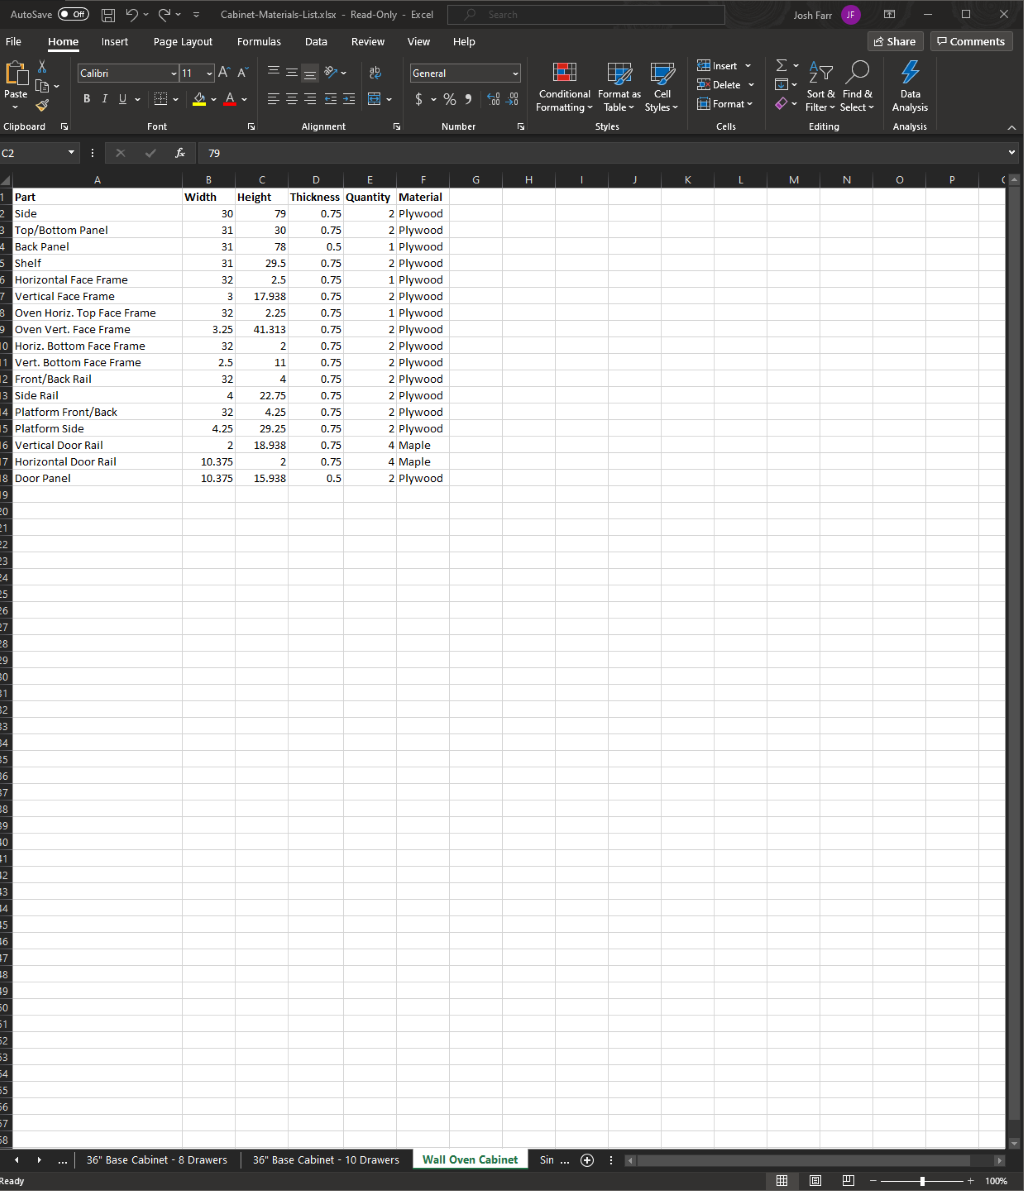 Use Excel spreadsheets to keep track of everything you can. It works for everything from cost tracking, inventory management, scheduling, time tracking, parts lists, and more.
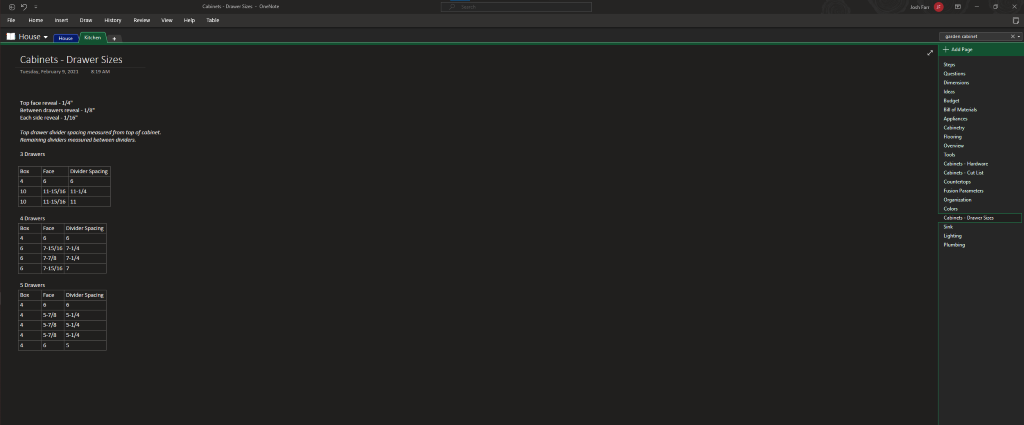 And keep lots of notes. I use OneNote, but any note taking app or even a physical notepad is helpful at all stages. Anything that doesn’t fit in a spreadsheet from inspiration, ideas, reference material, product links, checklists, general notes, progress logs, and whatever else you might need to write down and not forget.
 Drawings are another powerful Fusion 360 feature. From the exploded Fusion 360 3D views, I can start creating the drawings that will be exported to PDF for printing later.
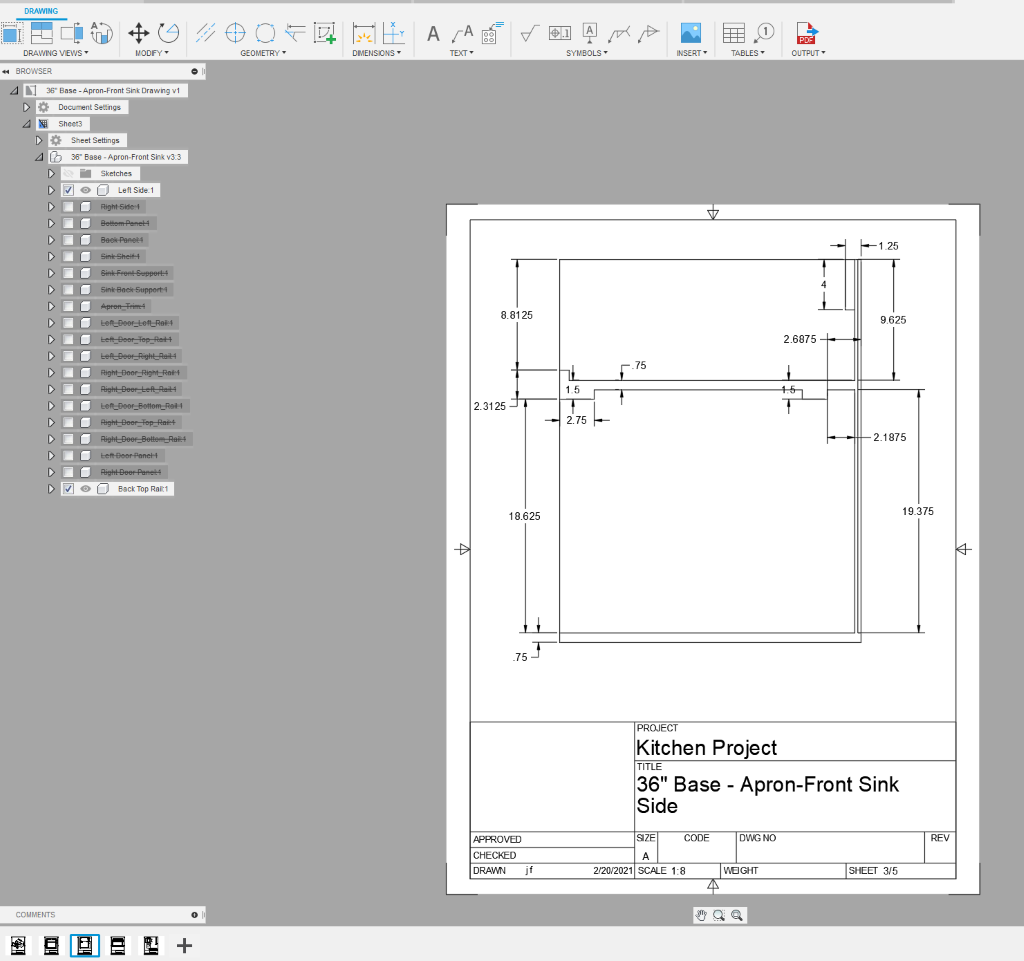 The drawings contain not only the 3D exploded views, but also various profile views with measured dimensions.
 With all of our parts lists and dimensions worked out, we can plug everything into our cut list software and print out an optimized layout illustrating the number of sheet goods and layout of the cuts required to break down the material into the individual parts. To make the layout clear, components use a codified naming system kept track of in an Excel spreadsheet.
Material Prep
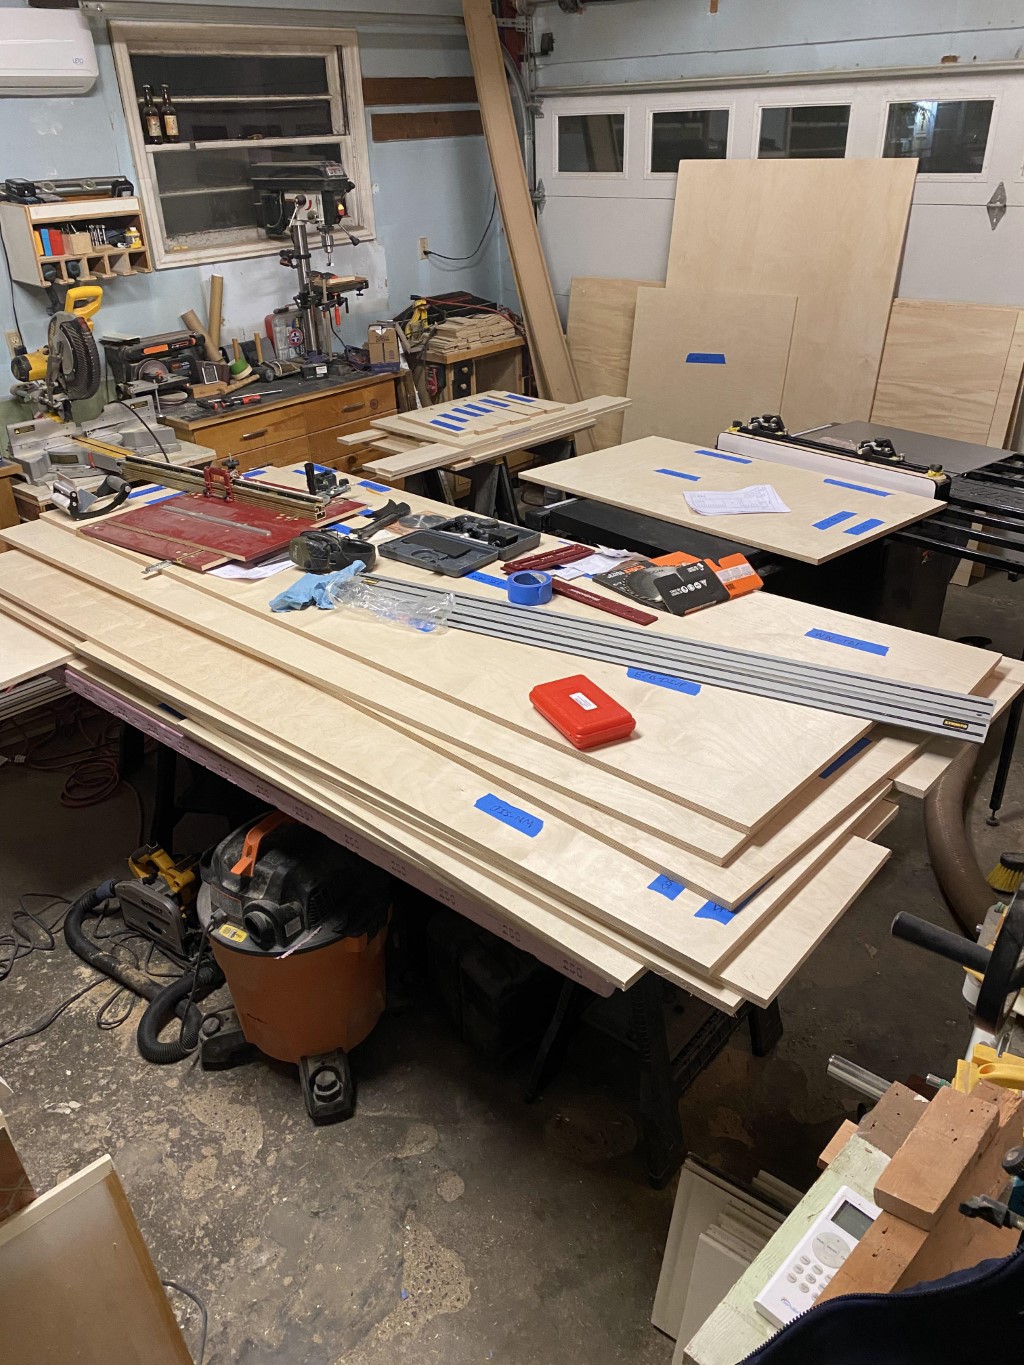 All of the new cabinet carcasses will be constructed from 15 sheets of Baltic Birch plywood in 3/4" (10 sheets), 1/2" (2 sheets) and 1/4" (3 sheets) thicknesses. The process goes from rough cutting full sheets with a track saw down to a manageable size first before moving on to the table saw for finish cutting the final parts.
Demolition
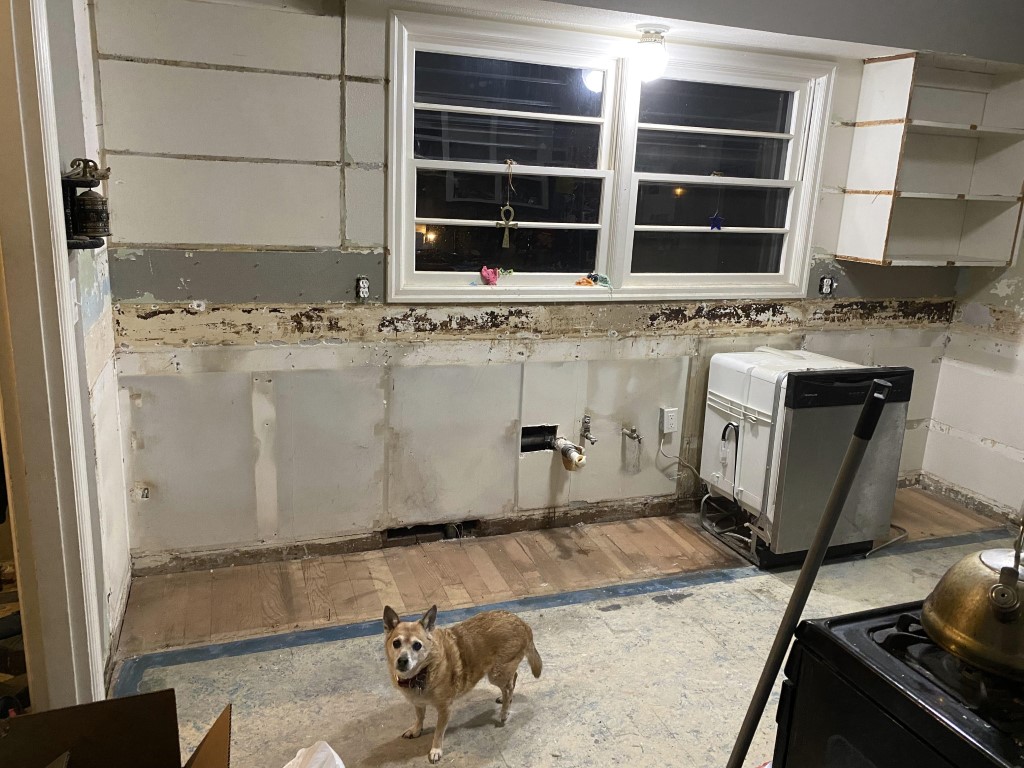 One side of the kitchen cabinets mostly removed, save the rest of a wall cabinet still to be done.
 The base platform which creates the toe kick of the original cabinets are not integral to the cabinet boxes themselves. The new cabinets follow a similar build style. This approach greatly simplifies leveling and fitting of the cabinets when it comes time to install them.
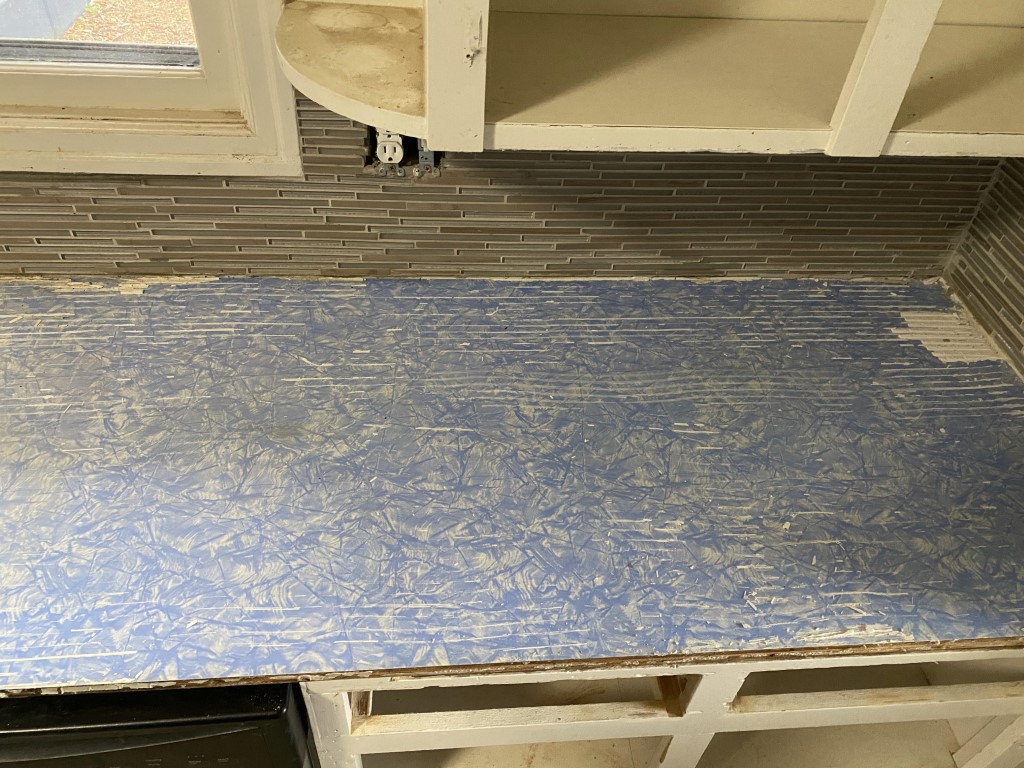 This is possibly the original countertop - an abstract swirly white and blue pattern laminate on top of 3/4" plywood base. The cheap contractor version we’ve been living with were large rectangular grey porous tiles laid on top of the original counter with thin set. The long horizontal lines are left behind thin set. The tiles were quite easy to pry up, secured more by the interconnection of the grout than anything else.
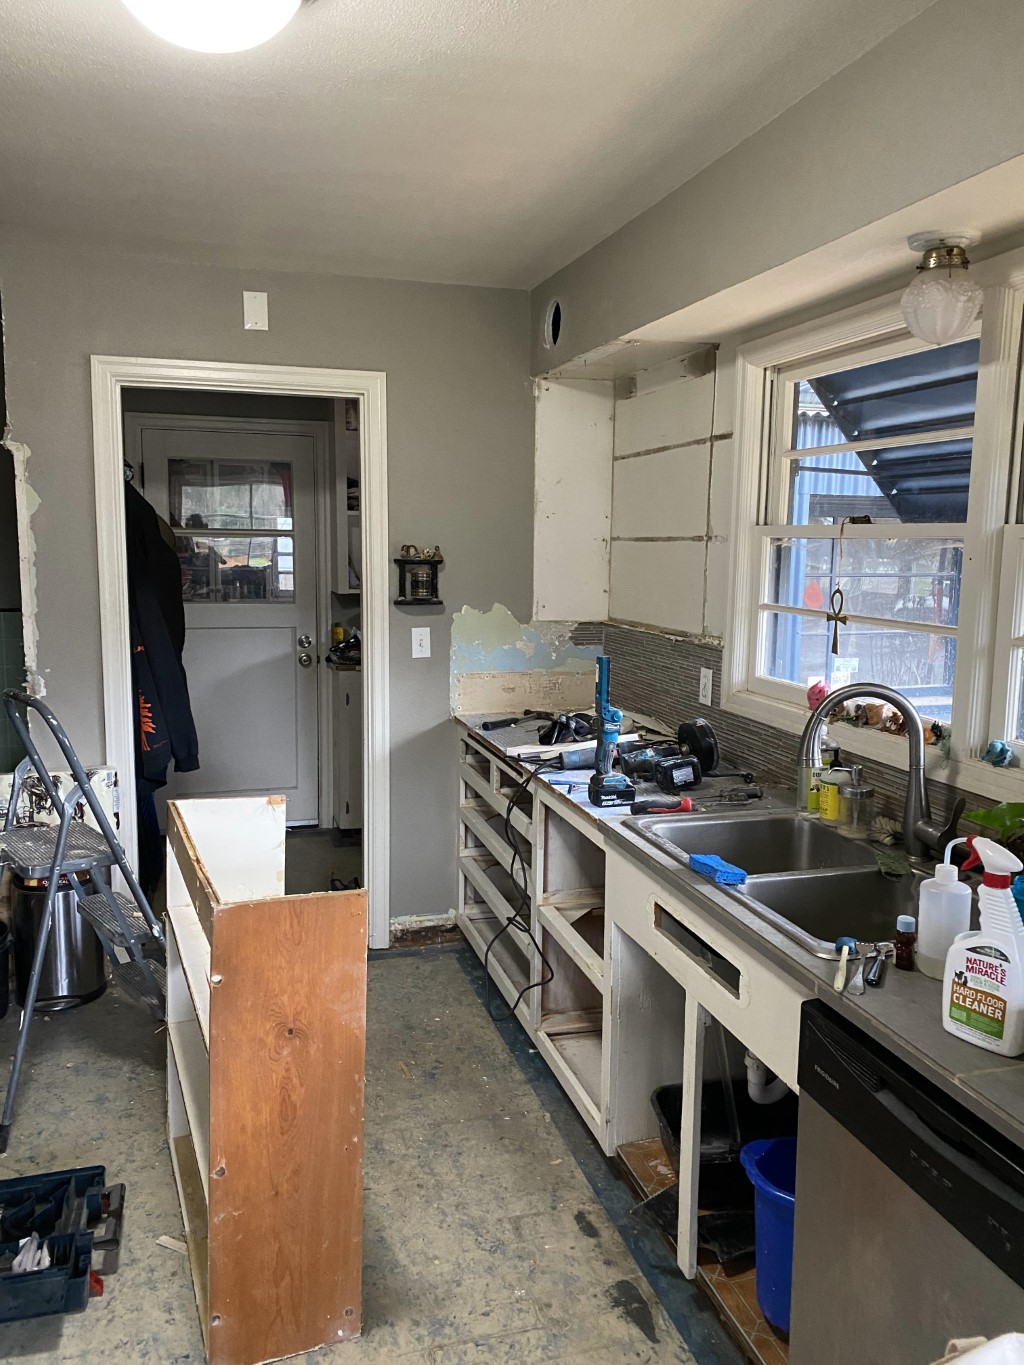 First wall cabinet down.
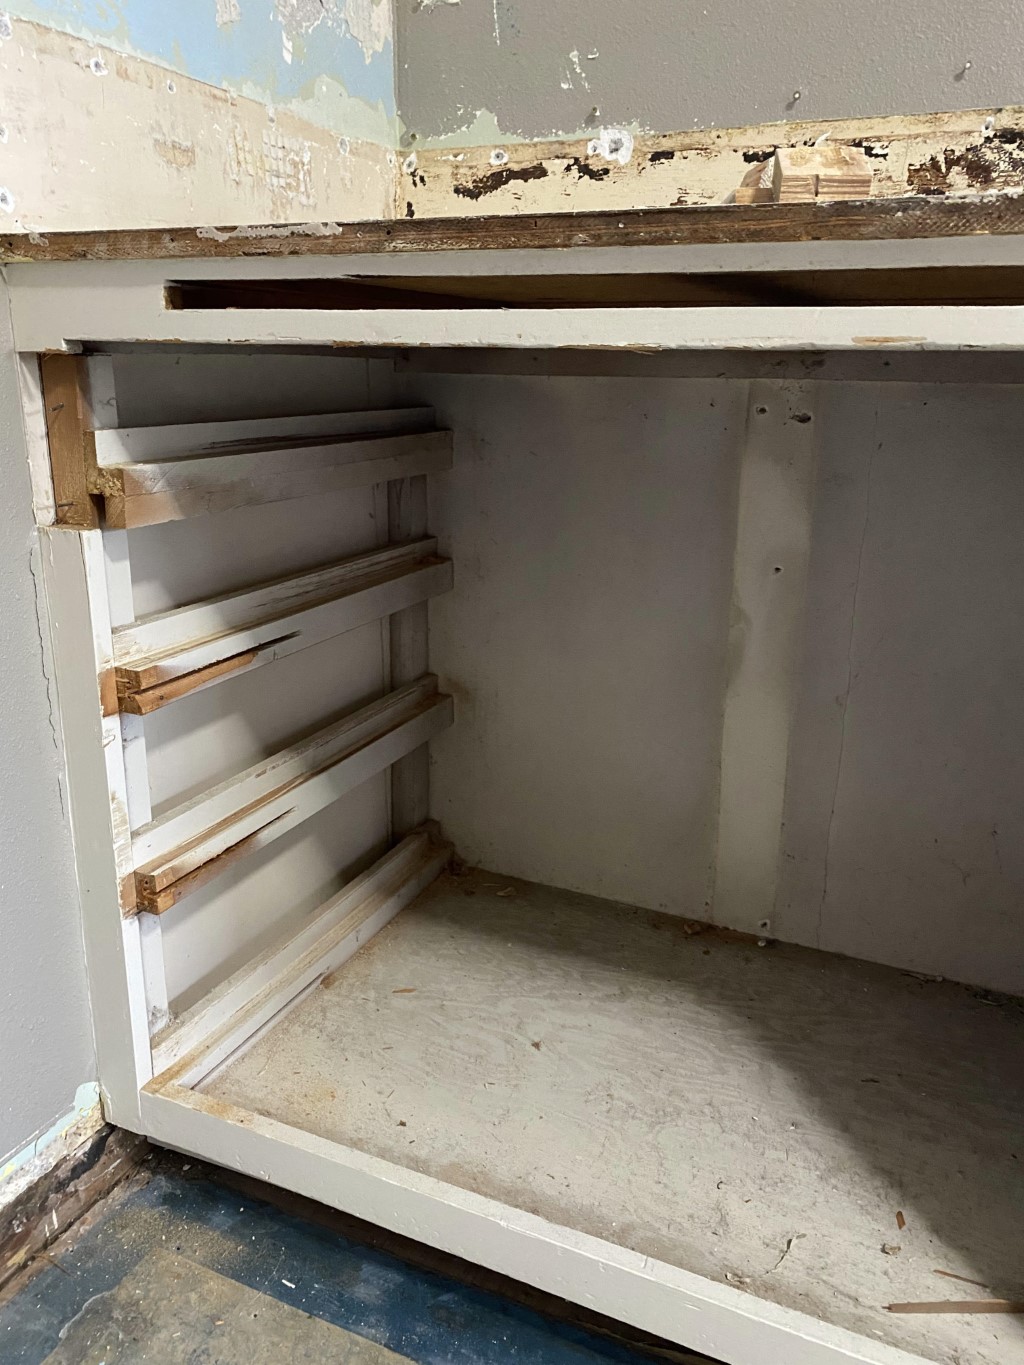 This the interior of an original base cabinet in a galley style kitchen in a ranch-style house in the PNW built in 1949. The construction is sparse, but sturdy to have endured 70 years of life. There are no metal drawer slides - the drawers simply slide on wooden rails. The base parts consist of regular 3/4" plywood while all of the face frame and rails are built of Douglas Fir material (old growth!).
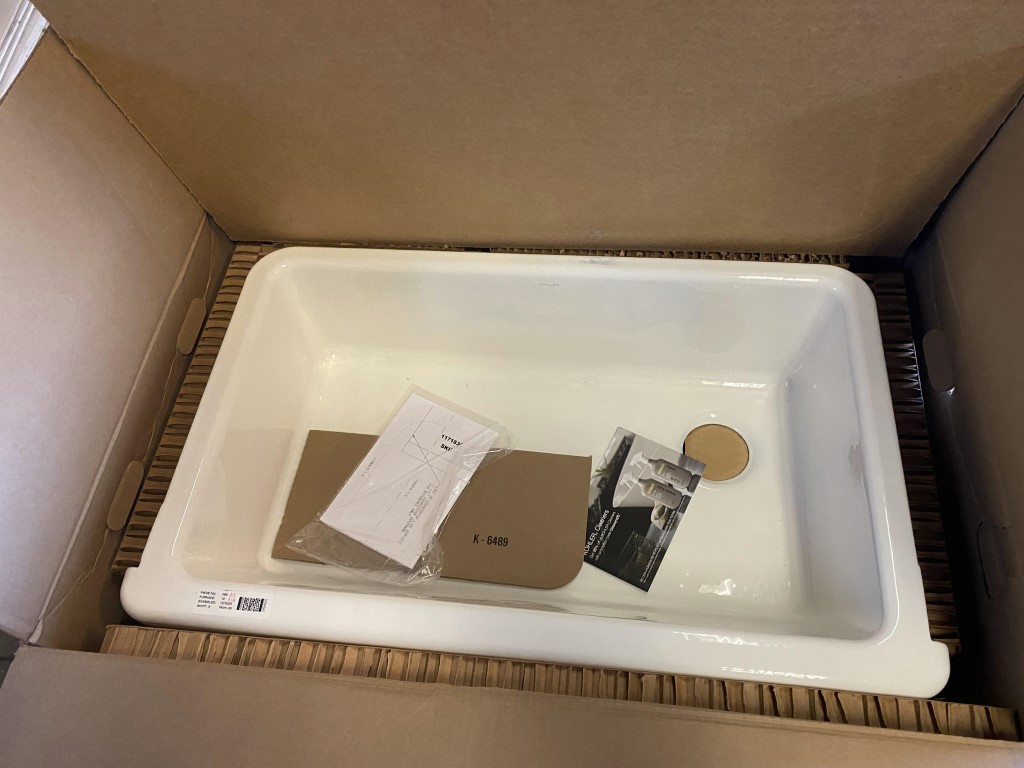 One new sink. Kohler 36" apron-front (aka farmhouse style) enameled cast iron weighing in at 140 pounds. I look forward to installing this.
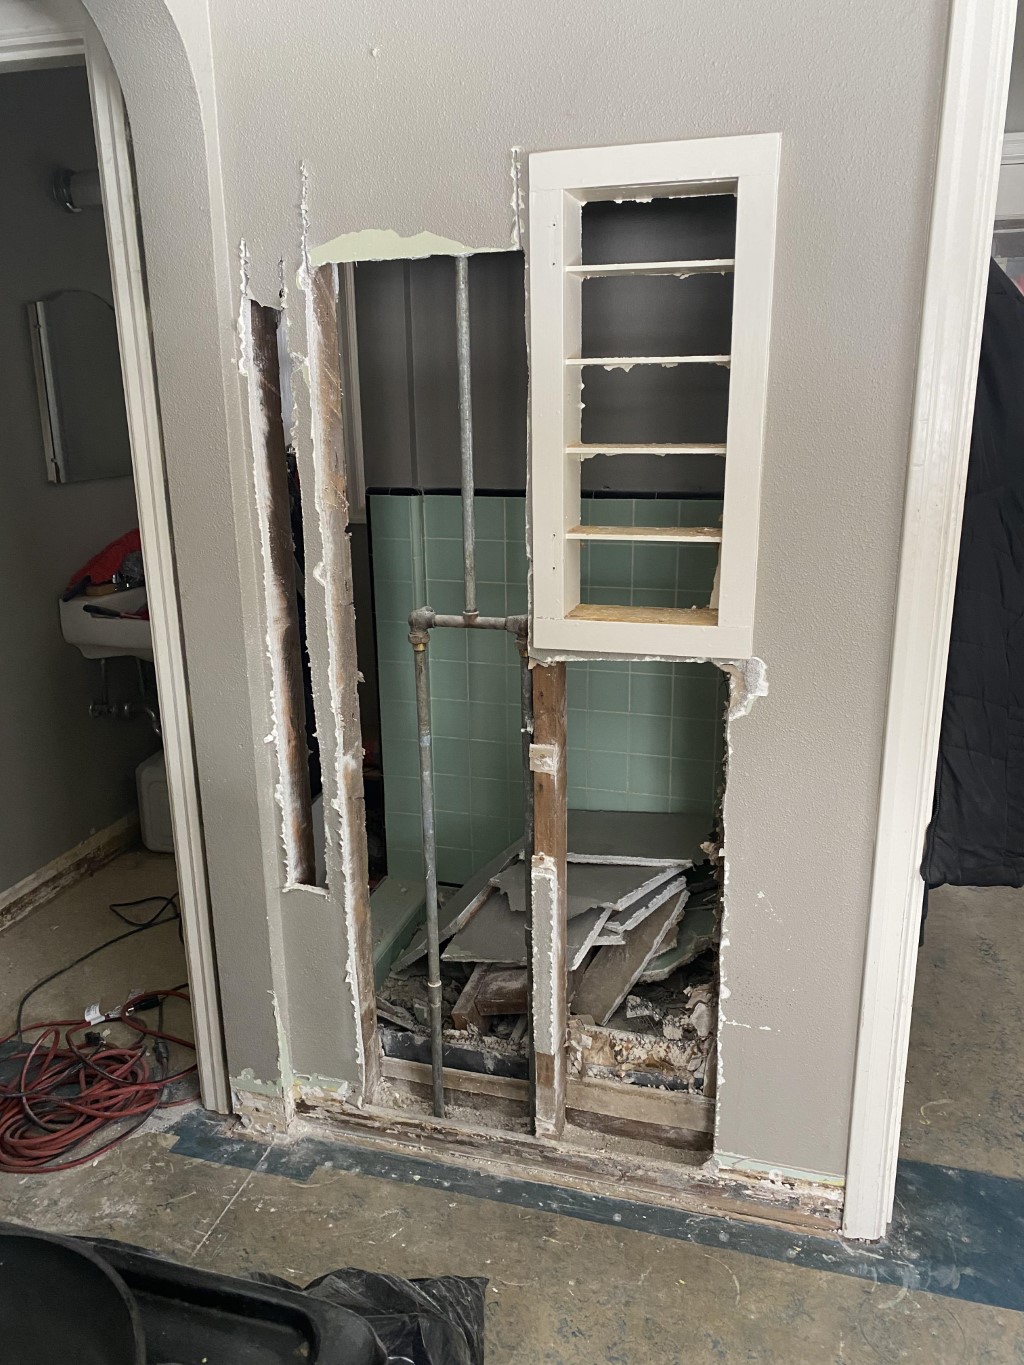 At the end of the kitchen is a 1/2 bathroom with a shower on the other side of the wall. It’s tiny and has never been used in the years we’ve lived here. (We’re making up for it by adding another bathroom elsewhere - so the math balances back out. shrug) There was also a small spice cupboard built into the wall. We’re opening up this side and walling off the old shower entrance. It the space of the decommissioned shower will be a new built-in cabinet housing a microwave and wall oven combo. Making use of this new space frees up counter space and extra room for more cabinetry.
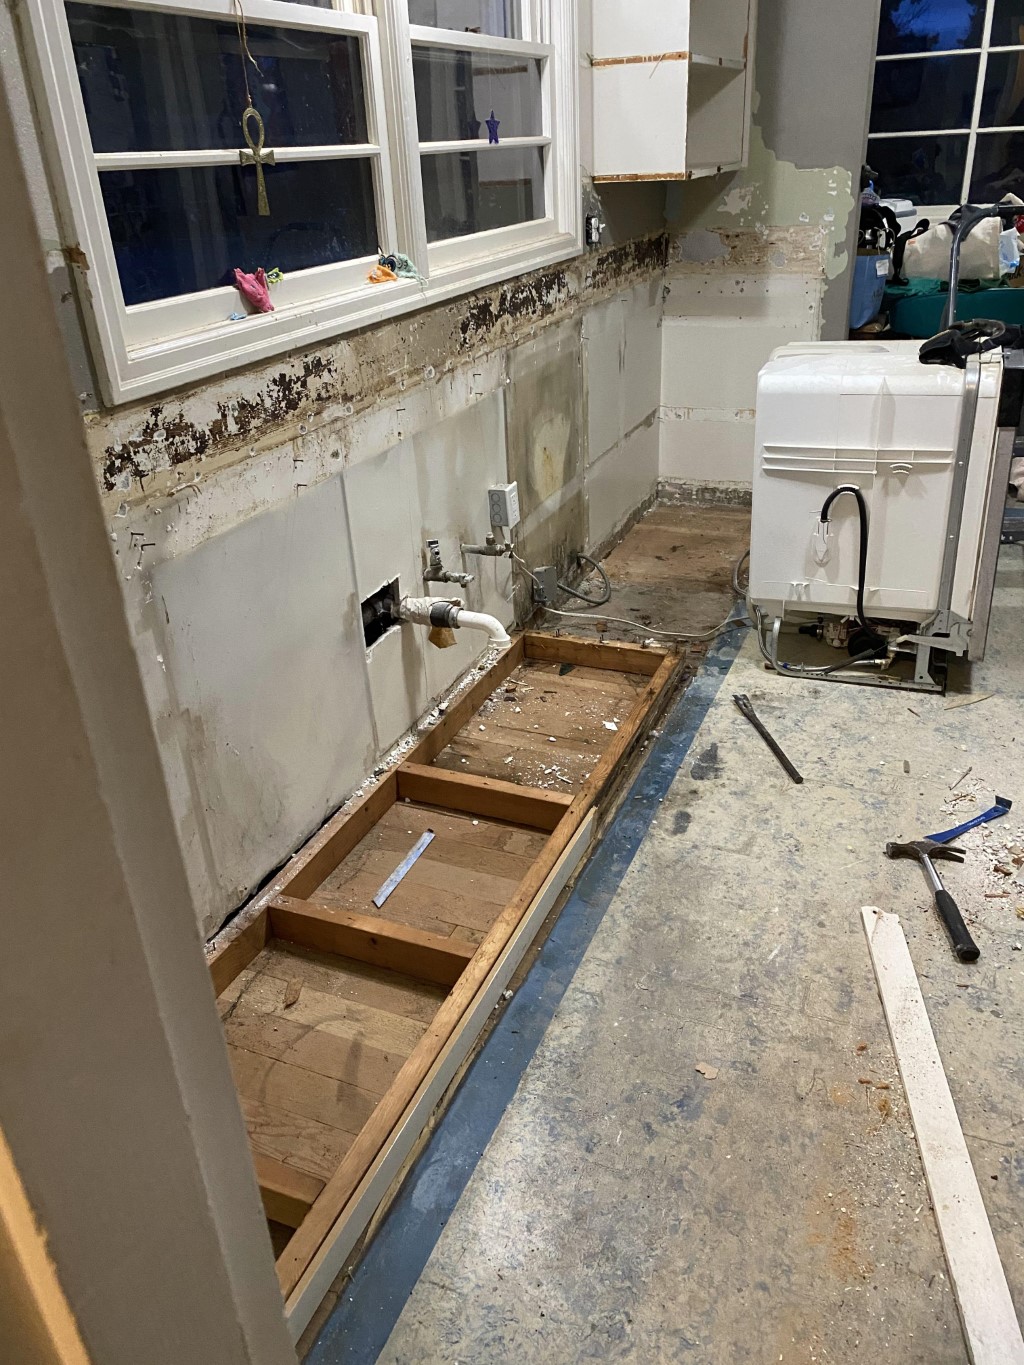
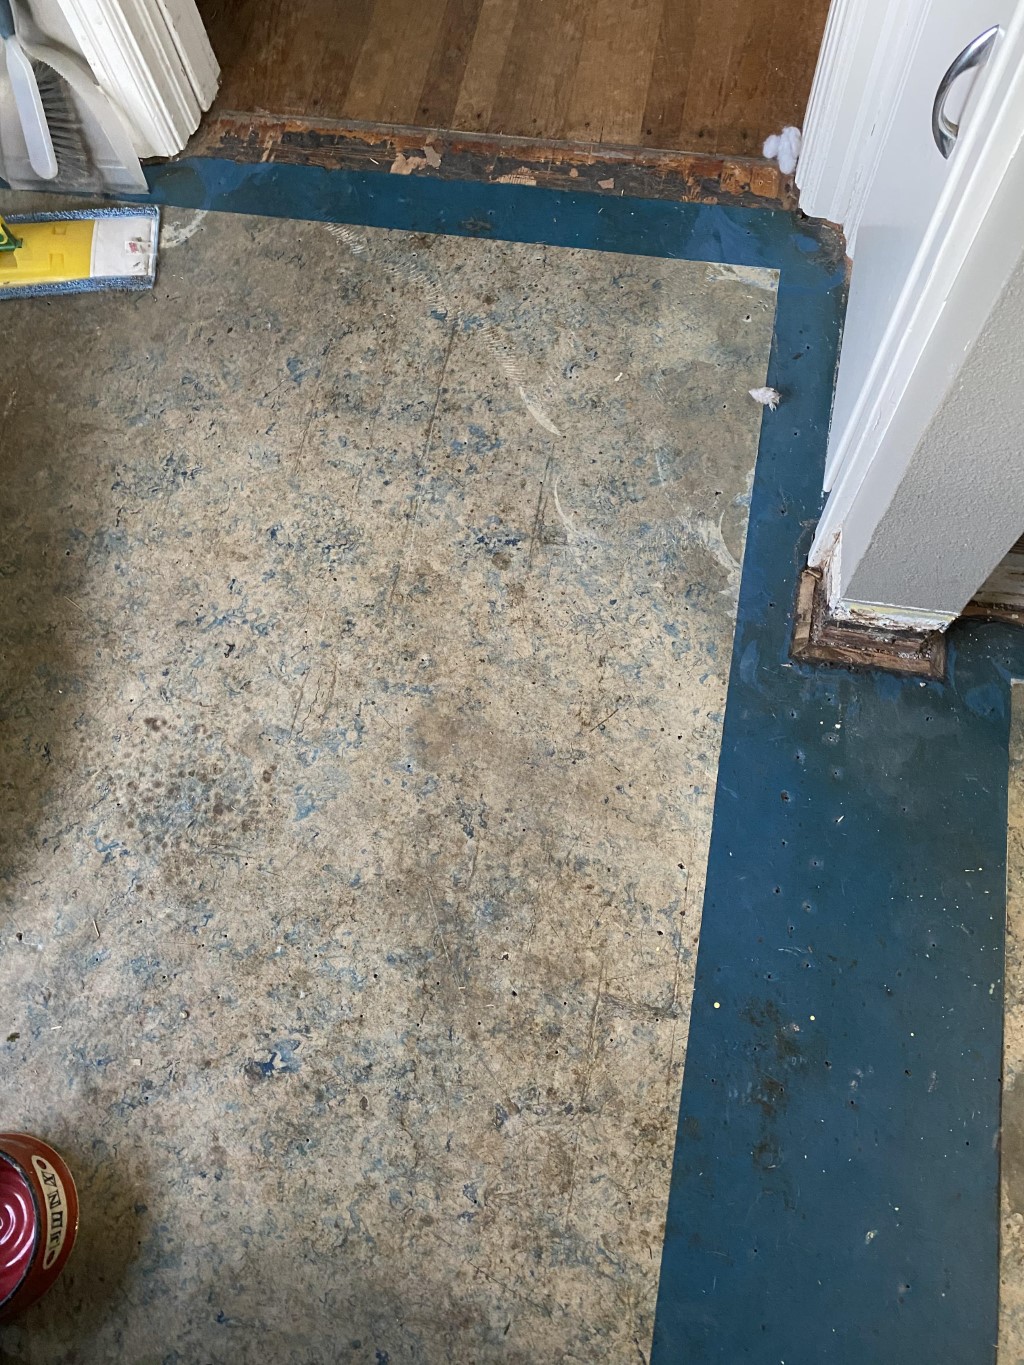 Flooring. This all started with flooring. When our puppy chewed through a piece of our very cheap builder grade rolled vinyl flooring, we decided to pull it up and replace it. That has snowballed into a full kitchen gut and remodel project. This is not that partially puppy eaten vinyl flooring. This is the original 1949 rolled vinyl flooring which was underneath a layer of 1/4" plywood held in place by 1500 nails on which said partially puppy eaten vinyl flooring was glued down onto.